Introduction #
phpMyAdmin is an open-source, web-based application written in PHP. It provides a convenient visual interface in your browser, allowing you to work with MySQL databases, turning it into the world’s leading database management system. It has all the functionalities you need to run your databases, such as:
- browse your database tables
- drop or truncate your database tables
- rename and change database tables fields and indexes
- import or export a database
- execute database queries
- search the database for a specific entry
- and many many more
The database management feature is fully integrated with the service we offer, and you can easily access it from the cPanel. In this tutorial, we will introduce the fundamentals of using phpMyAdmin, which will hopefully enable you to use it more confidently in future. Let’s begin!
Accessing the phpMyAdmin feature in cPanel #
Before you can access the phpMyAdmin functionality, you need to log into your cPanel account with us.
Once logged inside, please navigate to the “Database” section and click on the “phpMyAdmin” icon.

Clicking on the result redirects you to the “phpMyAdmin” feature allowing you to start managing your database. Let’s go over the landing screen and explain every aspect of it.
First look at the phpMyAdmin index page #
The first thing you are going to notice when you log in is the Server: localhost:3306 label at the top of the screen. This indicates that you are currently using a locally configure MySQL server that works on port 3306. This information also signifies the details you should set for your database in the configuration file of your application for “hostname“ and “port”.

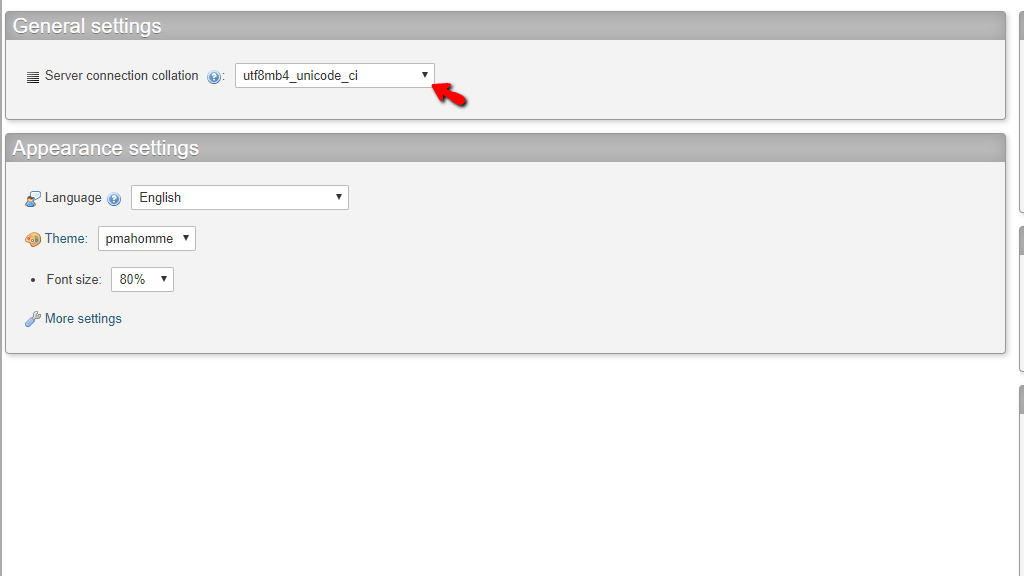
Bellow, you can see two sections – the “General Settings” and the “Appearance Settings”. Inside the “General Settings” section, you are able to alter the server connection collation of MySQL. This setting determines the charset or encoding that is used to send data to and from MySQL. We recommend keeping it with the default “utf8mb4_unicode_ci” UNLESS you need phpMyAdmin to use a very specific encoding. “utf8mb4_unicode_ci” ensures that the communication between phpMyAdmin and MySQL uses the full range of UTF-8 characters. If you do want to change it, please use the dropdown menu and select the desired collation.

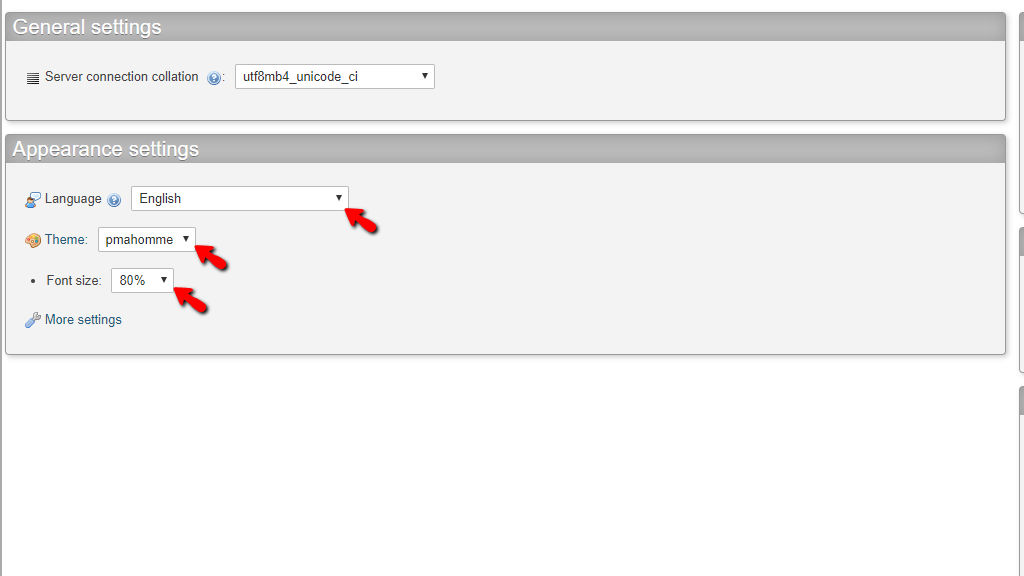
The “Appearance Settings” section is intended to changing the theme, the language, and the font size. To change these settings, use the provided dropdown menus.

Now, please point your attention to the left bar. There you can see a list of all your databases present on the server.

You might be wondering what the “information_schema” table is right now. Well, it contains valuable information, such as database metadata and other useful information about the MySQL server essential to the normal workflow of the database on your account. You should not pay attention to it and focus on the database tables of your website.
Please do not delete or modify the tables or entires of the “information_schema” database as this could lead to severe issues with all the databases on your Web Hosting Account, potentially causing data loss.
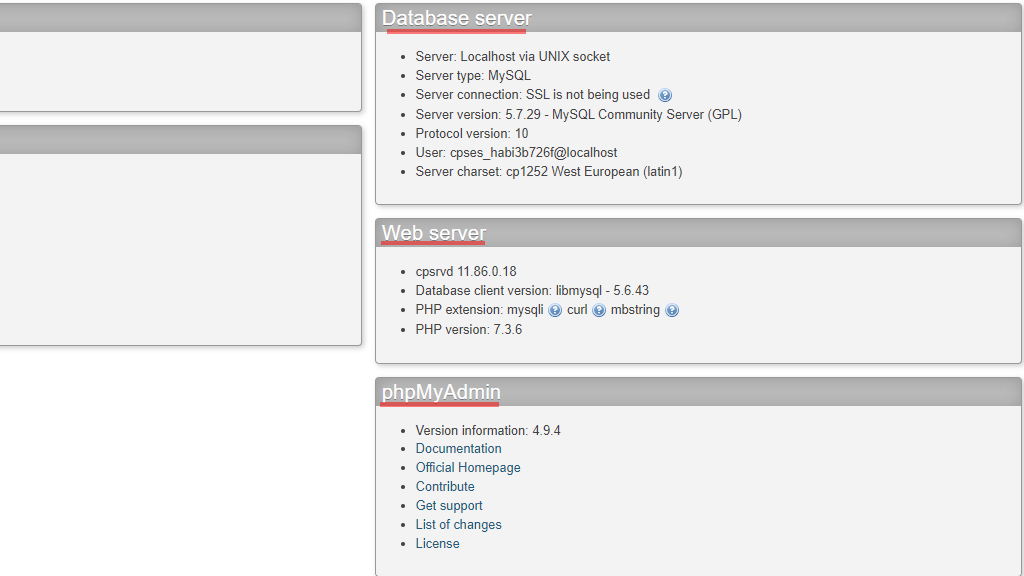
Lastly, on the right side of the screen, you can see three sections – the “Database Server” section, the “Web Server” section, and the “phpMyAdmin” section.
Under the “Database Server” section, you can find information about the MySQL server, such as the version, the current user, and MySQL charset.
Underneath the “Web Server” section information, you can see information about the webserver, such as its version, supported MySQL-related PHP extensions, and current PHP version.
Below the “phpMyAdmin” section, you can notice its current version, along with useful links related to the phpMyAdmin tool.

That sums it up! Hopefully, this summary of phpMyAdmin, how to access it, and its index page will get you started when you begin using it. If you are facing any technical issues with this functionality, such as an inability to access or use it, please feel free to contact our Technical Support Staff over the ticketing system in your Client Area.


