Introduction #
Permalinks are the URL address of the posts and pages on your WordPress-based website. Given that these URLs are permanent and do not cache, they are referred to as permalinks.
WordPress allows you to structure the permalinks of your website as you desire. This is something you should definitely pay attention to, in order to configure your URLs in an SEO-friendly and human-readable format.
In this tutorial, we will guide you on how to configure the Permalink Settings and set up your URLs in the most optimal structure.
Getting Started #
For a start, please log into your WordPress Admin Dashboard. You can do that by accessing your domain followed by “/wp-admin“, i.e., “yourdomain.com/wp-admin“, where “yourdomain.com” stands for your actual domain name.
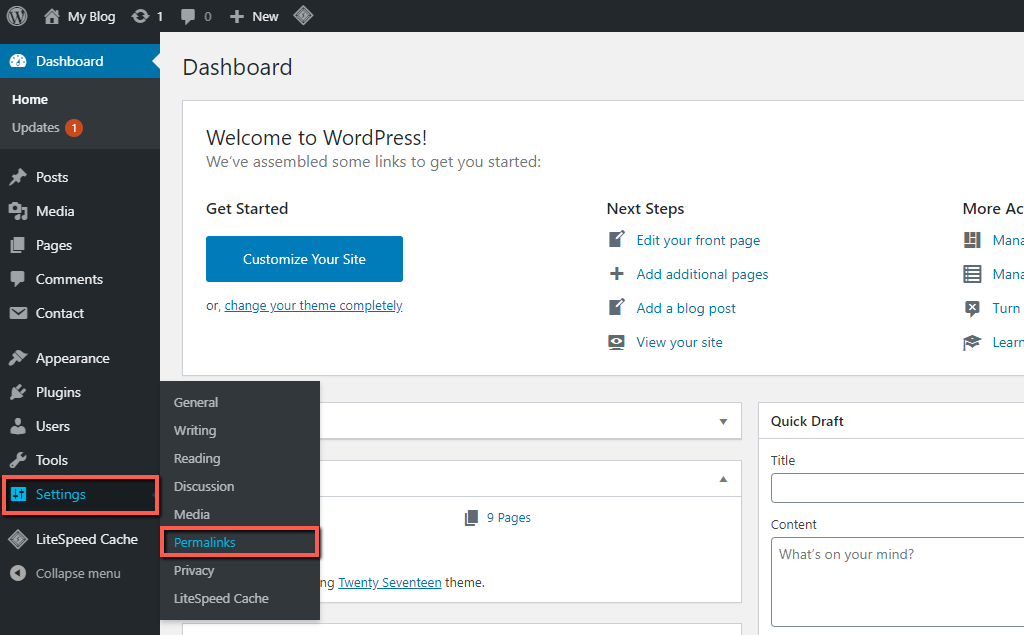
Once logged, please navigate through the left-hand side menu bar to Settings > Permalinks.

Upon doing that, you will be redirected to the “Permalink Settings” section, where you can start the configuration.
Configuring Permalink Settings #
Now that you are on the intended page, let’s review all the settings and alter them with the intention to your individual preferences. As you can see, the settings are grouped into two sections, where the first one is intended for your post URLs, whereas the second one is intended for category and tag base URLs.
Common Settings #
By default, WordPress generates the post URLs based on the date of creation and the title of the post. For example, if you create a “My First Post” post on the 18th of June, 2020. Then the URL of this post will become “https://domain.com/2020/06/18/my-first-post/“.
Within the first “Common Settings” section, you can select one of the default WordPress permalink structures, as well as create your custom one using the available tags listed beneath the “Custom Structure” field. Note that each tag must be separated with forward slashes (/), as shown in the example.
Generally, using the post name is the most common and reliable practice. It is not only beneficial for your SEO results but it is also user-friendly. Therefore, we will recommend you to choose the “Post name” option, unless you have a good reason to choose another one.

Optional #
Under the second “Optional” settings, you may customize the category base and the tag base URLs. By default, WordPress structures the URLs as follows:
- https://domain.com/category_base/category_name/ – For example, the page of the “Uncategorized” category will be “https://domain.com/category/uncategorized/“.
- https://domain.com/tag_base/tab_name/ – For example, the page of an “Example” tag will be “https://domain.com/tag/example/“.
Note that you can only modify the “category-base” and the “tag-base” values by entering the desired phrase into the corresponding field. They cannot be excluded from the URL using these settings.

When you perform all desired changes, please make sure to click on the “Save Changes” button to apply them successfully.
With this done, you have successfully configured your WordPress permalink settings. To sum up, in this tutorial, you have learned how to customize the structure of your post URLs, category, and tag base URLs. We hope this information had been useful to you, and you have managed to complete this task with ease.


