Introduction #
A typical WHM server comes along with a lot of services that utilize an SSL certificate to encrypt the connection between the server and the clients using them. The “Manage Service SSL Certificates” feature in the WHM control panel will allow you to manage the SSL certificates for the following services: Exim(SMPT), POP3, IMAP, cPanel, WHM, FTP, and iOS Mail Push Notifications (APNs).
By default, when you purchase a WHM license, you will receive a free SSL certificate issued by cPanel for all the aforementioned services. Using the “Manage Service SSL Certificates” functionality, you will be able to change the cPanel SSL certificate with a certificate you purchased from a trusted CA.
We highly recommend checking our tutorial on How to Generate a CSR in a WHM server. It contains great insight on how to generate a CSR which will then enable you to order an SSL certificate from an SSL vendor and install it for the services on your server. Without further ado, let’s begin the guide.
Accessing the Manage Service SSL Certificates feature #
First, you need to log into the WHM service for your VPS or Dedicated Server. After you have logged in, please use the search bar on the left side of the page and type “Manage Service SSL Certificates”.

When the functionality shows up below the search bar, please click on it so you can be sent to the “Manage Service SSL Certificates” page.
Installing a new certificate for the WHM services #
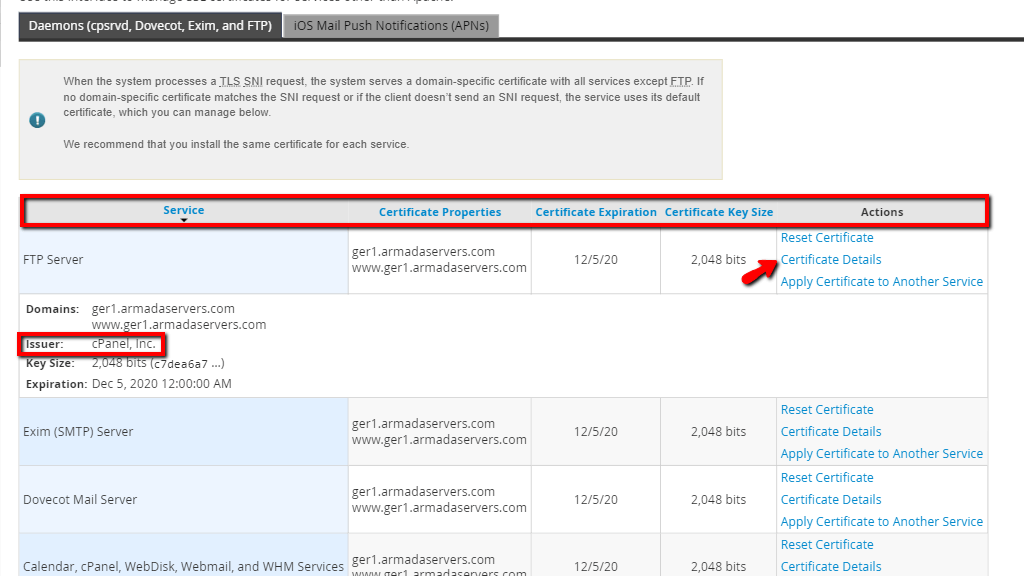
When you are redirected to the “Manage Service SSL Certificates” page, you will notice the “Daemons (cpsrvd, Dovecot, Exim and FTP)” section. Inside, you will be able to see a table section, populated with the services that have an SSL certificate installed.
- Service – This column will display the service the SSL certificate is installed for.
- Certificate Properties – This will show the hostname for which this certificate has been installed. You will always find the server’s hostname under this column.
- Certificate Expiration – This will show you the date when the certificate will expire. If you are using the free cPanel certificate, it will always be renewed a few days before it expires, as long as you maintain your WHM license active.
- Certificate Key Size – This will show the SSL certificate’s size in bits.
- Actions – This column will contain three options. The first one is the “Reset Certificate” link. When pressed, you will be able to replace the current certificate with a new self-signed one. We highly recommend avoiding this option as having a self-signed certificate will present the users trying to access the services with warnings. The second option is the “Certificate Details” link. When you press the “Certificate Details” link the column will expand and it will show you details about the SSL certificate. These datils include the above-mentioned ones, along with the Issuer – in this case cPanel, Inc. Lastly, you will have the “Apply Certificate to Another Service” link. When you press the “Apply Certificate to Another Service” link, you will see the content boxes at the bottom of the screen populated with all of the components of the SSL certificate, more specifically the certificate itself, the private key, and the CA bundle.
When you scroll down, you will encounter the “Install a New Certificate” section. Underneath you will find the “Browse Certificates” button.
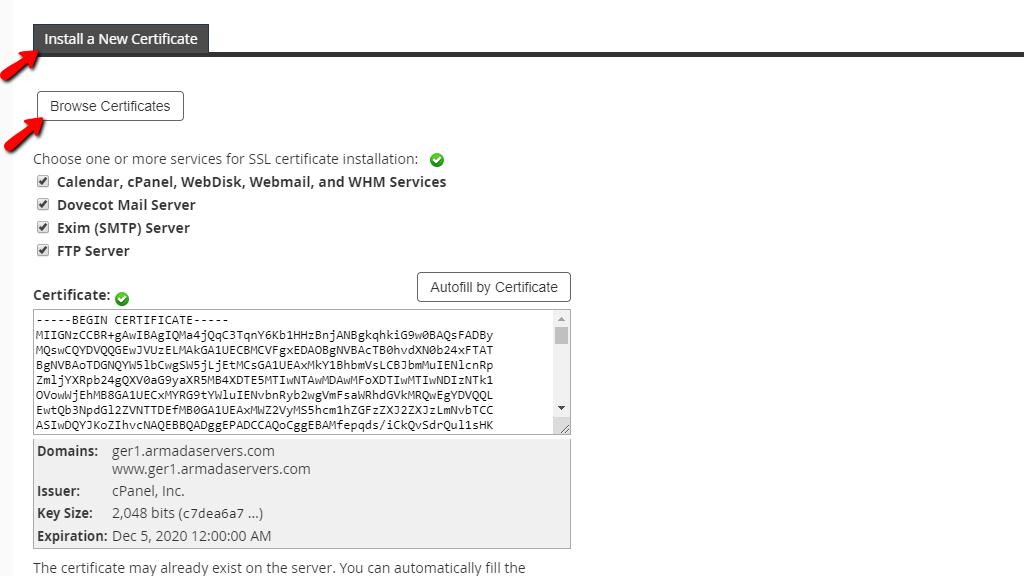
When you press the “Browse Certificates” button, a popup window will appear showing all of the certificates installed on your server within a table section. In order to select an SSL that you want to install for the cPanel services, please use the radio button located on the left side inside the “Certificate” table section, within the popup window. In order for certificates that you purchased from a trusted CA to appear inside this popup window, they need to be installed using the Install an SSL Certificate in WHM feature.

When you are done choosing an SSL certificate, please press the “Use Certificate” button located in the bottom left corner of the popup window. You will notice that the content boxes at the bottom of the page will be filled with the SSL components. Alternatively, you are able to insert the certificate, private key, and CA bundle directly into the content boxes if you have them available. Usually, the Certificate Authority will provide a zip archive that contains the components in a text file.

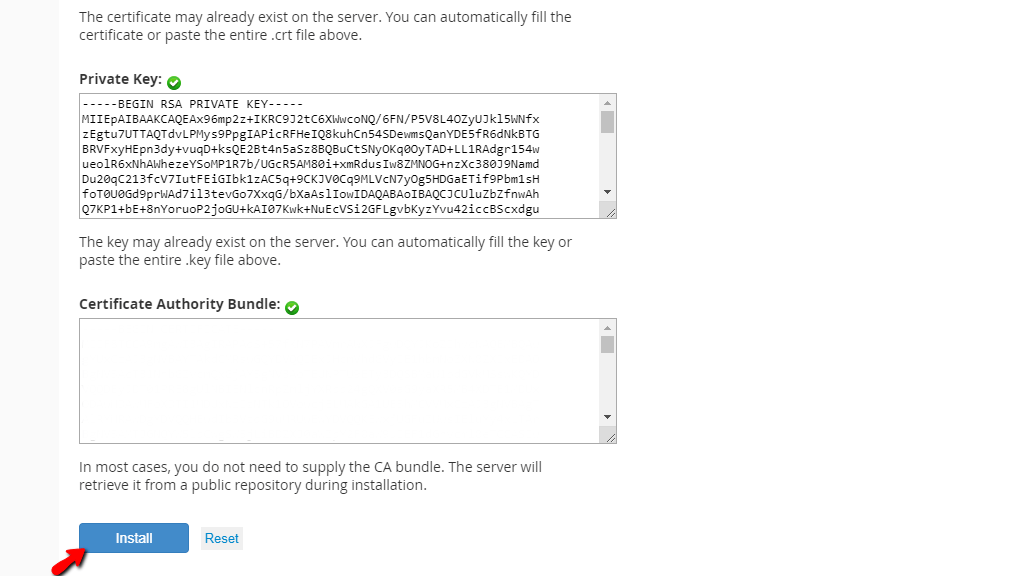
In our case, as we selected a self-signed SSL certificate, only the “Certificate” and “Private Key” content boxes will be filled, while the “Certificate Authority Bundle” will be empty, as self-signed certificates are not issued by a trusted CA.
In order to install the selected certificate, please press the “Install” button located at the bottom of the page.
When the “Install” button is pressed, another popup window will show up. It will ask you to restart the cpsrvd service in order to apply the certificate. Please press “Proceed” in order to restart the cpsrvd service.

This sums up the information about the ”Manage Service SSL Certificates” feature in the WHM control panel. You may now use it to apply certificates you purchased from a trusted Certificate Authority. If you are having issues doing so, please, do not hesitate to contact our Technical Suppor Staff. They are available 24/7 at your disposal from the ticket system in your Client Area.


