Introduction #
Apache is the main service serving web requests on a typical WHM server. Simply put, whenever someone visits your website through a browser, Apache will receive the request, locate your website inside its configuration file and it will show the content located in the root directory of the accessed website. Usually, each site has an index page that will show the homepage of your website to the visitors accessing it.
The Apache web service has a lot of configurations related to it and through the “Apache Configuration” feature in the WHM control panel, you are able to control the web service’s behavior based on your preference.
We will be covering all of the available settings inside this functionality, so please, tuck in comfortably as we are going to be as thorough as possible in helping you understand how to use the “Apache Configuration” feature and what the various sections under it can be used for. Let’s get started!
Accessing the Apache Configuration feature #
As with all of the features inside the WHM control panel, you need to log into the WHM service for your VPS or Dedicated Server. After you have logged in, please use the search bar on the left side of the page and type “Apache Configuration”.

When the functionality shows up below the search bar, please click on it so you can be sent to the “Apache Configuration” page.
Apache Configuration feature overview #
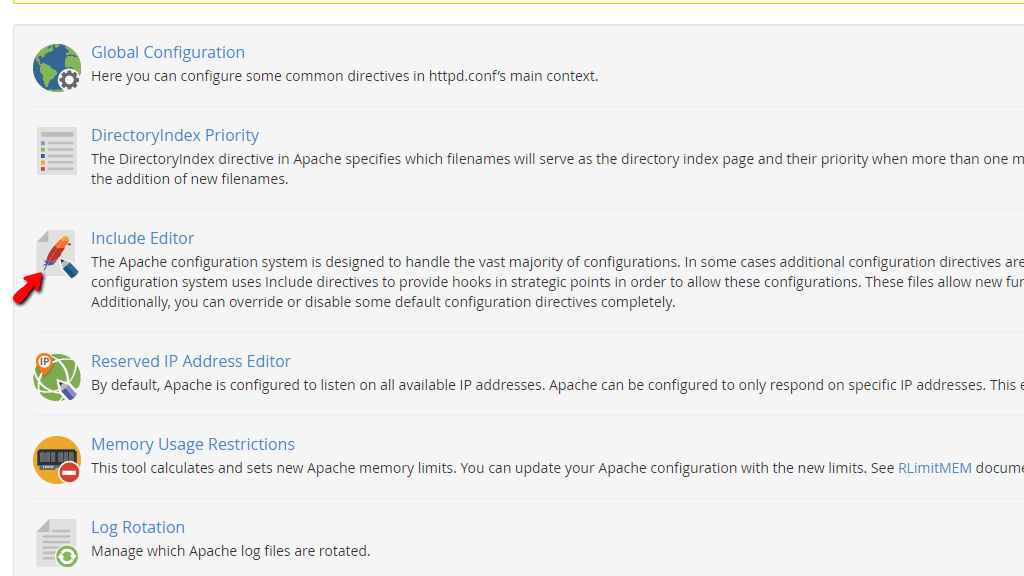
When you land on the “Apache Configuration” page, you will notice a couple of links, each representing a specific setting of the Apache web service you are able to modify. We will go through all of them, in the same manner, they are displayed on the page.

The first one is the “Global Configuration” section. It will allow you to add or remove common directives inside the httpd.conf (Apache configuration) file. Many of these directives require that you format your entry in a specific way. In order to view a directive, please refer to its documentation on the official Apache website.
The Global Configuration Section #
In order to access the “Global Configuration” settings of the Apache web service, please press the “Global Configuration” link, located at the top of the screen.

When the “Global Configuration” link is pressed, you will be redirected to the new page, containing the settings related to the directives inside the httpd.conf configuration file of the Apache service.
On the “Global Configuration” page, you will find a table section containing a lot of rows. Each one of those represents a specific setting of the Apache web service. On the top right of this section, you will locate a “Find” field where you can type in a particular setting you are interested in. This will display it at the top of the section for your convenience.

Let’s go over all of the directives you are able to alter in the table section.
- SSL Cipher Suite – This row will have a radio button inside which will allow you to select to either use the default Cipher Suite provided by cPanel or enter your own custom one. We recommend sticking to the one offered by cPanel. For more information about this setting and cipher suites, please press the “[?]” link located right next to the “SSL Cipher Suite” label, under the “Apache Configuration” column.
- SSL/TLS Protocols – On this row, you will see a radio button. Using it, you will be able to select either the default (TLSv1.2) protocol which cPanel uses during the SSL/TLS handshake phase or it will provide you with the option to use your own settings and allow other SSL/TLS protocol, such as TLSv1.1, SSLv2, SSLv3, etc. We highly recommend disabling older protocols such as the ones we referred to in the previous sentence and use the default TLSv1.2. For more information about this setting and SSL/TLS protocols, please press the [?] link located right next to the “SSL/TLS Protocols” label, under the “Apache Configuration” column.
- SSL Use Stapling – Using the radio button inside this row will either enable or disable Online Certificate Status Protocol (OCSP) stapling. If this setting is enabled, each of the TLS handshakes will also include an OCSP response for its own certificate. This will improve the security level and increase the performance because the client will not need to contact the Certificate Authority (CA).
- Extended Status – You may use the radio button to enable or disable the “Extended Status” option. When enabled, it will include additional information about the incoming requests on the Apache status pages.
- LogLevel – This row will contain a dropdown menu from which you are able to select the verbosity level of the apache error log. Simply put, this will lower or increase the amount of information apache provides inside its error_log. We recommend that you use at least “info” for production servers. For more information about this directive, please check its official documentation.
- LogFormat (combined) – In this row, you will find a radio button that will allow you to either use the long log format for the Apache log or let you set a new one. We recommend keeping the default setting here. If you are interested in setting your own format, please refer to the documentation of this directive.
- LogFormat (common) – In this row, you will find a radio button that will allow you to either use the short log format for the Apache log or let you set a new one. We recommend keeping the default setting here. If you are interested in setting your own format, please refer to the documentation of this directive.
- Trace Enable – Using the dropdown on this row will let you enable or disable trace requests. The default value is “Off” and we recommend keeping it as such. If you want to read more about trace requests, please refer to the documentation of this directive.
- Server Signature – Using the dropdown on this row will let you enable or disable the server signature. When enabled people will be able to see your server’s hostname and apache version included in various error messages, FTP directory listings, curl request results, etc.). The default value is “Off” and we recommend keeping it as such. If you want more information about this directive, please refer to its official documentation.
- Server Tokens – Using the dropdown menu in this row will allow you to control the amount of information Apache provides to visitors in the HTTP request headers. The default setting is “Product Only” and we recommend keeping it as such. If you want to get a better understanding of what the rest of the options do, please press the “[?]” link located right next to the “Server Tokens” label, under the “Apache Configuration” column.
- File ETag – Using the dropdown menu in this row will allow you to control the amount of information Apache provides to visitors requesting a file over HTTP. This setting defaults to “None” and we advise you to keep it this way. If you want to get a better understanding of what the rest of the options do, please press the “[?]” link located right next to the “File ETag” label, under the “Apache Configuration” column.
- Directory “/” Options – The checkboxes inside this row will help you manipulate the behavior of the “Options” directive which pertains to the root directory. You need to be very careful when disallowing any of the features inside the Options directive, as your users may rely on them for their websites. You should keep the checkboxes with the default values in order to guarantee the normal functionality of your user’s projects. If you want to better understand what this directive does and its features, please refer to its documentation.
- Start Servers – The radio button inside this row will let you define the amount of child processes apache creates when it is started. There is little to no reason to ever change this, as the processes are dynamically controlled depending on the server’s load.
- Minimum Spare Servers – The radio button inside this row will allow you to define the minimum number of idle child processes. Changing this value from the default one should only be done on very busy servers.
- Maximum Spare Servers – This is analogical to the above directive in regards to the fact that it should be only changed for busy servers. Using the radio button inside the row will allow you to select the maximum number of idle child processes.
- Server Limit (Maximum: 20,000) – Using the radio button inside this row will allow you to set the limit for the “MaxRequestWorkers” for the lifetime of the Apache httpd process. We HIGHLY recommend keeping this set to its default value (256) as if you do not have a good understanding of how this directive works, apache may not start at all and the system will become unstable.
- Max Request Workers – Using the radio button inside this row will allow you to define the number of requests Apache may process simultaneously. This value CANNOT be increased higher than the value that is defined within the “Server Limit” directive. The default value should be kept here unless you have a perfect understanding of how this directive works.
- Max Connections Per Child – Using the radio button inside this row will let you limit the number of requests an individual apache child process can handle. Typically, when the child serves the number of processes defined within this directive, it will terminate, however, if this setting is set to “0” the child process will never expire. We recommend keeping this setting to the default value set by the WHM control panel, as setting it to “0” may result in high memory utilization as the process will remain active forever.
- Keep-Alive – The radio button inside this row will let you enable the “Keep-Alive” for HTTP requests. This means that the connection will remain persistent until a predefined threshold is reached. This allows HTTP requests forking through a single connection which improves the loading of your website.
- Keep-Alive Timeout – The radio button inside this row will allow you to set the number in seconds in which the server will wait until a subsequent request on the persistent connection is let through.
- Max Keep-Alive Requests – Using the radio button inside this row will let you define the number of requests that can be forked through the Keep-Alive connection. You should put into consideration the number of visitors you have on your website and adjust this setting accordingly. The default (100) should be sufficient for a server with a moderate amount of load.
- Timeout – Using this radio button you will be able to set the timeout value in seconds for the Apache web service requests. This is the time the server will wait before it times out a certain request, that is running for an amount of time, greater than the defined value.
- Symlink Protection – Using the radio button within this row will help you enable or disable symlink protection for the apache web service. The “FollowSymlinks” feature in the “Options” directive exposes Apache to a symlink security vulnerability. This symlink vulnerability allows a malicious user to serve files from anywhere on a server that strict operating-system-level permissions do not protect. For more information regarding this vulnerability, you can check the symlink race page. We highly recommend keeping this disabled.
When you alter the directives to your liking, please press the “Save” button located on the bottom of the page.

This will redirect you to a summary page, which will show all the directive values you have set. Please go through them one last time before finalizing the process in case you have made a mistake.

After you review the new values, to finish the process and apply the new settings, please press the “Rebuild Configuration and Restart Apache” button located on the bottom of the summary page.
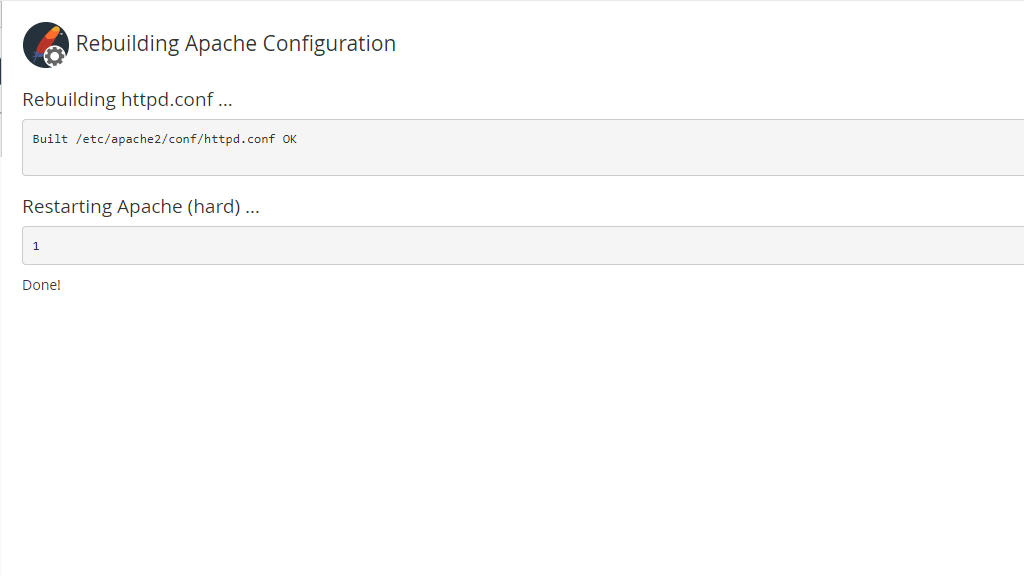
The last page will be a changelog, showing you that the Apache configuration file has been rebuilt and that the Apache service has been restarted.
The DirectoryIndex Priority Section #
To access this section, please press the “DirectoryIndex Priority” link located underneath the “Global Configuration” link on the “Apache Configuration” page.

When you land on the “DirectoryIndex Priority” section, you will see a large content box, populated with a lot of files with different extensions (PHP, CGI, HTML, js, etc.).

The files inside this content box will represent the priority in which the Apache web service will process the files in the website’s root directory. If you keep our default configuration, if all the files that populate the content box are within the root directory of a website and if this site is accessed by a visitor in a web browser, Apache will show the “index.php” file as it is currently on top of the content box. Let’s go over all the buttons, located on the right side of the content box:
- Move Up – Please select a file from the content box and press this button to move it up on the priority list.
- Add – Please press this button to add a new file, which you can then move up or down the content box, altering its priority in the process.
- Remove – Please press this button to remove a file from the content box completely.
- Move Down – Please select a file from the content box and press this button to move it down on the priority list.
Once you have made the changes on the “DirectoryIndex Priority” page, please press the “Save” button located on the bottom of the content box to apply the new index priority.

This will send you to a page, containing the new order of the index priority.

If you are happy with the new index priority, please press the “Rebuild Configuration and Restart Apache” button located on the same page.
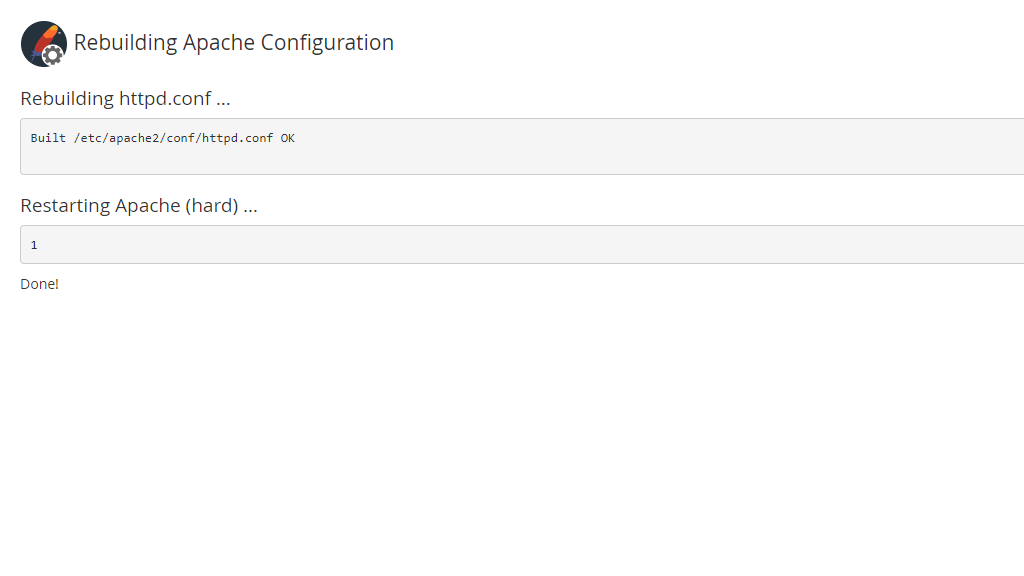
The last page will be a changelog, showing you that the Apache configuration file has been rebuilt and that the Apache service has been restarted.
The Include Editor Section #
To access this section, please press the “Include Editor” link located underneath the “DirectoryIndex Priority” link on the “Apache Configuration” page.
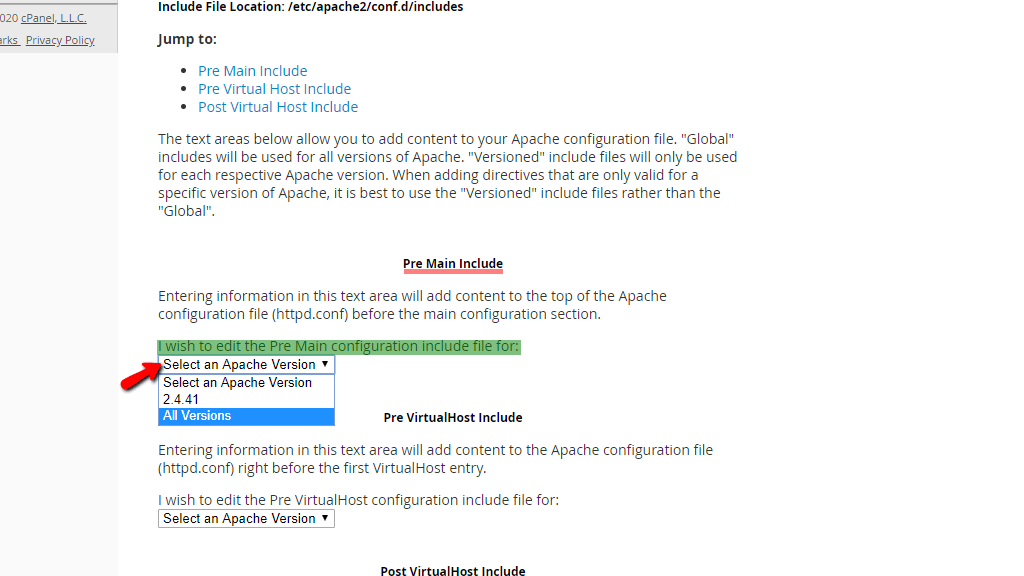
When you land on the “Include Editor” page, you will be able to add additional configuration files to your main Apache httpd.conf, using the Include directive.

Please note that any change you perform on the httpd.conf file will affect the default Apache configuration which may alter the way Apache behaves.
You have the following options on the “Include Editor” page:
Pre Main Include
In order to add the “Includes” directive on top of the Apache configuration file before the system configures the VirtualHosts, please use the dropdown menu located under the “I wish to edit the Pre Main configuration include files for:” heading. Please select the “All Version” option so you can add this directive to all future Apache versions. You should use this option to prevent overwriting any part of the httpd.conf.
This will open a content box, where you can type in the changes or options you want to include.

After you are done, please press the “Update” button located underneath the content box.

This will show you which apache configuration files have been altered and will also give you access to the “Restart Apache” button located on the bottom of the page which needs to be pressed so the process is finalized and Apache accepts the new “Include” directive values.
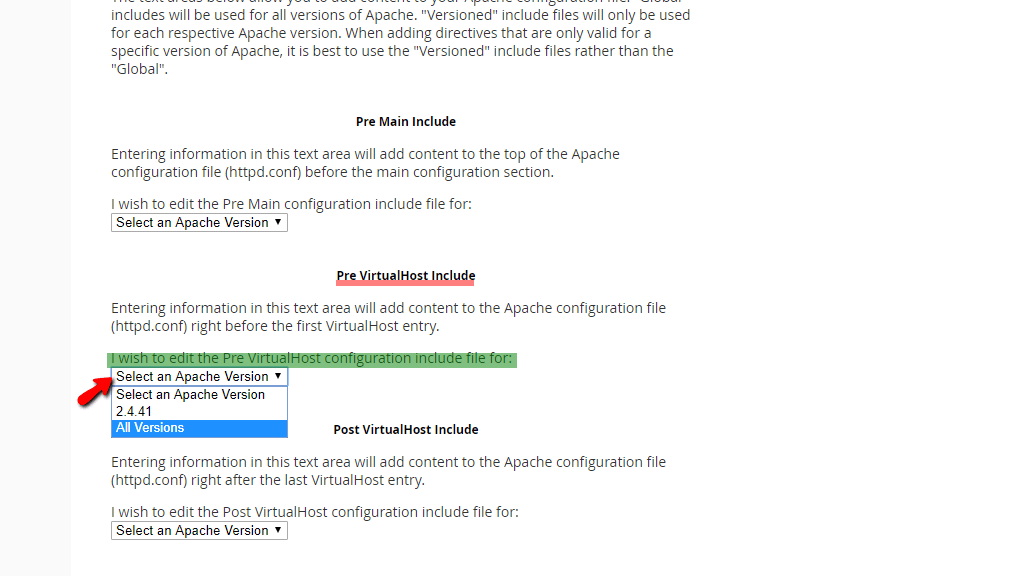
Pre VirtualHost Include
To insert the “Includes” directive right before the VirtualHosts line, please use the dropdown menu located under the “I wish to edit the Pre VirtualHost configuration include file for:” heading. Please select the “All Version” option so you can add this directive to all future Apache versions. You should use this option to only modify the part of the httpd.conf before the system configures the VirtualHosts.
This will open a content box, where you can type in the changes or options you want to include.

After you are done, please press the “Update” button located underneath the content box.

This will show you which apache configuration files have been altered and will also give you access to the “Restart Apache” button located on the bottom of the page which needs to be pressed so the process is finalized and Apache accepts the new “Include” directive values.
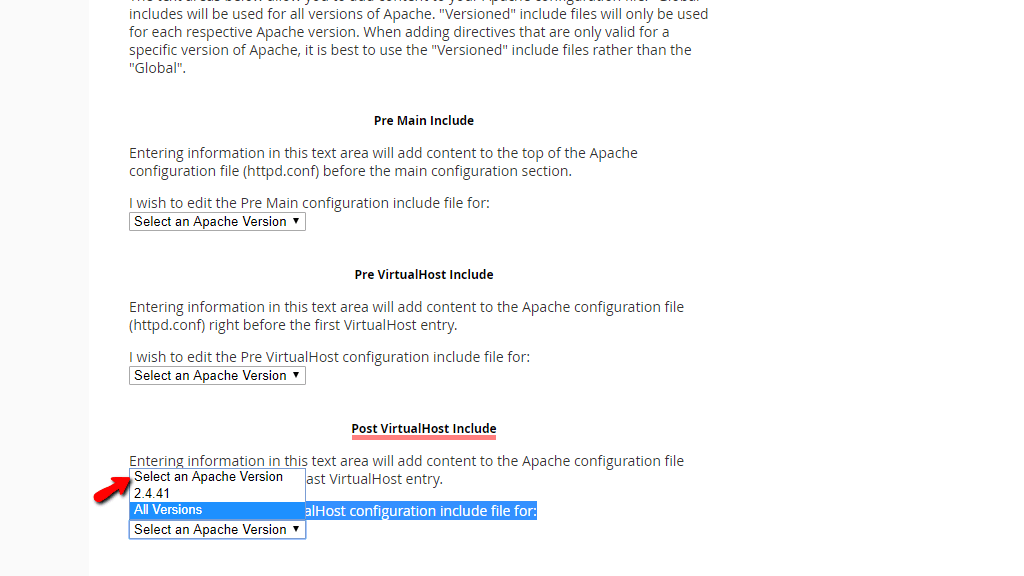
Post VirtualHost Include
To insert the “Includes” directive after the VirtualHosts entry, please use the dropdown menu located under the “I wish to edit the Post VirtualHost configuration include file for:” heading. Please select the “All Version” option so you can add this directive to all future Apache versions. Using this option will permanently modify a part of the httpd.conf.
This will open a content box, where you can type in the changes or options you want to include.
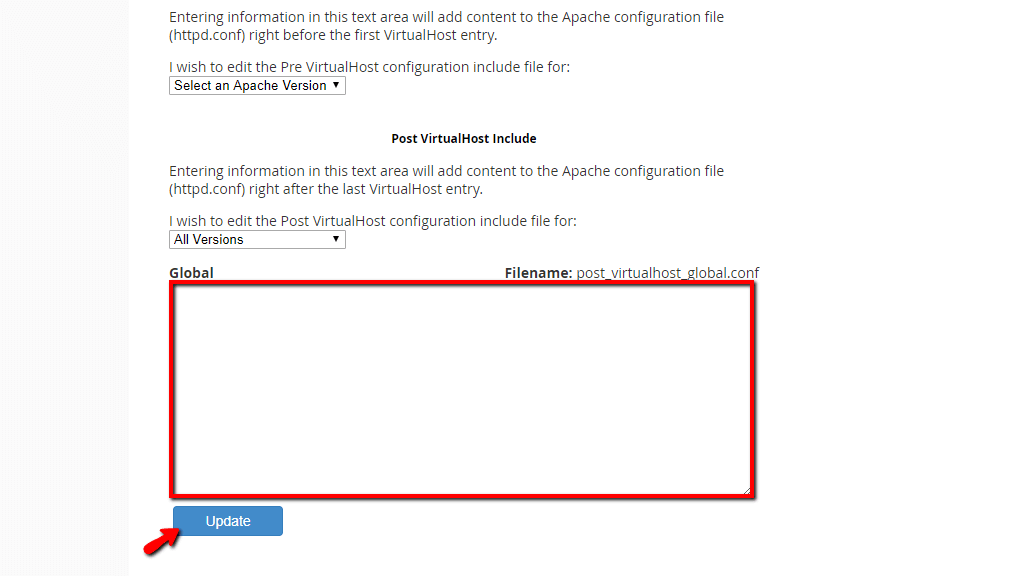
After you are done, please press the “Update” button located underneath the content box.
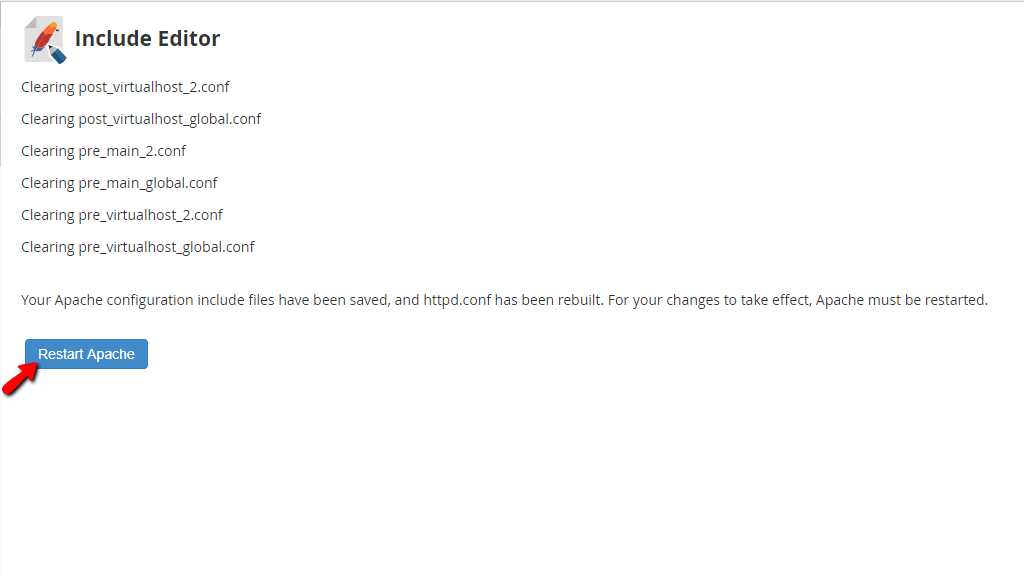
This will show you which apache configuration files have been altered and will also give you access to the “Restart Apache” button located on the bottom of the page which needs to be pressed so the process is finalized and Apache accepts the new “Include” directive values.
The Reserved IP Address Editor Section #
Typically, the WHM control panel will configure Apache to respond to any requests on any of the IP addresses added on your server. The “Reserved IP Address Editor” section will allow you to configure Apache to ignore certain IP addresses. Furthermore, the system will not assign these IP addresses to new accounts.
To access this section, please press the “Reserved IP Address Editor” link located underneath the “Include Editor” link on the “Apache Configuration” page.

When you land on the “Reserved IP Address Editor” page, you will see a table section containing all of the IP addresses on the server.
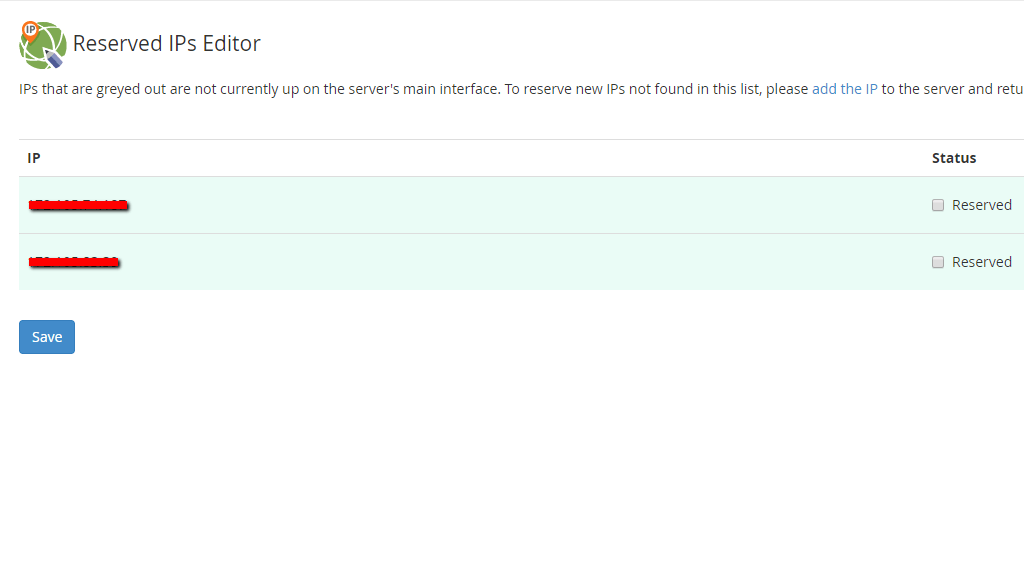
To add an IP address, or remove an IP address from the reserved IP address list, please select or respectively deselect it using the checkbox under the “Status” column.
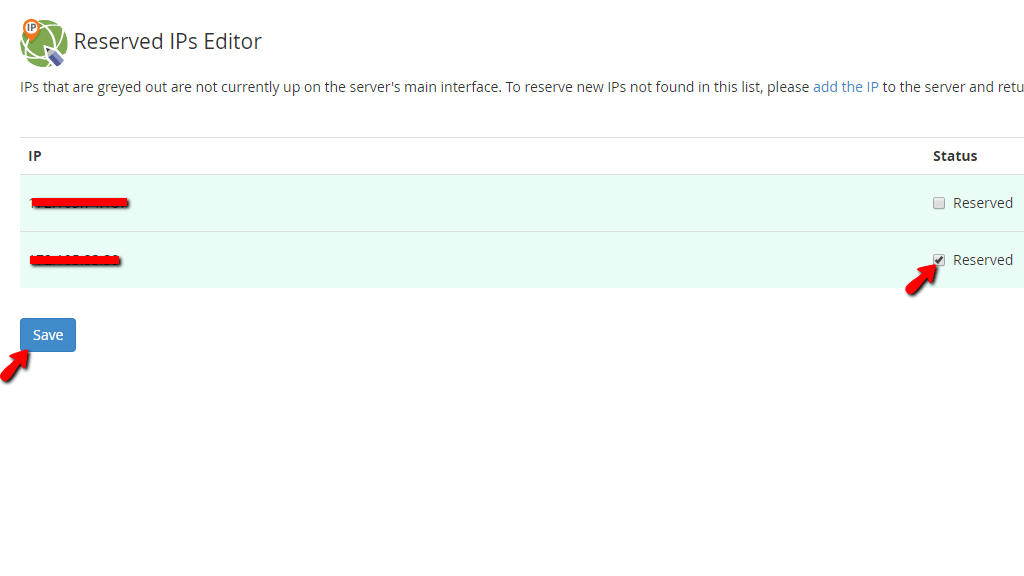
When you have selected an IP address, please press the “Save” button located below the table section.

This will redirect you to a page informing you about the IP you selected and will also contain a button “Rebuild Configuration and Restart Apache” which needs to be pressed in order to finalize the process.

The last page inside the “Reserved IP Address Editor” section will show a changelog, letting you know that the Apache configuration file has been rebuilt and that the Apache service has been restarted.
The Memory Usage Restrictions Section #
Using the settings contained with the “Memory Usage Restrictions” section, you will be able to calculate and set a new memory limit for Apache processes. This limit only applies to an individual Apache process.
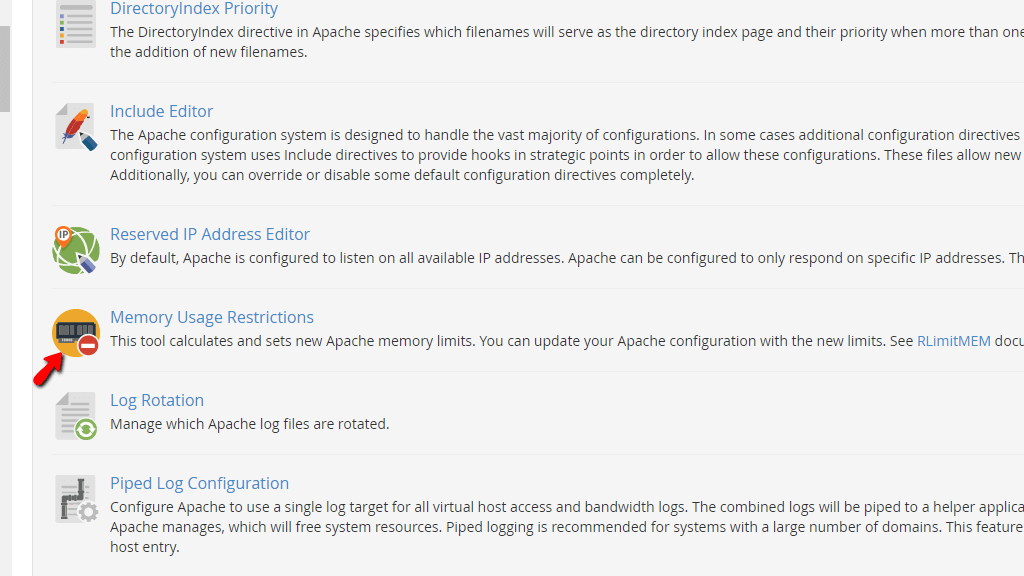
To access this section, please press the “Memory Usage Restrictions” link located underneath the “Reserved IP Address Editor” link on the “Apache Configuration” page.
When you land on the “Memory Usage Restrictions” page you will find a description of the section and beneath this description, you will see a radio button that will let you either disable or enable the memory restriction.
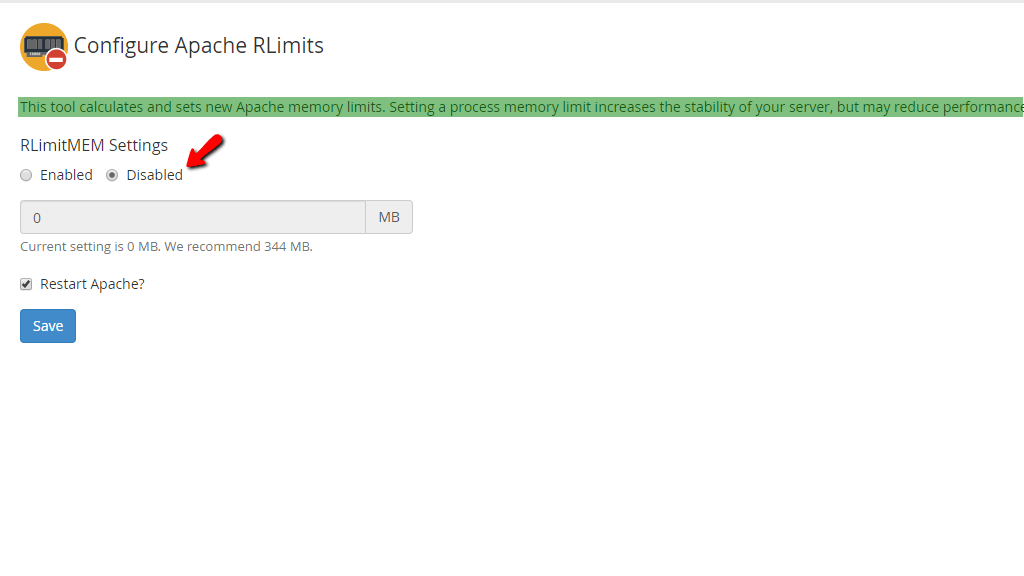
If you select “Enable” the greyed-out text field below the radio button will become active and you can type in the limitation value (this must be an integer value greater than 1). The system recommends using 344MB so if you are planning on enabling this, please this value
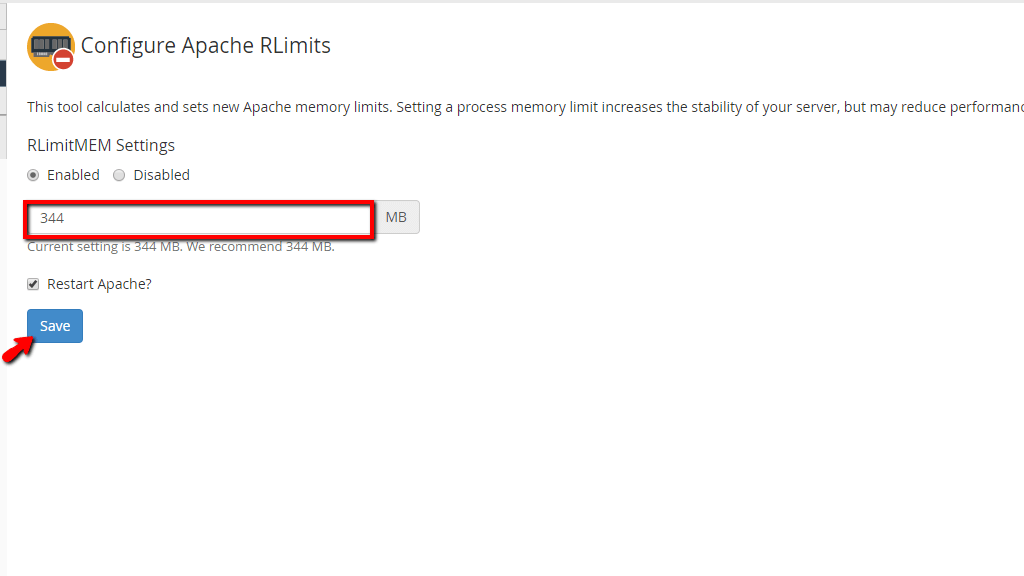
When you are done typing in the limiting value, please press the “Save” button located beneath the text field.

This will redirect you to a page, which will let you know that the memory limit has been set and that the Apache web service has been restarted.
The Log Rotation Section #
The “Log Rotation” section will allow you to select the logs you want the cpanellogd daemon to compress and store as an archive. At the end of the month, the cpanellogd daemon will compress the logs you selected in this section into a single file for each type. The system will store the compressed files in the /home/username/logs directory, where the username represents the name of the cPanel account.
To access this section, please press the “Log Rotation” link located underneath the “Memory Usage Restrictions” link on the “Apache Configuration” page.

When you land on the “Log Rotation” page you will find a description of the section and beneath this description, you will locate checkboxes that you can include inside the cpanellogd daemon rotation.
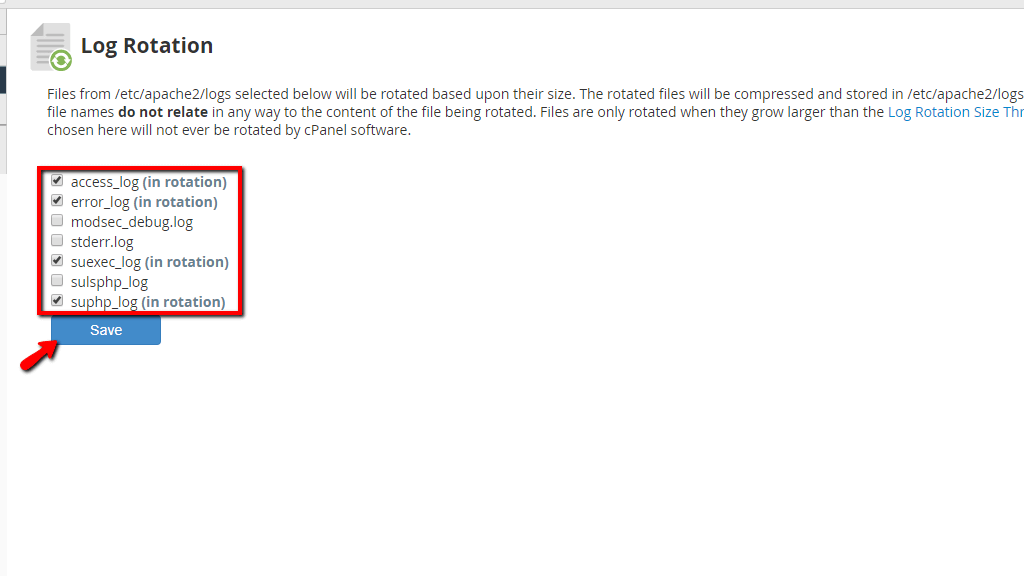
When you have chosen the logs you want to include in the rotation, please press the “Save” button located underneath the checkbox section.

The last screen in the “Log Rotation” section will show which logs are currently in the rotation and which ones are not.
The Piped Log Configuration Section #
Using the option inside the “Piped Log Configuration” section will enable you to use a single file for all virtual host access and bandwidth logs. When the option is selected the system will relay the combined logs to an assistant application (the splitlogs binary), which will split the logs into individual domain logs. Furthermore, enabling this option will reduce the number of log files that Apache needs to manage and will reduce the used number of resources used during the process.
To access this section, please press the “Piped Log Configuration” link located underneath the “Log Rotation” link on the “Apache Configuration” page.

When you land on the “Piped Log Configuration” page you will find a description of the section and underneath, you will locate a checkbox that lets you enable the “Piped Access Logs” option.
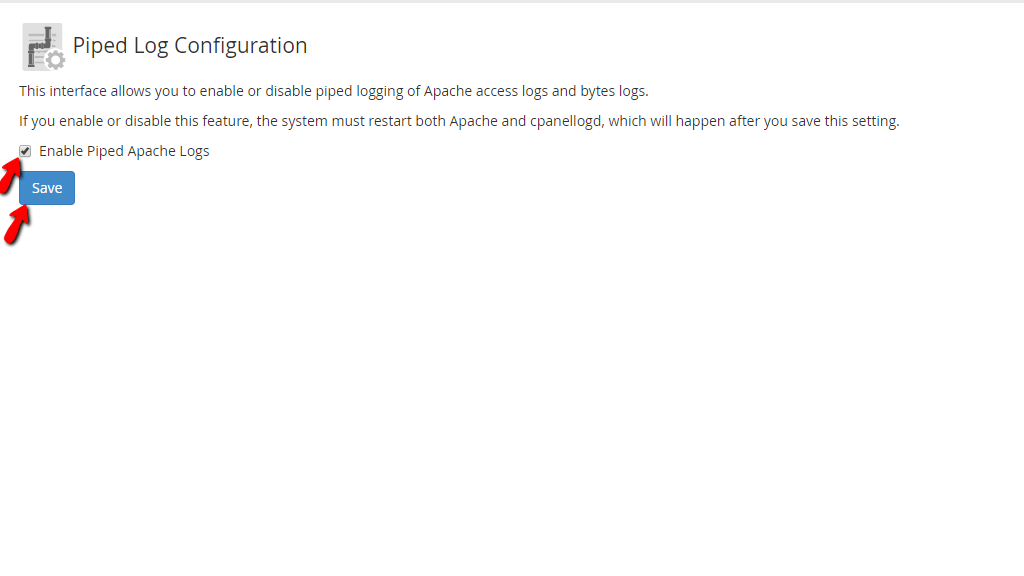
To save this setting, please press the “Save” button located under the “Enable Piped Apache Logs” checkbox.
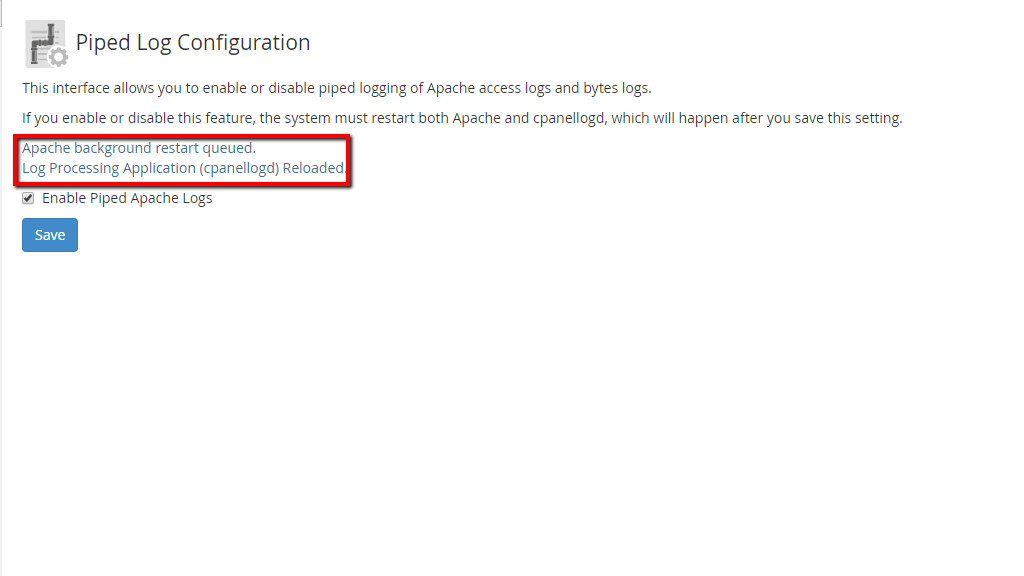
When the “Save” button is pressed, you will see a message appearing above the “Enable Piped Apache Logs” notifying you that apache is queued for a restart and the cpnaellogd daemon has been restarted.
With this last section, we will end our tutorial regarding the “Apache Configuration” feature in the WHM control panel. It is a lot of information to go through but we are certain that we covered everything important you need to know and if you acquire the information provided in this guide, you will be able to manipulate the Apache service to your liking with ease. As always, our technical support is 24/7 available at your disposal and will be happy to assist you, should you face any difficulties with this functionality. They are reachable through the ticketing system in your Client Area.


