Introduction #
The last part of the LiteSpeed Cache tutorial series is related to the Toolbox. This section has a lot of tools at your disposal, which can help you manage the LiteSpeed Cache plugin after you have configured the rest of the settings as required. Hopefully, this will make it easier for you to find what you are looking for when searching for specific functionalities. Let’s get started!
Getting Started #
To begin, you have to log into your WordPress Admin Dashboard. To do so, please add “/wp-admin” to your domain name – for example, “mywordpress.com/wp-admin” where “mywordpress.com” is your actual domain.
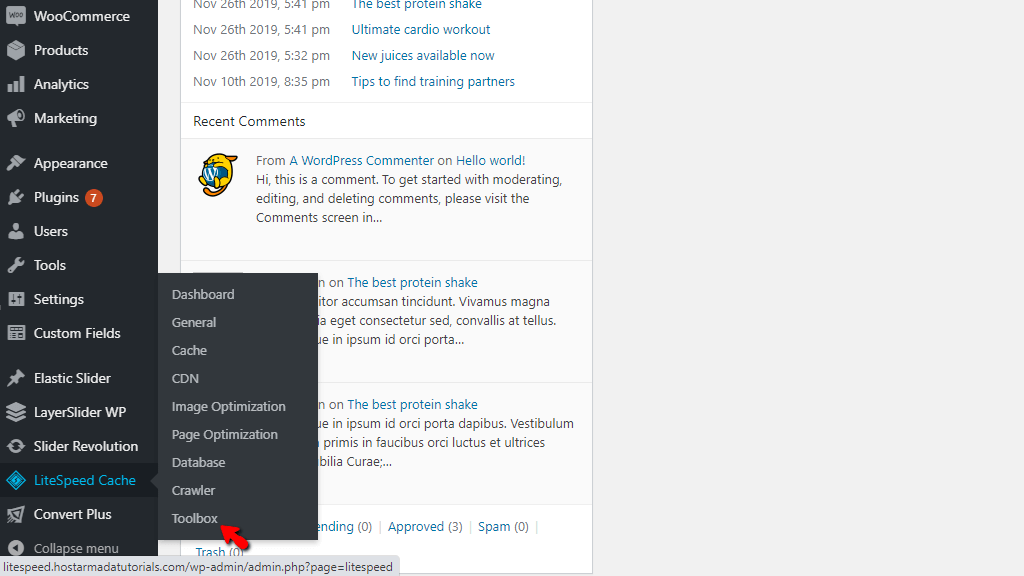
Once you are in, please hover over the “LiteSpeed Cache” option on the module bar on the left. When the submenu is expanded, please click on the “Toolbox” option.
Upon doing that, you will be redirected to the “Toolbox” section. As you can see, it is divided into eight tabs. To keep it consistent, we will separately review each of them in the following lines of this tutorial.
Purge Tab #
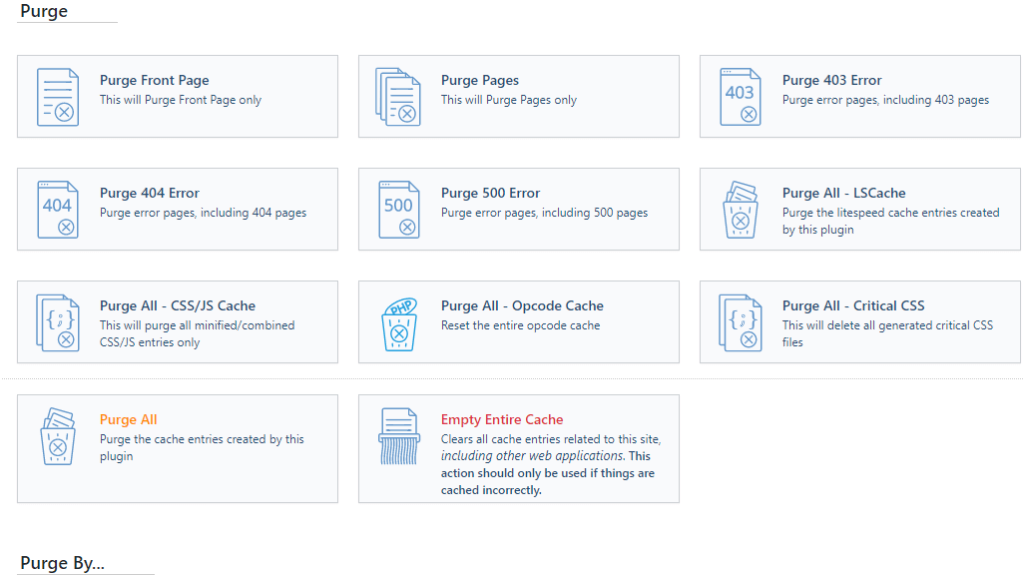
The “Purge” tab contains a list of page categories allowing you to selectively purge the cache type you need. This is particularly useful when you perform changes to a specific file that is being cached in “CSS“, for instance, and you want to purge only that cache type. Purging only a particular type of cache allows you to keep the rest of your content cached.
Import/Export Tab #
Within this tab, you will be able to export or import different LiteSpeed Cache configurations. It is a great feature that you can use to create multiple test configurations, which can then be applied to other websites in order to improve their performance.
- Export – Clicking on this button will export all the current settings of your LiteSpeed Cache plugin within a file that can be saved locally.
- Import – Clicking on this button will open a popup window, allowing you to import a file generated from the previous button and deploy all the configurations from it.
- Reset Settings – This button will clear all the configurations you applied and will reset them to the default state. It could be a useful option when you want to create an entirely new configuration, and you already saved the current one.

Edit .htaccess Tab #
This tab is intended for directly editing the .htaccess file without having to log in through FTP or SSH. It can be used to change the current content of the file or completely clear it. Excellent for troubleshooting issues!
- Frontend .htaccess Path – This text field will allow you to specify the location of the frontend .htaccess file. Typically, this will be the root directory of your WordPress.
- Backend .htaccess Path – This text field will allow you to specify the location of the backend .htaccess file. It is intended for the configuration of your backend, and it will typically be located in the “wp-admin” folder of your WordPress website.
- Current .htaccess content – This content box contains all the current rules and pieces of code that your .htaccess file contains. Anything you remove or add there will be saved upon clicking the “Save Changes” button located on the top of the content box.

Heartbeat Tab #
The WordPress heartbeat API is represented by AJAX calls, which are triggered every time the admin-ajax.php file is executed. This happens as a result of plugins, themes, or functionalities on your site, aiming to sync the data between the server and your application. A downside of it is that it could start utilizing a high amount of CPU.
If you are experiencing such issues on your site, then these settings could be of great help. You can optimize the AJAX calls by raising the occurrence intervals on the pages they are not needed that frequently.
- Frontend Heartbeat Control – This option should be turned on ONLY if you want to optimize the heartbeat API ajax calls on your frontend by setting an interval.
- Frontend Heartbeat TTL – The default value is 60 seconds, and it is pretty optimal. If you still see issues with the CPU usage, then raise it to 120 seconds. If you insert 0, you will essentially disable it.
- Backend Heartbeat Control – This option should be turned on ONLY if you want to optimize the heartbeat API ajax calls on your backend by setting an interval.
- Backend Heartbeat TTL – Again, the default value is 60 seconds. Still, you can consider turning it off by setting it to 0 seconds as you will very rarely face heartbeat issues with functionalities in your backend.
- Editor Heartbeat – Definitely set this to On as this will save your work in the editor you are using to deploy content on your site.
- Editor Heartbeat TTL – Another setting which you should definitely keep as On. If you have a huge news site with a lot of writers constantly pushing outposts, then you should consider raising the internal a bit. The default 15 seconds should be optimal.

Report Tab #
Under this tab, you will be able to generate passwordless links and send reports about issues you are experiencing with the LiteSpeed Cache plugin.
- Install DoLogin Security – Pressing this button will install the “DoLogin Security” WordPress plugin. A great plugin that allows you to generate temporary passwordless links that people can use to access your admin area.
- LiteSpeed Report – You may use this to directly report an issue to the LiteSpeed Cache plugin support team.
- Passwordless link – This button can only be accessed if the DoLogin Security plugin is installed. It immediately generates a passwordless link you can give to someone to log into your admin area or if you are sending it to the LiteSpeed support team. They will use it to log in and investigate the reported issue.
- Notes – This content box can be used to leave a note for the support team of the LiteSpeed Cache plugin. A good thing you can do is leave step-by-step instructions on how the issue you are facing can be recreated.

Debug Settings Tab #
A useful tab that has settings that are handy when you are troubleshooting issues related to caching.
- Disable All Features – Disables all types of caching from the LiteSpeed Cache plugin when turned On. Only use this for troubleshooting.
- Debug Log – Records all errors into the debug.log file located inside the “wp-content” folder of your site. Use the “ON” or “Admin IP Only” option, depending on the matter.
- Admin IPs – You may enter admin IP addresses separate by commas, which allow them to take advantage of specific admin IP command actions, such as NOCACHE and PURGE, allowing you to effectively troubleshoot a given issue.
- Debug Level – Increase this to “Advanced” should the “Basic” debug level prove to be insufficient in your case.
- Log File Size Limit – Increase this if your debug.log file is filled up quickly.
- Log Cookies – If you are troubleshooting issues related to cookies, then turn this “ON”.
- Collapse Query Stings – If you are troubleshooting issues related to Query Strings, then turn this “ON”.
- Debug URI Includes – You may use this content box to only log errors on specific pages. It is great if you want to isolate the issue only for particular pages.
- Debug URI Excludes – This content box will allow you to completely exclude URLs from the log.

Log View Tab #
There’s nothing particularly special or interesting about this page. There are two buttons, and both of them are used to truncate the debug.log file for the LiteSpeed Cache plugin.

Beta Test Tab #
Only use the options under this tab if you are a passionate user of the LiteSpeed Cache plugin, and you want to paticipate in the beta test for future releases. Other than that, you should never really even access it.
- Use the latest GitHub commit – This button will select the latest available change directly from the GitHub dev repository.
- Use the latest WordPress release version – This button will select the latest available version from the WordPress plugin repository.
- Upgrade – This button will deploy one of the selected versions above.

There you have it! The last tutorial in our comprehensive WordPress LiteSpeed Cache plugin series.


