Introduction #
Being able to completely reset a DNS zone to its default values can come in handy when you have a lot of DNS records inside a certain DNS zone that have been added over the course of a long period of time making it cluttered in the process. Another reason you might want to do this is if the DNS zone currently has a lot of DNS records serving third-party services and you want to remove them all at once, instead of having to manually remove them from the cPanel account. In this tutorial, we are going to talk about the “Reset a DNS Zone” feature in the WHM control panel that can save you a lot of time if used properly. Let’s get started!
Accessing the Reset a DNS Zone feature #
First, you need to log into the WHM service for your VPS or Dedicated Server. After you have logged in, please use the search bar on the left side of the page and type “Reset a DNS Zone”.

When the functionality shows up below the search bar, please click on it so you can be sent to the “Reset a DNS Zone” page.
Resetting a DNS Zone #
When you click on the first result presented by the WHM, you will be immediately redirected to the “Reset a DNS Zone” page where you will notice a search bar below the “Choose a Zone to Reset” heading. You can use the search bar to filter out the DNS zones and find the one you want to reset. Below this search bar, you will find a section containing the DNS zones of the domains hosted on your server.
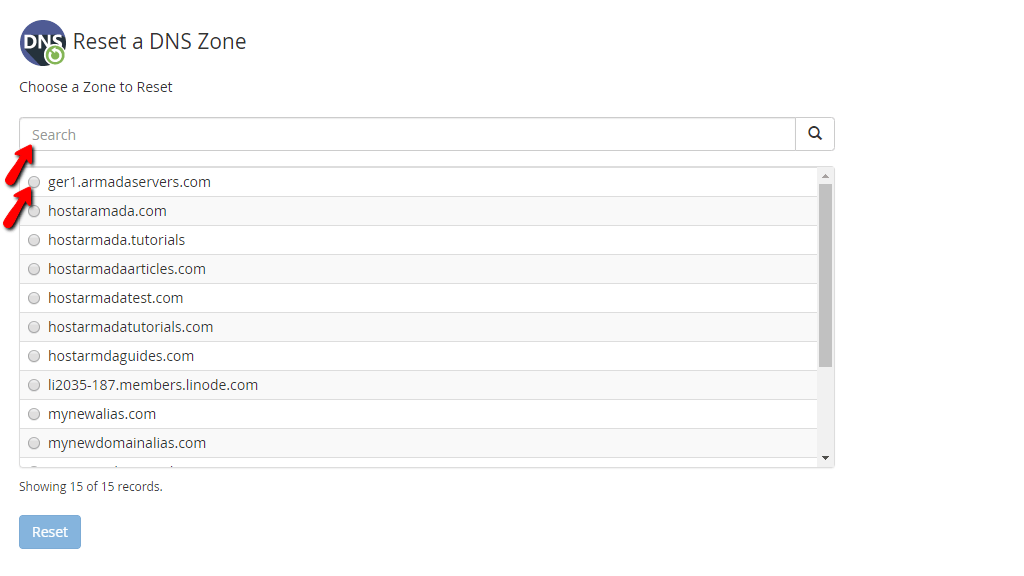
In order to reset the DNS zone, please select it with the radio button positioned right before the domain name for the concrete DNS zone, and then please press the “Reset” button located below the section containing all the DNS zones.

After clicking on the “Reset” button, you will be taken to a page, where you need to finalize the process. This is done by pressing the “confirm” button underneath the text, explaining what is the outcome of this process. On the left side of the “confirm” button, you will see a blue “back” link that will take you back to the previous page, should you decide not to proceed with the reset.

If you are absolutely certain that this is what you want and you have pressed the “confirm” button, you will be redirected to a page containing information about the procedure. It will show a label, which will read “Zone Reset: domain.com:” and below that, it will show you all the new DNS records that were added for that DNS zone, after the reset. Those DNS records are the default ones for your server.

And there you have it! All the information regarding the “Reset a DNS zone” feature, neatly packed under this tutorial. The steps are pretty straightforward and you should be able to easily work through them. If you are struggling with this functionality and need help with it, please do not hesitate to contact our Technical Support Team over the ticking system available in your Client Area.


