Introduction #
PHP is the most commonly used programming language when it comes to web programming and creating dynamic websites in particular. As such it is supported by nearly every Web Hosting Company around the globe. In that manner, HostArmada is no different. PHP is natively supported with every Web Hosting package along with a few other programming languages. As every trending programming language PHP constantly evolves in order to improve its already existing functionalities and to introduce new ones. With every new PHP version, we are enjoying faster and faster websites at the cost of fewer resources being consumed.
When a website in PHP is created, a concrete PHP version is typically being used. This is the default PHP version for the website and with it, the programmer guarantees that 100% of the website functionality will be working as expected. However, as we have mentioned PHP constantly evolves releasing newer versions, therefore the need for an adequate PHP version selector arises. With our Shared Hosting Packages our customers are provided with the option to select the specific PHP version for their Web Hosting Accounts that their websites are requiring and in the following lines of this tutorial, we will review in detail the “PHP Selector” feature of cPanel.
Accessing the PHP Selector feature in cPanel #
To be able to use any of the features cPanel has to offer you will first have to successfully login to the cPanel service.
Once logged you should see all the features presented in separate feature groups. To access the “PHP Selector” feature, you will need to either use the search tool provided at the top of the page, or you will need to locate the “Software” features group where the “PHP Selector” feature resides.

When you click on the feature you will be redirected to the default page for the same. There you will be able to perform any further modifications on the PHP version as well as on the included PHP Modules.
Changing the default PHP Version for your Web Hosting Account #
When every cPanel account is created, we will also automatically set a default PHP version for the same. That is the PHP version any PHP script uploaded on your Web Hosting Account will be utilizing. Please note that the default version might differ depending on how often PHP releases new versions.
When you access the default page for the “PHP Selector” feature you will be presented with several options to choose from. Right at the top of the page, you will see a wide section with two fields – “Current PHP version” and “PHP version“. The first one will show the currently active PHP version for your entire Web Hosting Account while using the second one you will be able to set the preferred PHP version on your own. To do that please click on the actual number for the version and from the drop-down list that will appear please choose the needed PHP version.
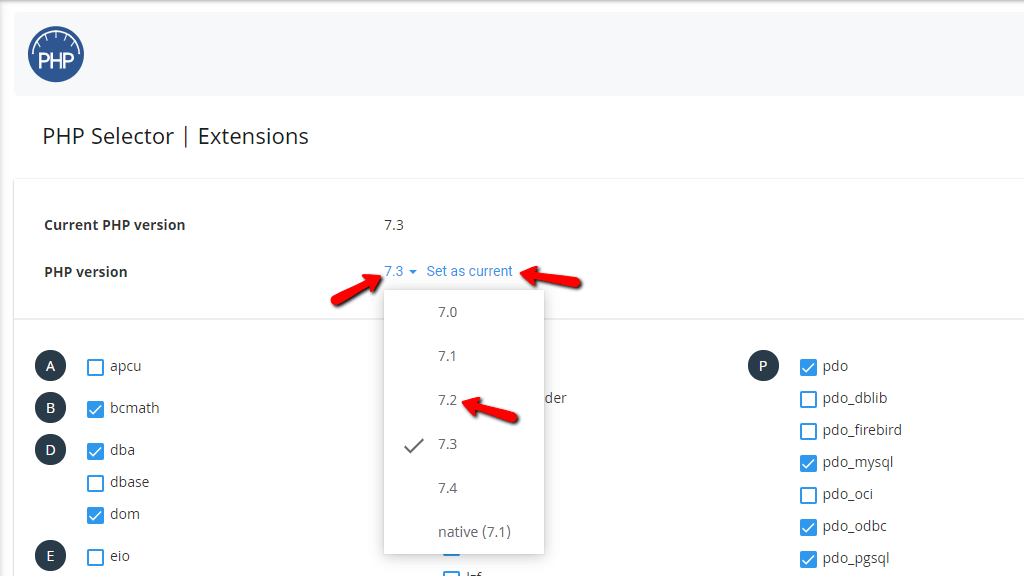
Once you are ready, please click on the “Set as current” link in order for the PHP version you have chosen to be activated for your entire Web Hosting Account.
Configuring the PHP Modules for the selected PHP version #
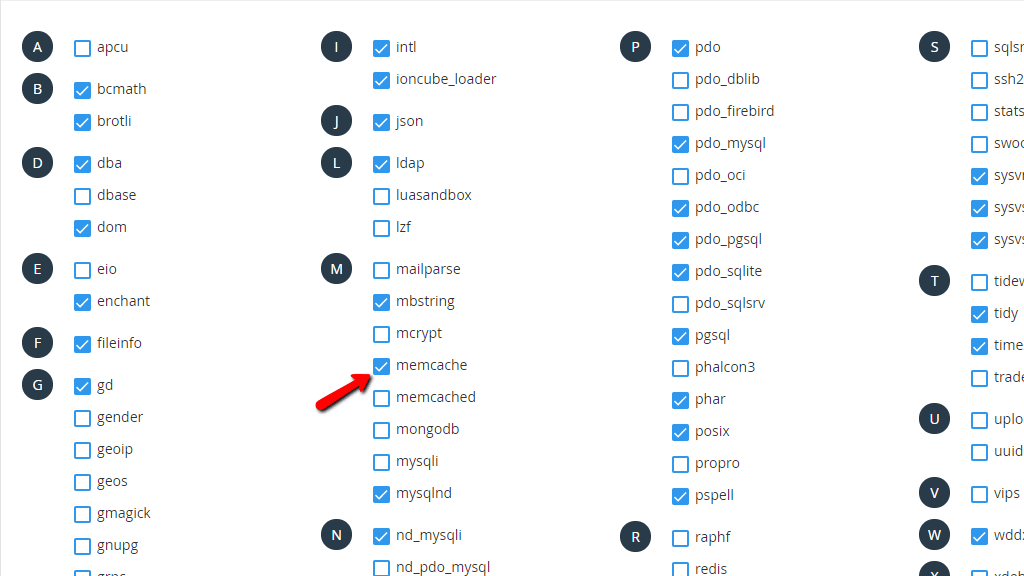
The flexibility of PHP allows it to be extended with a large number of additional PHP Modules. Of course, to operate properly and to be compliant with most of the Opensource applications these days, we have already preselected a set of modules required for the proper operation of the websites hosted on our Web Hosting Service. However, you might need some other module that is not included by default. In such cases, you will need to activate the module on your own. To do that the “PHP Selector” feature provides you with a large list of already installed modules. Using this list you can quickly activate or deactivate PHP modules with a simple click.
To activate a PHP Module for the selected PHP Version please go ahead and select the module by checking the checkbox provided for every module.

The module will then be activated immediately and you will be provided with a status message at the top right corner of the page.
Deactivating a module is basically the same as activating one. Simply remove the check for the module you would like to disable and cPanel will immediately disable the module for you.
When the PHP Module is disabled cPanel will once again display a status message in the top right corner of the page.
If you are wondering what is the meaning of some of the modules you can hover over the name of every module and cPanel will display for you a short tooltip with additional information for the chosen module.
Finally, if you have enabled or disabled multiple PHP Modules and you would like to reset the active modules to their defaults, please use the “Reset to default” button displayed at the top of the page right next to the name of the feature.

Please bear in mind that some of the modules might be conflicting with others. If that is the case, cPanel will inform you of the status text displayed after the activation of the selected PHP module. Therefore, please pay attention to the status of the activation once you select a PHP module.
Configuring the PHP options for the selected PHP version #
Often, you might need to configure the so-called variables used by the PHP service. PHP variables are the settings used by the PHP service when executing scripts on your Web Hosting Account. Such are for example:
- allow_url_fopen
- display_errors
- error_reporting
- max_execution_time
- max_input_time
- memory_limit
- post_max_size
and many more. These are referred to as PHP options in the “PHP Selector” feature.
To change any of the PHP Options you will need to click on the “Switch to PHP options” button displayed at the top side of the page, right next to the name of the feature.

Changing an option is a relatively simple task. Depending on the value of the option you will have different ways to configure it – select from a list of predefined values, enable or disable an option by checking its checkbox or enter the value of the option manually.

Please bear in mind that you do not have to save anything. Once you configure an option it will be automatically saved by cPanel for your convenience.
Understanding how the PHP Service can be configured and how you can change its versions is critical when it comes to the proper functioning of your websites. We would like to congratulate you for reading this tutorial since it will bring you one step closer to managing your Web Hosting Account in the best way possible. In case you need any additional information on the matter or if you are experiencing any difficulties managing the PHP versions and options, please do not hesitate to contact our experienced Technical Support Crew since then will be able to assist you with any PHP-related issue you might be experiencing.


