Introduction #
Coupons are often used as a way of driving sales and building customer loyalty. After all, who would not appreciate a complimentary discount? Coupon campaigns can be beneficial for any business as long as they rely on a well-thought strategy. WooCommerce comes with compelling built-in tools that will allow you to effortlessly manage your campaigns and create your coupons within a few clicks. This will be the main focus of our guide – we will review how to create coupons and enhance the functionalities of your Online Store. So, if you are ready, let’s kick-off!
Getting Started #
Now, in order to begin, we will first need you to log in to your WordPress Admin Dashboard and head to WooCommerce > Coupons.
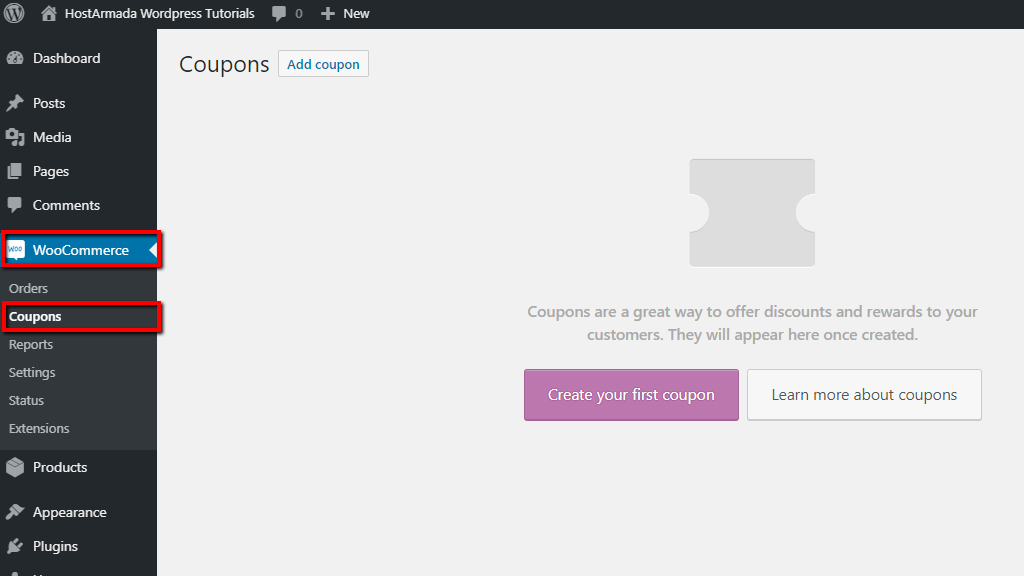
In case this is the first time you are accessing the “Coupons” page you will be prompt to create your first coupon code or to learn more about WooCoommerce coupons which will redirect you to the official WooCommerce documentation. If you have coupons already added you will see them listed instead. Now, let’s move forward to adding your first coupon.
Adding coupons #
In order to add your new coupon code, please click either on the “Add coupon” button or on the “Create your first coupon” button – both buttons will present the “Add new coupon” page.

Under the first field, you will have to enter the actual coupon code that your customers will need to apply during checkout in order to benefit from the discount. Alternatively, if you do not want to enter a custom code you can click on the “Generate coupon code” button and you will be provided with an autogenerated code.
In the field below you will be able to enter a description for the coupon. This description is intended for the store owner and managers, therefore it will be visible only on the list of coupons and it will not be displayed on your store’s frontend.
Underneath you will notice the “Coupon data” meta box which is split into three main sections: “General”, “Usage restriction”, and “Usage limits”. We will review each of the sections separately, starting with the default “General” section.
General section #
Under the “General” section you will have to set up the main options for the coupon, so let’s take a closer look at each of them.

The first “Discount type” dropdown menu will present the three default WooCommerce discount types to select from.
- Fixed cart discount – This discount type will apply a fixed discount amount on the cart subtotal.
- Percentage discount – This discount type will apply a percentage discount on the cart subtotal.
- Fixed product discount – This discount type will apply a fixed discount amount on specific product/s only.
Under the “Coupon amount” field you will have to specify the discount amount or percentage discount amount depending on the discount type you have selected above. Please enter only the numeric value in a monetary decimal (.) format without currency symbols or percent signs, e.g. “19.99″.
If enabled, the “Allow free shipping” checkbox option will include free shipping to any order with this coupon code applied. Please note that you must have the “Free shipping” method enabled and set up to require “A valid free shipping coupon”. You can review your shipping settings by navigating to WooCommerce > Settings > Shipping.
From the “Coupon expiry date” you can set up an expiration date for the coupon. If you click on the empty field you will be presented with a calendar pop-up to select the date. Alternatively, you can manually enter it in a YYYY-MM-DD format.
Usage restriction section #
Under the “Usage restriction” section you will find the options that will allow you to control the usage of this coupon code. Let’s take a peek on each of them separately.

From the “Minimum spend” option you will be able to define a minimum subtotal amount required in order to allow the usage of the coupon.
Oppositely, from the “Maximum spend” option you will be able to define a maximum subtotal amount above which the usage of the coupon will NOT be allowed.
The “Individual use only” checkbox option will allow you to control whether this coupon could or could not be used combined with other coupons. If you would like to limit the usage per order to this coupon only, please tick the box.
The “Exclude sale items” checkbox option will allow you to control the applicability of the coupon on items that are already on sale. If you would like to restrict the usage of the coupon on sale items, please tick the box.
From the “Products” and “Exclude products” fields you will be able to define specific products to be included and respectively excluded for this coupon code.
The same applies to “Product categories” and “Exclude categories” – you will be able to include or exclude certain categories by defining them in the corresponding field.
From the last “Allowed emails” option you will be able to set email restrictions that will only let the coupon work for the email addresses specified in this field. You can use the wildcard character (*) to include a range of email addresses, e.g. “*@gmail.com” for any Gmail account.
Usage limits section #
Under the “Usage limits” section you will find the options allowing you to set up usage restrictions. You would most certainly like to limit the usage of the coupon code, so let’s review these two options.

The first “Usage limit per coupon” option will allow you to set up a limit on how many times this coupon code can be used in total.
The second “Usage limit per user” will allow you to set up a limit on how many times this coupon code can be used by a given customer.
For example, if you set the “per coupon” limit to 100 and the “per user” limit to 1, each customer will be able to apply the code once under the condition that they are among the first 100 customers, after the 100th customer the code will be deprecated.
Finally, under the “Publish” section at the top right end, you will notice a few additional edit options. Let’s review them and you will be ready to add your new coupon code.
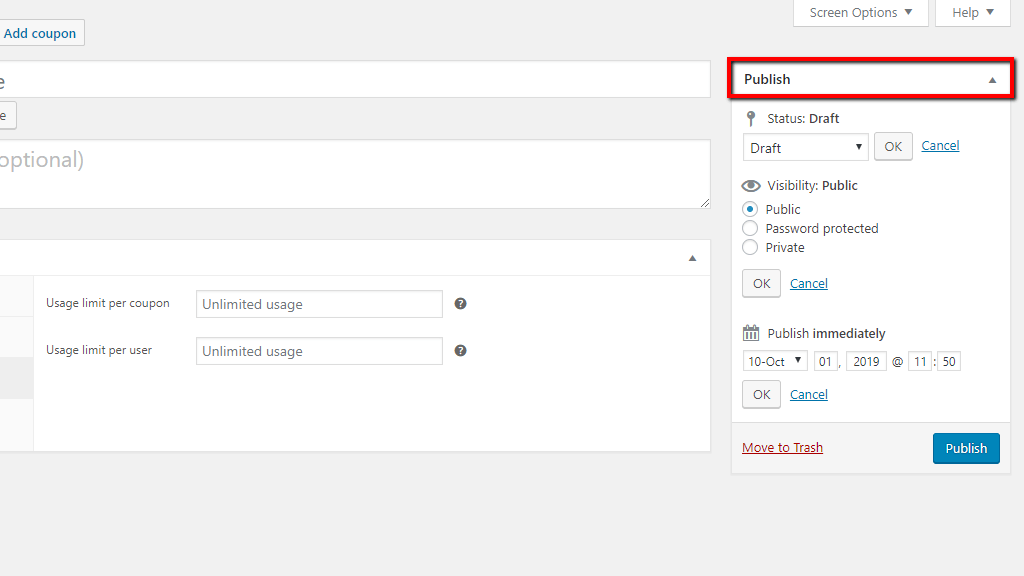
You will be able to change the “Status” of the coupon by clicking on the “Edit” button and selecting between “Draft” and “Pending review” from the dropdown menu. You can control the “Visibility” of the coupon by choosing between “Public”, “Password protected” or “Private”. The “Publish” option will allow you to schedule the publication of the coupon in case you do not want to immediately publish it. By clicking on the red “Move to Trash” text you can delete the coupon.
That is pretty much it! Now, just hit the “Publish” button and your new coupon code will be added and ready to use.
Well done! You have learned a new way to make your customers happier. As always, we would like to thank you for your trust in our guidance and encourage you to contact our Support Team in case additional instructions are needed.


