Introduction #
The “Mail Queue Manager” feature in the WHM control panel gives you the option to either view, delete or attempt to deliver queued emails that have not been sent out yet. It can be really useful when you are troubleshooting problems related to mail delivery. For example, if your email queue is full and you are trying to find what is causing it. Usually, if you notice a lot of emails being sent from a specific email account in a very short period of time and the same are being queued up, this is a sign of a compromised account that is spamming and you should investigate it. Let’s start the guide.
Accessing the Mail Queue Manager functionality #
First, you need to log into the WHM service for your VPS or Dedicated Server. After you have logged in, please use the search bar on the left side of the page and type “Mail Queue Manager”.

When the functionality shows up below the search bar, please click on it so you can be sent to the “Mail Queue Manager” page.
Searching for Emails #
When you are redirected to the “Mail Queue Manager” page, you will notice a section that has a search field inside. It will allow you to filter search results based on specific criteria. These criteria can be chosen from the dropdown menu, located on the right side of the search field:
- Search Sender – Selecting this option will search for a specific sender.
- Search Recipient – Selecting this option will search for a specific recipient.
- Search Message-ID – When troubleshooting email problems, you will notice that each message has a unique ID number. You may filter the messages based on this if you are aiming to see a message with a specific ID.
- No filter – This option will remove any restrictions in regards to the search criteria and you may search freely.
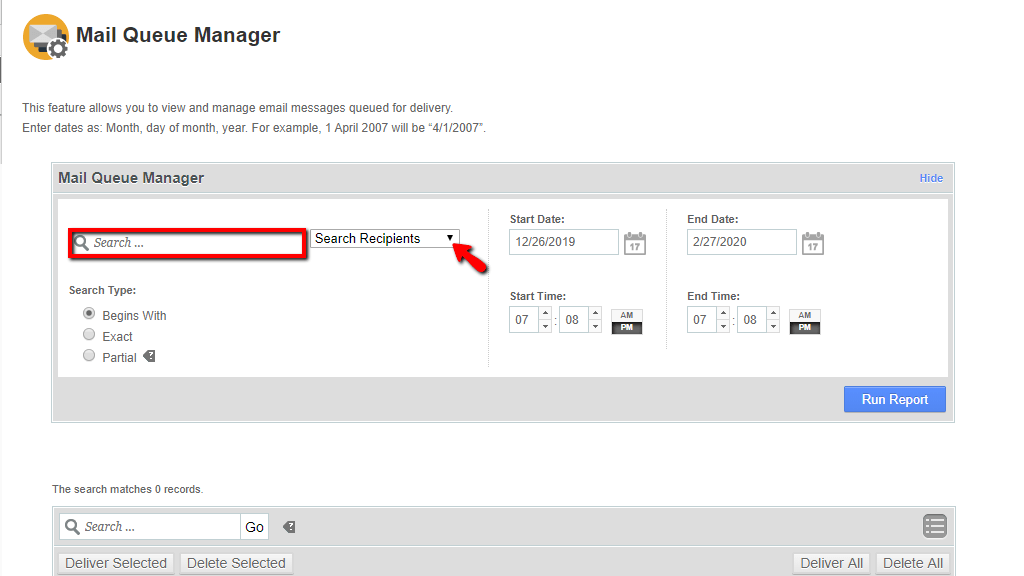
Below the search field, you will see the “Search Type:” setting. Your options are:
- Begin with
- Exact
- Partial
In order to select a given search type, please use the radio button on the left side of the respective option. Note that the “Begin with” and “Exact” options are much faster than the “Partial” however, the results it provides are typically more accurate.

On the right side of the search field, you will notice two sections where you may configure the search result to show a match from a specific date period. For example, under “Start Date” you may set 12/26/2019 and in “End Date” you can select 01/26/2020 which will show you results ONLY from the 26th of December 2019 until the 26th of January 2020. Below the date fields, you will see time fields where you are able to use a similar pattern to manipulate the results based on the time when the specific issue you are looking for occurred.

Once you have selected the criteria and the rest of the search options inside this section, please press the “Run Report” button located on the bottom right corner of the “Mail Queue Manager” section.
When you press the “Run Report” button, the second section underneath the “Mail Queue Manager” section will be populated with results. Let’s go over the information it contains.
- Time Received – This will show the time in which the email arrived at the destination server.
- Sender – This column will show which was the sender who attempted to send the message.
- Message-ID – The unique message ID for the sent message.
- Recipient(s) – This will show the recipient(s) who were meant to receive the mail.
- Size – This will display the size of the email.
- Status – This will show the current status of the email. If it is queued up it will be displayed as “Frozen”.
- Actions – The available actions within this column will be “Delete Message”, “Deliver Message”, “Return to Mail Queue”.
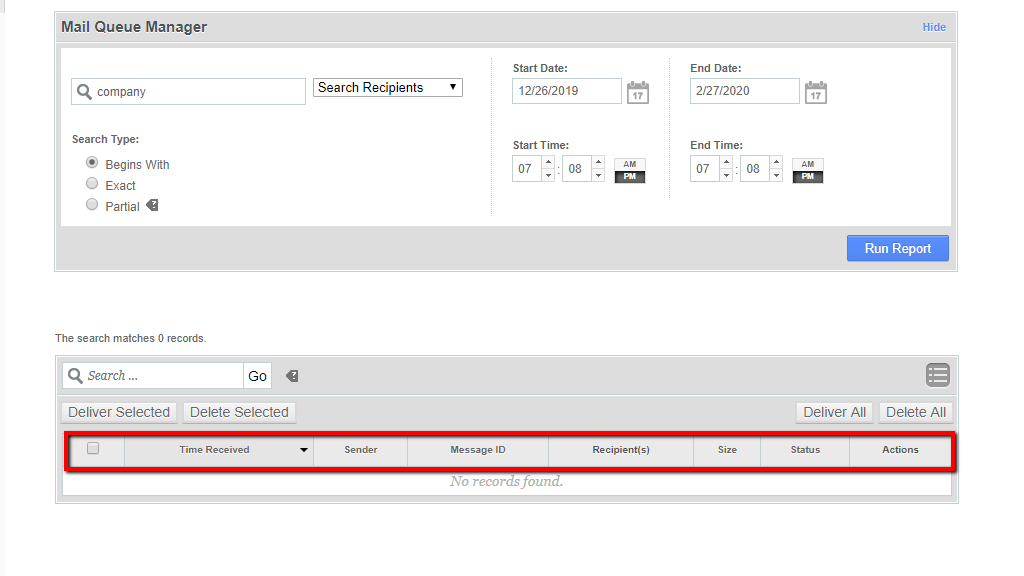
In order to deliver a message, please use the checkbox located on the left side of the table sections, to tick the desired emails and then press the “Deliver Selected” located above the “Time Received” column. To delete them, please press the “Delete Selected” instead.

If a message is not delivered, the mail server will attempt to do so a couple of times. If it is unsuccessful this message will be “Frozen”. In this process, the server saves a lot of resources as mail delivery does take its fair share, especially if it is constantly happening. The system will stop attempting to deliver the message when it is frozen until you manually unfreeze it.

In order to do that, please press the Icon located on the right side of the magnifying glass icon inside the “Actions‘ column.
This concludes our tutorial about the “Mail Queue Manager” feature in the WHM control panel. A pretty handy functionality allowing you to manipulate the behavior of your queued and frozen messages. If you need any assistance regarding this tool, please, feel free to contact our Technical Support Team over the ticketing system in your client area. They are 24/7 available at your disposal.


