Introduction #
Have you ever been in a situation where important emails were lost, or you have deleted them by accident? Well, you can completely forget about such inconveniences if you are using Phluit hosting services. Our solutions come with JetBackup integrated right into the cPanel account. The module allows you to restore email accounts and content from up to 7 days back. Note that this will restore the mailbox, in the exact way it was on the day it was backed up on and any new emails which you have received since then will be removed. Use this option only if you do not need any recent emails. If you require specific emails restored and you want to leave the rest of your current inbox intact, please reach our Technical Support team and ask them for assistance. They are reachable 24/7 via the ticketing system in your Client Area.
Getting Started #
To start using the “Email Backups” feature, you need to log into your cPanel account first. . Upon logging in, you will notice a few sections, each having its unique icons that represent a cPanel feature. The icon you should look for is the “Email Backups”, which will be located under the “JetBackup” features group.
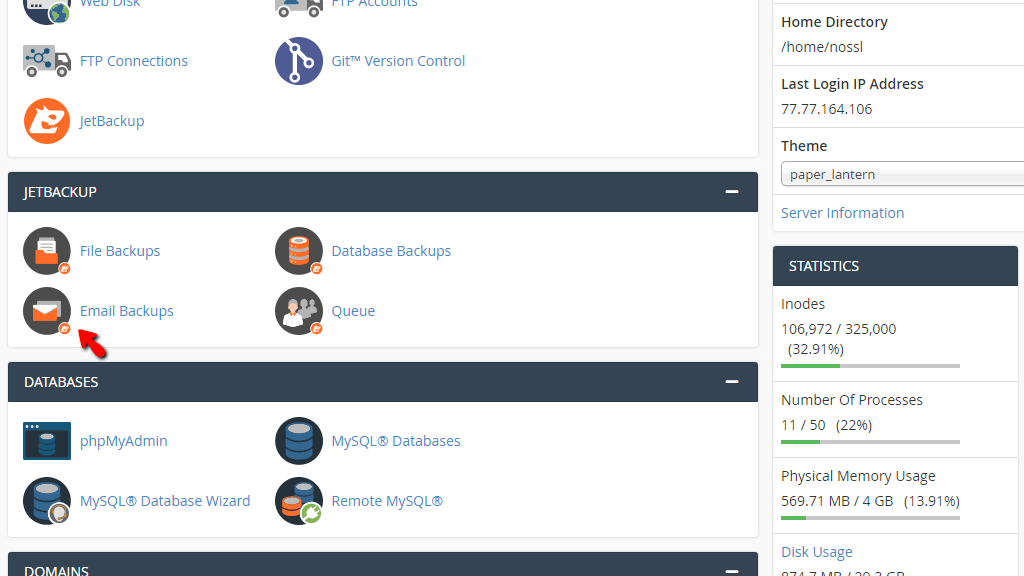
Once pressed, you will be redirected to a new section, which will contain a table section populated with all of the available email backups.
Restoring Email Accounts #
As with the other restore types, the “Email Backups” page will be no different. Upon landing there, you will see a table section, populated with all the available email backups.
- Email Accounts – This column indicates the name of the backed-up email account.
- Creation Date – This column displays the date on which the backup is created. It will typically contain at least 14 copies for the past 14 days. Note that, the number of available backups varies, based on your shared hosting plan.
- Notes – This column contains notes added to the backup if any. To add a note, all you need to do is click on the “Click to add Note…” label on the corresponding row.
- Location – This column shows the location of the backup. It can be either remote or local.
- Actions – This column contains the available actions you can do with the backup. You should see only the “restore” button there.

To initiate the restoration process of an email account, please click on the “Restore” button located on the corresponding row. Pressing the “Restore” button will expand the row itself, and two additional options will be unveiled – the “Add to Restore Queue” button and the “Cancel” link.
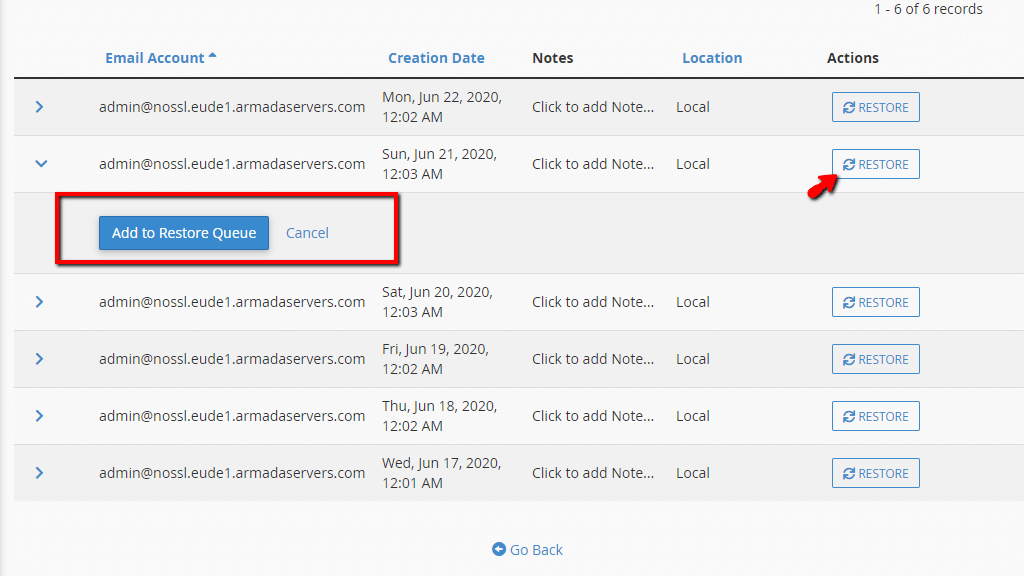
If you wish to start the restoration process, please press the “Add to Restore Queue” button. Alternatively, press the “Cancel” link, which will shrink back the row, and you may either choose another email account or leave the feature.
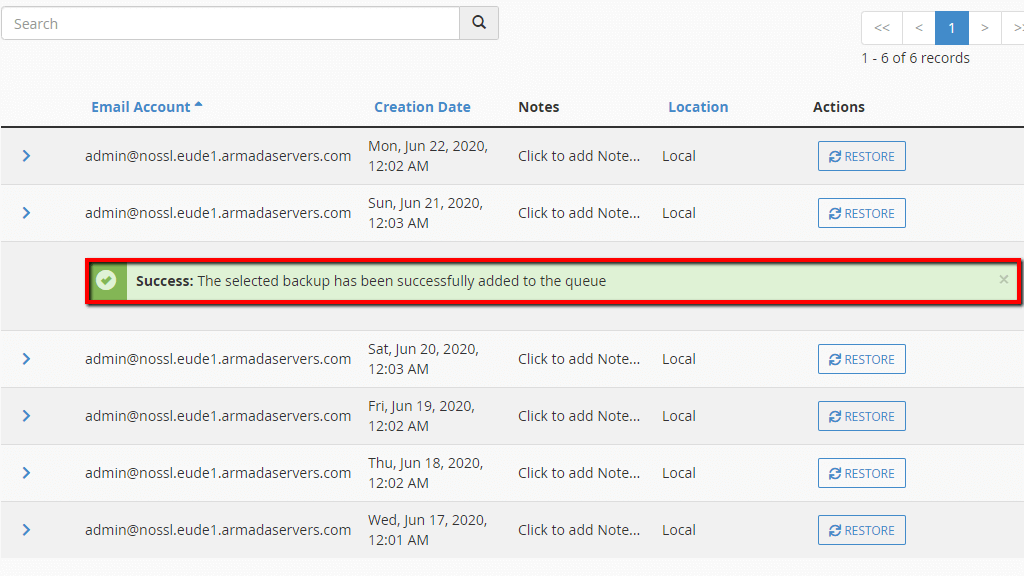
After you click on the “Add to Restore Queue” button, a success message will be shown under the row of the selected database notifying you that you have started the restoration process, and it has been added to the queue. To check the status of the process, please go to the index cPanel page and access the “Queue” feature, which is located under the “JetBackup” section.

Upon clicking on the “Queue” icon, you will be redirected to a page that has yet another table section populated with your most recent backup restores.

Let’s go over all the columns under this table section.
- Type – This column shows the type of restore. It could be Files, Databases, or Emails.
- Date – This column displays the date on which the restoration process was started.
- Target – This column indicates the name of the account where the restore is being processed.
- Status – This is the column that you should be most eager to see! It will display either a “Completed”, “Failed” status, or “In Progress” status.
- Action – This column will be empty in case the process had been successfully completed or still in progress.
Once you notice the “Completed” message under the “Status” column, this means that the file restoration is complete, and you can now go and test out your website.
That’s it! The know-how on how to restore your email accounts from the cPanel account. We hope that the instructions were presented in an understandable way, and they have enabled you to go through the processes without any worries. If you still do not feel confident enough doing this on your side, please feel free to contact our Technical Team and ask them to help you out. They are 24/7 available at your disposal through the ticketing system in your Client Area. In order to speed up the process, please provide them the following information in the ticket: email account name and the date from which you want to restore it.


