Introduction #
In this tutorial, we will guide you on how to upload and download files using the FileZilla FTP Client. Transferring files to and from your hosting account via FileZilla is as simple as dragging and dropping them to the desired folder. Let’s jump right in and convince you how easily you can achieve that.
Getting Started #
Before we step into instructing you on how to transfer the files we would like to make a note. We do assume that at this point you have the FileZilla Client already installed on your local computer and you have established a successful connection to your web hosting account.
Once you are connected, you will see displayed two panels: the left one will list the files and directories of your local computer, while the right one will list the files and directories on the remote server (i.e. your hosting account).
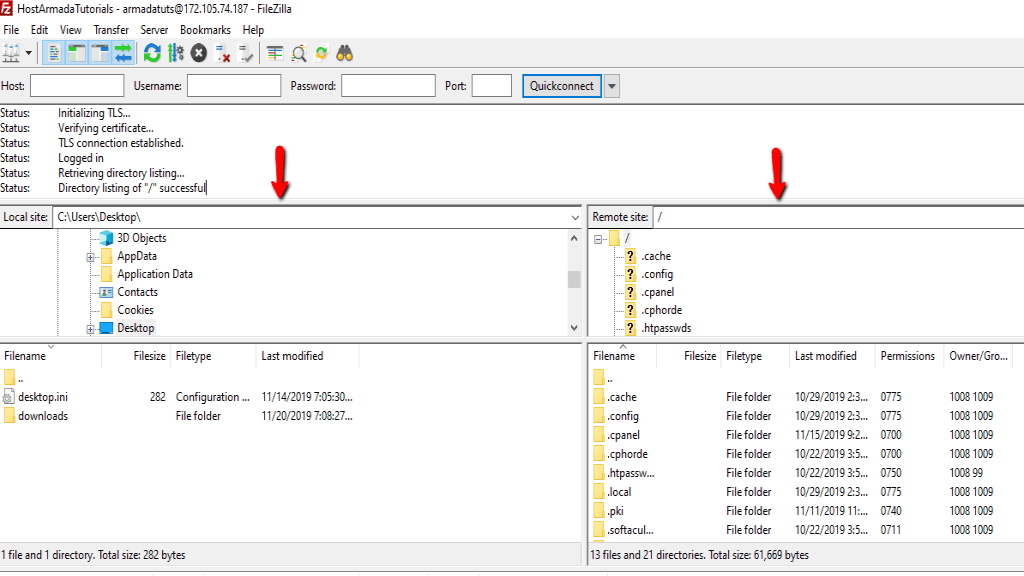
If your screen looks similar to the screenshot example above, you are in the right place and we are ready to begin.
Uploading Files #
In order to upload given file(s) or folder(s), first, you will need to navigate through the left panel among your local folders and locate the desired files/folder. Second, you will need to navigate through the right panel and make sure to select the directory under which you would like to upload the files on your hosting account.

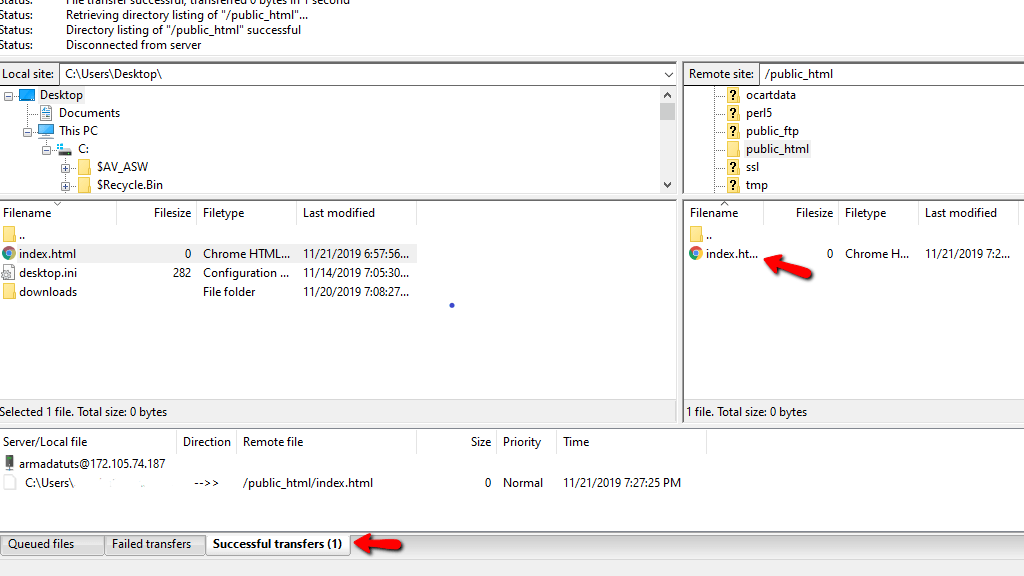
In case you need to upload multiple files or folders, you can select them by holding the “ctrl” (PC) / “command” (Mac) key on your keyboard and clicking on them. Once you select the files you want to upload, please right-click on them and select the “Upload” option. You can also, simply drag and drop the files into the desired remote directory.
Please note that the transfer process duration will vary depending on the size of the files, therefore in some cases, it may take a long time to finish.
If the transfer is successful, you will see the file(s) displayed in the right column. You can also find additional information by clicking on the “Successful Transfers” tab.
As we previously mentioned, the process is really simple and intuitive. We hope you have managed to handle it.
Downloading Files #
As you have probably guessed, the process of downloading files/folders from your hosting account to your local computer is pretty much the same as uploading them. However, this time you will need to do everything oppositely. You will have to locate the web files/folders by navigating through the directories in the right panel, once you locate them right-click and select the “Download” option instead. Also, please make sure that in the left panel you are located under the directory where you desire to download the file(s) or folder(s).

Similarly to the previous example, if the download process is successful you will see the file(s)/folder(s) displayed in the left panel, it will also be recorded in the “Successful transfers” tab.
Pretty much – that is it! Now you should be able to quickly transfer files from your local computer to your hosting account and vice versa. We hope you have found our tutorial useful and easy to follow. In case you have ended up with any error messages, please make sure to escalate the case to your Support Team for further assistance.


