Introduction #
Now that we had covered the WooCommerce “Settings“, “Categories“, “Tags” and “Attributes“, you are finally ready to start adding products to your Online Store. In this guide, we will walk you through the process of creating your products step by step and we will precisely explain the specifications of this process. If you are ready to start – let’s jump right into it!
Getting Started #
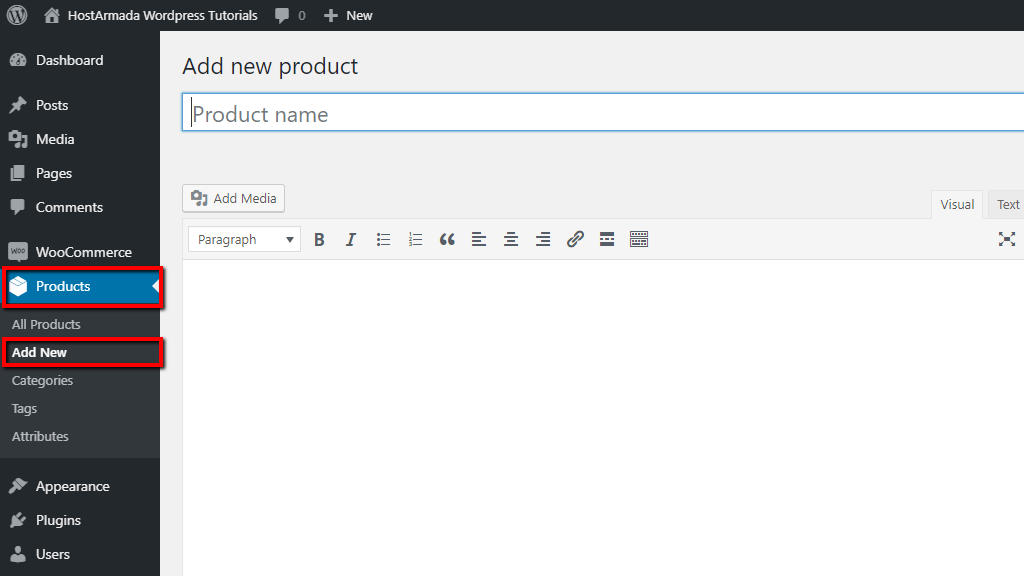
As usual, we will first need you to log in to your WordPress Admin Dashboard and navigate through the left menu bar to Products > Add New.
In case you have previously used WordPress you should be quite familiar and comfortable with this interface. Anyhow, let’s review the page and what exactly you will need to configure.
Adding Products #
Now that you have accessed the “Add new product” page, at the top of it, you will see the “Product name” field where you will need to enter a title for your product. Followed by a content field where you can write a description for your product. This description will be displayed in the “Description” layout on the product page.

Once you are ready, please scroll down to the “Product Data” section. Here you will find all the essential product settings. First, you will have to select the product type.

Please, click on the dropdown menu in order to select the product type you wish to add. You can also enable the checkboxes at the right of it in case the product you are adding is “Virtual” and/or “Downloadable“.
As each of the product types has different “Product data” settings we will separately review them, starting with the “Simple product” type.
Simple Products #
The “Simple Product” type is applicable to almost all products. Simple products are unique and unrelated to other products. Such products do not include options and are shippable. Examples of simple products would be paintings, books, tools, etc.
After you select your desired product type you will have to configure its “General” settings available under the default section.

You will need to configure the following options:
- Regular price – The regular price is the usual price your customer will have to pay for this product.
- Sale price – Here you will have to enter a price that will be applied whenever you are running a sale. You can click on the blue “Schedule” text in order to define the period of your sale.
- Tax status – From this dropdown menu, you will have to select between the “Taxable” option where the tax will be calculated on top of the product price plus the shipping rate, “Shipping only” option where the tax will be applied only on the shipping amount, and “None” option where no tax will be applied at all.
- Tax class – This dropdown menu will display all the default tax classes as well as any custom classes you have created. Here from you will need to select the tax class applicable to this product.
After you are ready, please switch to the “Inventory” section.
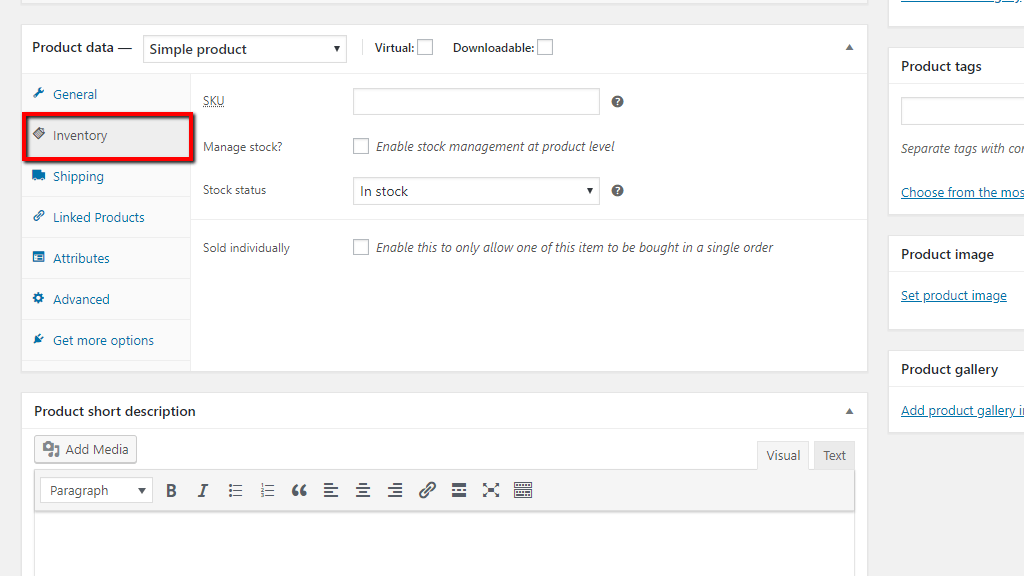
- SKU (Stock Keeping Unit) – Here you can enter a unique identifier for your product that will help to easily distinguish it.
- Manage stock? – This checkbox option will allow you to enable stock management on a product level. If you keep this option disabled you will have to manually update the stock status of your products. If enabled, it will display three additional fields. “Stock quantity” where you can enter the current quantity available of the product. From the “Allow backorders” dropdown menu you can decide whether or not to permit backorders for this product. Backorders will allow you to go below 0 stock quantity. The “Low stock threshold” option will allow you to define the quantity under which your product will be considered low in stock. Once the quantity defined in here is reached, you will be notified by email.
- Stock status – This dropdown option will be presented only if you keep the “Manage stock?” option disabled and you wish to update your product status manually. From the dropdown menu, you can select between “In stock“, “Out of stock“, or “On backorder“. This status is usually displayed on your store’s frontend while your customers are browsing your products.
- Sold individually – Enabling this checkbox option will determine that product as purchasable via separated order only.
Following is the “Shipping” section.
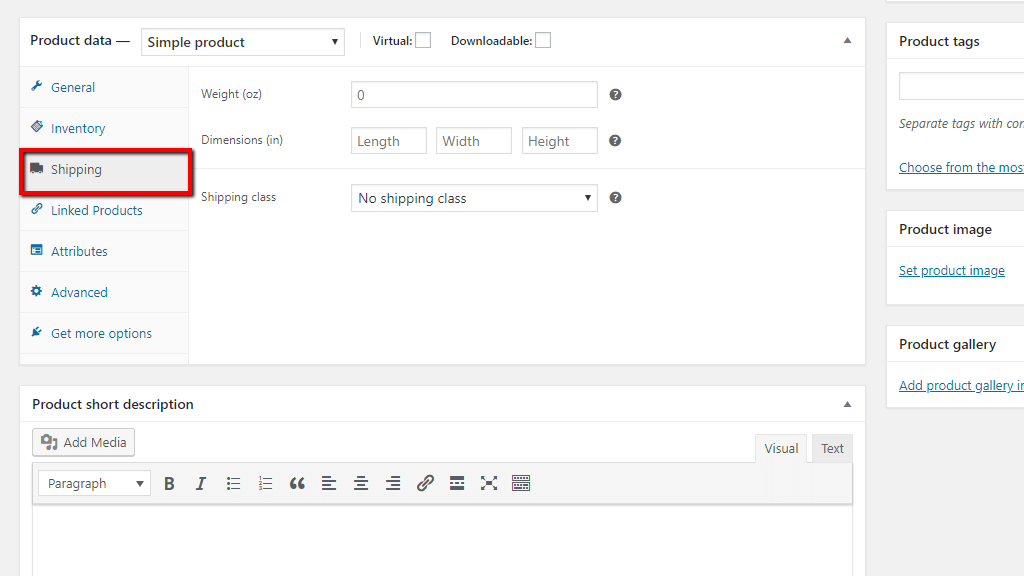
- Weight – Here you will need to enter the weight of your product.
- Dimensions – Here you will need to enter the Length-Width-Height of the product. Please make sure to add your values accurately as if your shipping calculations are based on dimensions your customers might end up with errors or incorrect shipping rates.
- Shipping class – This dropdown will list all your current shipping classes. You can either select the shipping class you desire to use or alternatively leave it to “No shipping class”.
Next is the “Linked products” section.

Setting up “Upsells” and “Cross-sells” will allow you to promote additional products to your customers while they are browsing your store.
- Upsells – Under this field you can select products that are considered as similar, but more profitable and high in quality and expenses. These products will be displayed under “You may also like” section on the product details page.

- Cross-sells – Under this field you can select products that are considered as related and you think your customer might be interested in. These products will be displayed under the “You may be interested in” section on the shopping cart page based on the currently selected items.

Next, you will have to configure the “Attributes” for the product.
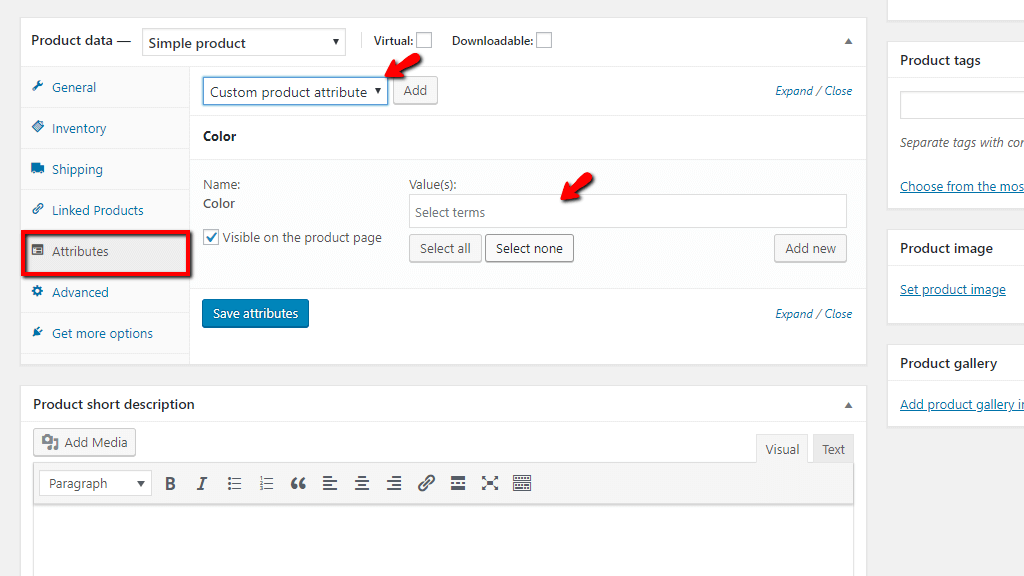
The dropdown menu option will allow you to select from your existing global attributes or create a new “Custom product attribute”. Once you select the option just click on the “Add” button and the attribute will be included. Afterward, from the “Value(s)” field you will have to select the terms of the given attribute that you would like to apply to the product. You can choose whether these terms will be displayed on your store’s frontend from the “Visible on the product page” checkbox.
The following is the “Advanced” section.

Here you will be presented with the following three options:
- Purchase note – Under this field, you can write a custom note which will be sent to your customers after purchase.
- Menu order – This field will allow you to set up a custom ordering position for the given product.
- Enable reviews – This checkbox option will allow you to control whether your customers are allowed to leave reviews for this product.
The final section is “Get more option”. You can click on the “Browse the Marketplace” button which will redirect you to the “WooCommerce Marketplace” where you can explore useful WooCommerce extension.
Virtual Products #
“Virtual” are products that do not require shipping, for example, services. The “Virtual” product option is applicable to “Simple” and “Variable” products. Enabling the “Virtual” checkbox will disable the “Shipping” options section for your product, respectively, you will not be able to configure your shipping rates and classes and no shipping rates and taxes will be applied.

In case you are adding a “Variable product”, you will not be able to apply the “Virtual” product option globally. Instead, it needs to be enabled per variation. Therefore, the option will be available under the “Variations” tab. You will need to select the variation and once its settings are displayed you will be able to tick the “Virtual” checkbox.

Once you configure all the variations you wish to set up as “Virtual” products, please do not forget to click on the “Save changes” button at the bottom of the page.
Downloadable Products #
“Downloadable” are products that are provided in a downloadable file format, such as digital products like audiobooks, photos, videos, music, etc. If you tick this checkbox your customers will be provided with a link in an order confirmation email wherefrom they will be able to download the product. If you enable the “Downloadable” product option three additional fields will be displayed under the “General” section.

- Downloadable files – Here you can add multiple files and organize them in your desired order. In the “Name” field you will have to enter the title of the products. From “File URL” you can directly enter the source URL of the file or alternatively click on the “Choose file” button which will let you select from your WordPress Media files and automatically generate the URL.
- Download limit – From this field, you can set up a limit for the number of times your file/s can be downloaded. If you do not want to limit the downloads, please leave the field blank.
- Download expiry – From this field, you can set up the expiration period of the link in days count. If you do not want to set up an expiration period, please leave the field blank.
Similarly to the “Virtual” products the “Downloadable” products are configured per variation for the “Variable product” type. This option is extremely useful in case you are offering the same product in a physical and digital version. You will find the above-described field under the “Variations” section.
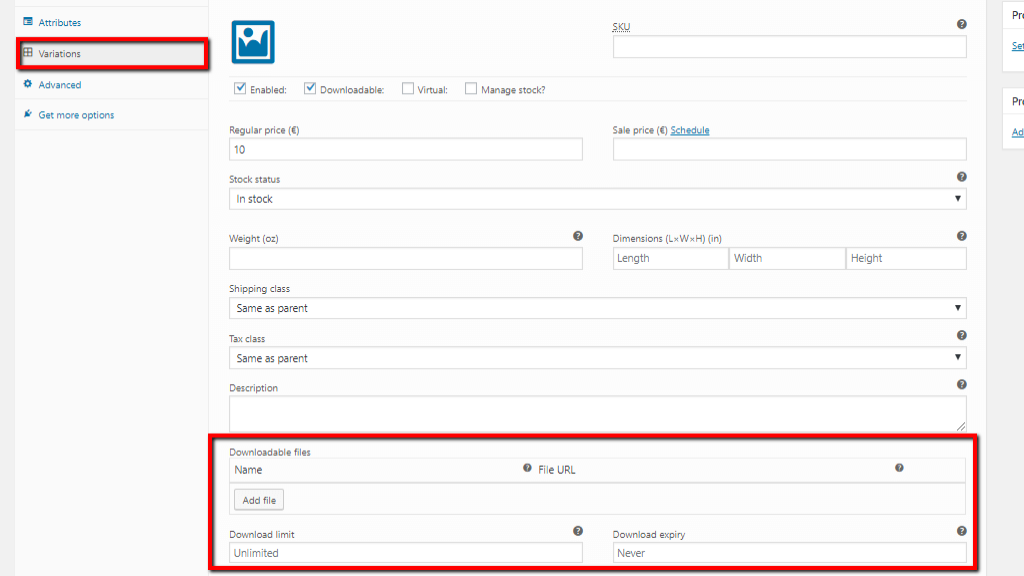
Once you configure all your variations that need to be “Downloadable”, please do not forget to click on the “Save changes” button at the bottom of the page.
Grouped Products #
The “Grouped product” type will allow you to combine multiple simple products as one individual product. In order to add a “Grouped product” you will have to first separately create all the “Simple products” that will be included in the grouped product.
When you select the “Grouped product” type from the “Product data” dropdown menu, you will notice some of the sections will disappear leaving only the section necessary in order to add this type of product.
As we have already covered these section above and you are familiar with the process of setting them up, we will only focus on the main specifics when creating a grouped product. Please switch to the “Linked Products” section and let’s review what is different there.

You will notice a new “Grouped products” field where you will have to select which products you would like to combine under this product. The information related to your simple products will be automatically collected and merged under your new group product.
In case you do not want these simple products to be available for purchase individually you can easily achieve that. You will have to click on the “Edit” button for the simple products in question. Then from the “Publish” section at the top right corner click on the “Edit” button next to “Catalogue visibility” and you will be provided with few options where you need to select “Hidden”. Afterward please hit “OK” and “Update” and you will be all set.
External/Affiliate Products #
The “External/Affiliate Product” type is applicable to products which you offer at your Online Store but are sold by a third party. By creating an “External/Affiliate product” you can easily redirect your visitors to the destination where they will be able to purchase the selected products.
When you select the “External/Affiliate Product” type from the “Product data” dropdown menu, you will notice that the unneeded sections will disappear leaving only the section necessary for creating the product.
The main difference here is under the “General” section where you will be provided with two additional fields.

Under these fields, you will have to specify the external destination.
- Product URL – In this field, you will have to enter the external URL or affiliate link of the product in question.
- Button text – From this field, you will be able to customize the default “Buy Products” text appearing on the purchase button.
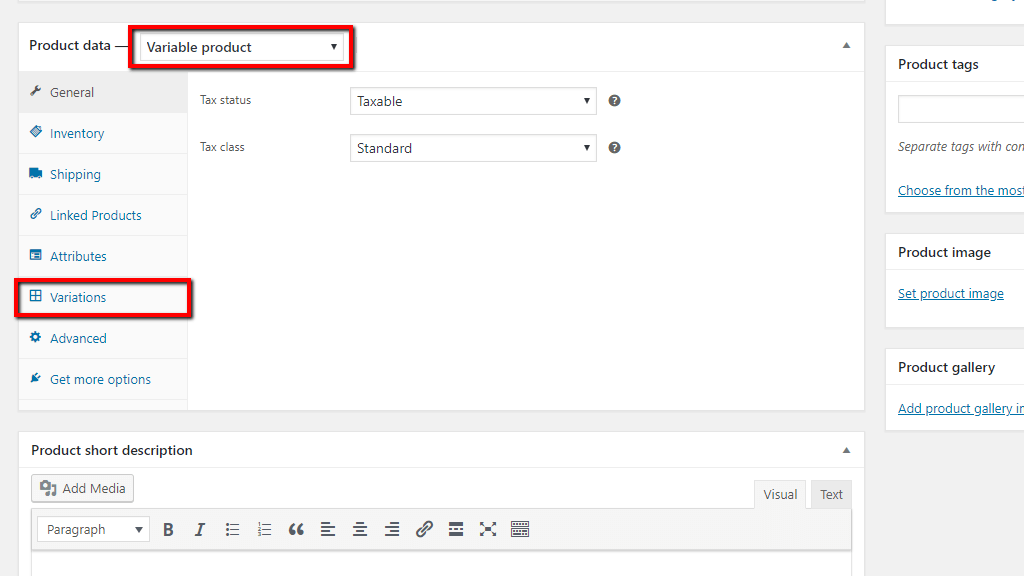
Variable Products #
The “Variable product” type will allow you to create products with different versions and variations. You will be able to set up the price, stock options, etc. individually for each variation. For example, if you are selling clothing and you offer different colors and sizes, with the “Variable product” type you will be able to add and customize each of the variations of your product.
In order to add your variable product, please select the “Variable product” type from the dropdown menu under the “Product data” meta box. After the type is selected, you will notice that a new “Variations” section will appear where you will be creating the actual variations of your product.
The process of adding a variable product is similar to adding a simple product, therefore as you are already familiar with the rest of the settings, we will focus only on what is specific for this product type.
In order to create the variations, you will have to select the attributes these variations will be based on. Please switch to the “Attributes” section, select each of the applicable attributes from the dropdown menu and click on the “Add” button.
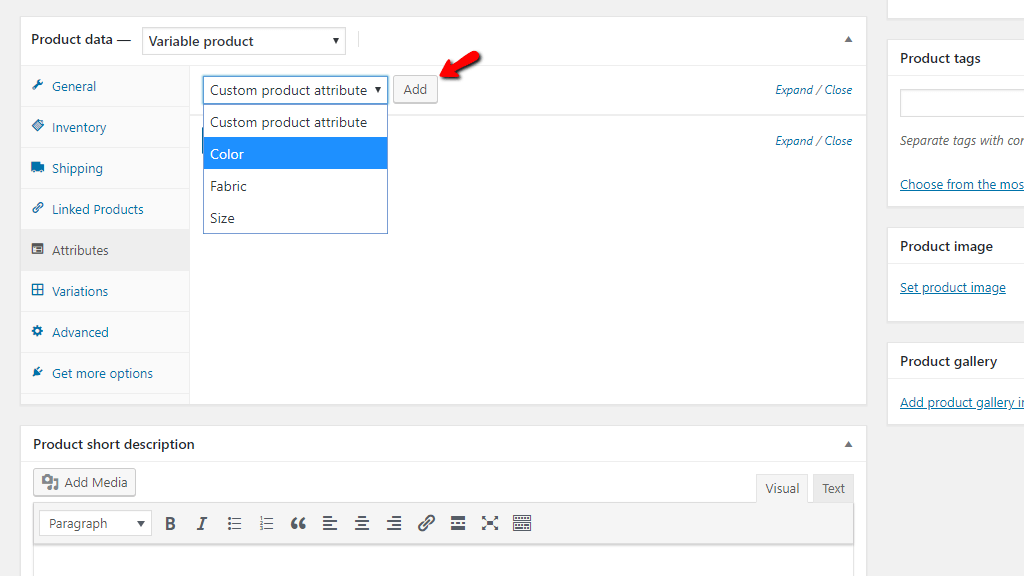
Once you add the desired attributes, you will have to select the terms applicable for this product. You can click on the “Select all” button in order to add all terms configured for this attribute or you can manually add them one by one by typing them in the empty field. You can also include an additional term/s to this attribute by clicking on the “Add new” button. Please, make sure to tick the “Used for variations” checkbox as this is required in order to create variations. After you are done, please click on the “Save attributes” button and you will be ready to move forward.

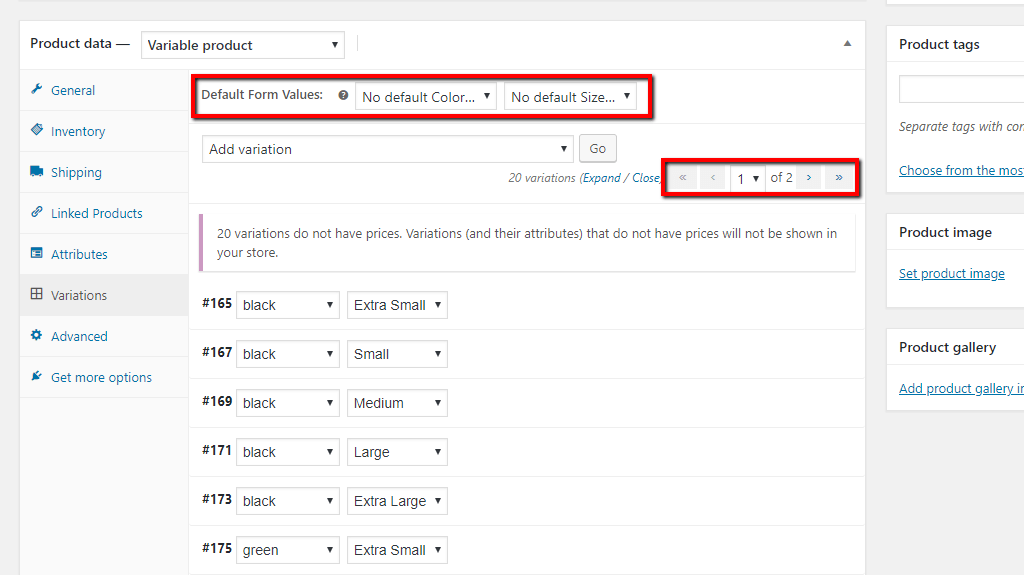
Now, please switch to the “Variations” section so we can review how to create and customize them. From the dropdown menu, you can either select “Add variation” which will allow you to manually configure your variations one by one or select the “Create variations from all attributes” option which will automatically create all possible combinations of your attributes. After you select the option, please click on the “Go” button, then you will be presented with a pop-up window asking for your confirmation where you will have to hit the “OK” button and your variations will be successfully added.
Once that is done, from “Default Form Values” you will be able to select the default variation which will be pre-selected for this product. Selecting default values for the product will automatically enable the “Add to cart” button on the product page.
You will also notice a field, showing the number of pages you currently have. Please note that only 10 variations are listed per page and you will be able to navigate through these pages using the arrows.
Now, let’s review how to configure your variations’ data. Please hover over the variation you would like to edit and click on the triangle icon. Then the variation will be expanded displaying all the details you need to enter.

You will notice that all the options displayed here are already familiar as we have previously reviewed them under the “Simple product” type section. Worth to mention is that you will be able to select an individual image for each of the variations by clicking on the blue image icon. Once you are ready with each of the variations listed on this page, please do not forget to click on the “Save changes” button in order to ensure no data will be lost.
Now that we have reviewed the specification for each of the product types we can continue further with the configuration of the rest of the product settings which are the same for all product types.
At the very bottom of the page, below the “Product data” meta box, you will see the “Product short description” section. Here you will be able to enter a custom description for your product which will appear underneath the product name.

Even though there is no restriction in regard to the length of the description, it is recommended to keep it short and straight to the point.
Now we will need your focus on the right end of the “Add new product” page where you will notice a few more sections.
Under the “Product categories” section you will see all your current categories listed and you will be able to select the appropriate category by ticking the checkbox in front of it or add a new category by clicking on the blue “+ Add new category” text.

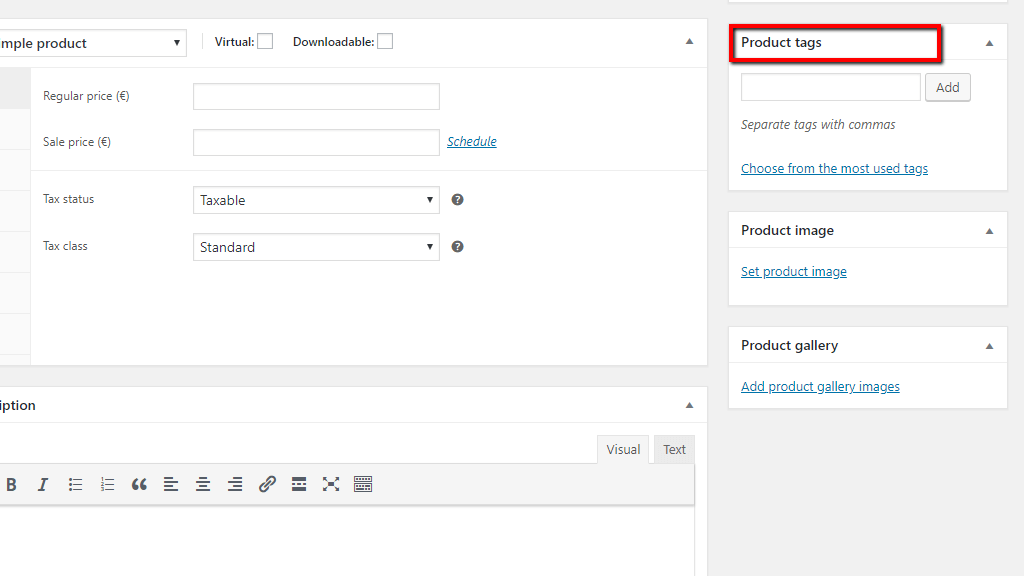
Right below you will see the “Product tags” sections where you will be able to select from your existing tags or add new tags applicable to this product.
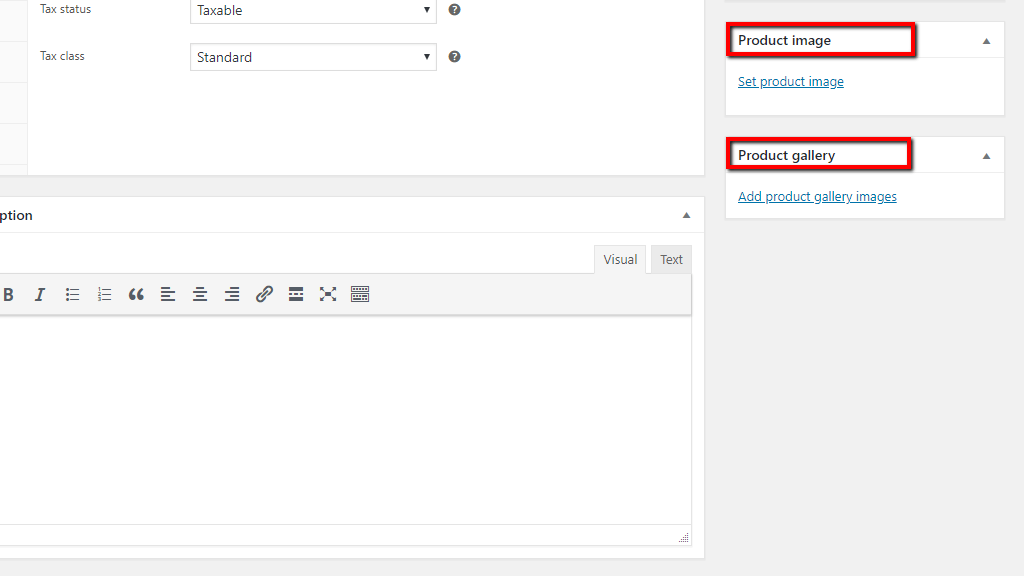
Lastly, you will have to select the main and additional images for your product. From the “Product image” section you can click on the “Set product image” text and choose the default image for the product which will be displayed on the shop page, product page, on the cross-sales or up-sales, the thumbnail on the cart, etc. From the “Product Gallery” section you can select additional images for your product by clicking on the “Add product gallery images” text. These images will be displayed underneath the main product image.
Let’s review the final section before you are ready to publish your product. At the top right end of the “Add new product” page, you will see the “Publish” section. There are three buttons there that will allow you to “Save draft” of your product, “Preview” it and directly “Publish” it.

You will also notice some additional settings that could be edited. You will be able to change the “Status” of the product by clicking on the “Edit” button and selecting the appropriate one from the dropdown menu. You can control the “Visibility” of the product by selecting between “Public”, “Password protected” or “Private”. The “Publish” option will allow you to schedule the publication of the product in case you do not want to immediately publish it. The “Catalog visibility” option allows you to control where your product is listed, you can choose between “Shop and search results”, “Shop only”, “Search results only”, or “Hidden”.
You are now familiar with the process of creating every product type in WooCommerce. We trust you are ready to add all your products and start making online sales. We would like to sincerely wish you good luck with your store and thank you for trusting our guidance. As usual, we welcome you to reach our Support Team in case any further instructions are needed.


