Introduction #
MySQL is powering a huge portion of the open-source applications along with many other web frameworks that utilize databases. It is an immutable part of almost every single website and having the option of managing the database and the user that is assigned to it could be very useful in various situations, such as:
- You may need to change a database user or its password because you suspect that they have been compromised.
- You may want to entirely change the direction in which the website is going by changing the database name.
In order to achieve the aforementioned tasks, we are going to introduce you to the “Manage Database Users” and “Manage Databases” features in the WHM control panel. Let’s get started.
Accessing the Manage Database Users feature #
First, you need to log into the WHM service for your VPS or Dedicated Server. After you have logged in, please use the search bar on the left side of the page and type “Manage Database Users”.

When you click on the first result presented by the WHM, you will be immediately redirected to the “Manage Database Users” page where you will notice a blue bar on the top informing you that you are not obliged to respect database prefixing, meaning that you do not need to follow the pattern “cpaneuser_database” and you can simply name your database user with whatever name you want.
Changing your database username and its password #
Below the blue bar, you will see a search field, allowing you to filter out database users based on their names.
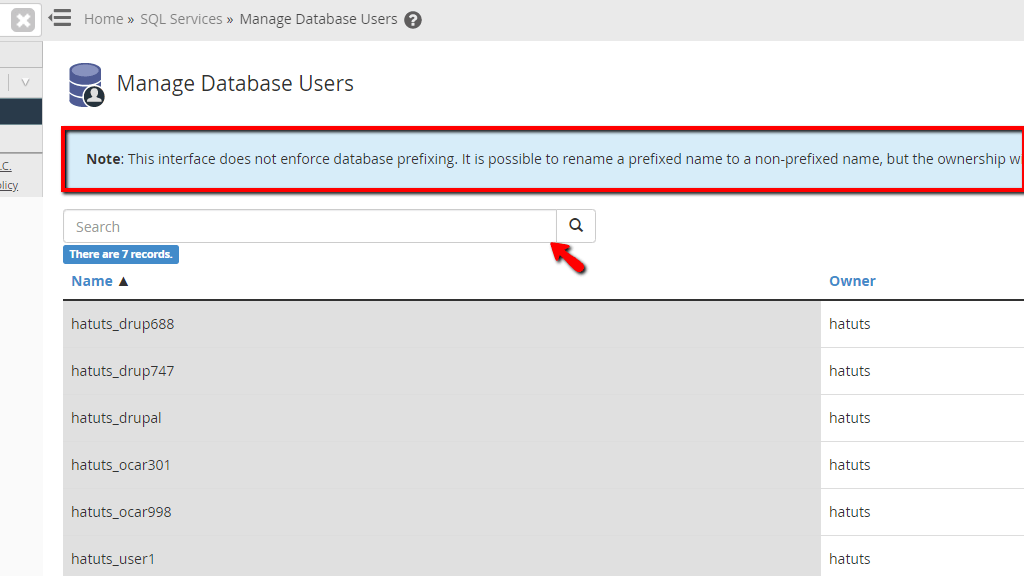
Underneath you will find a table section containing three columns that provide the following information.
- Name – This column will display the name of the database user.
- Owner – This will show the username of the reseller who owns the database user. Usually, this will be the username of the cPanel account.
- Action – In this column, you will find a button with a pencil icon inside it and when you press it, you will be able to perform changes to the username of the database and its password.
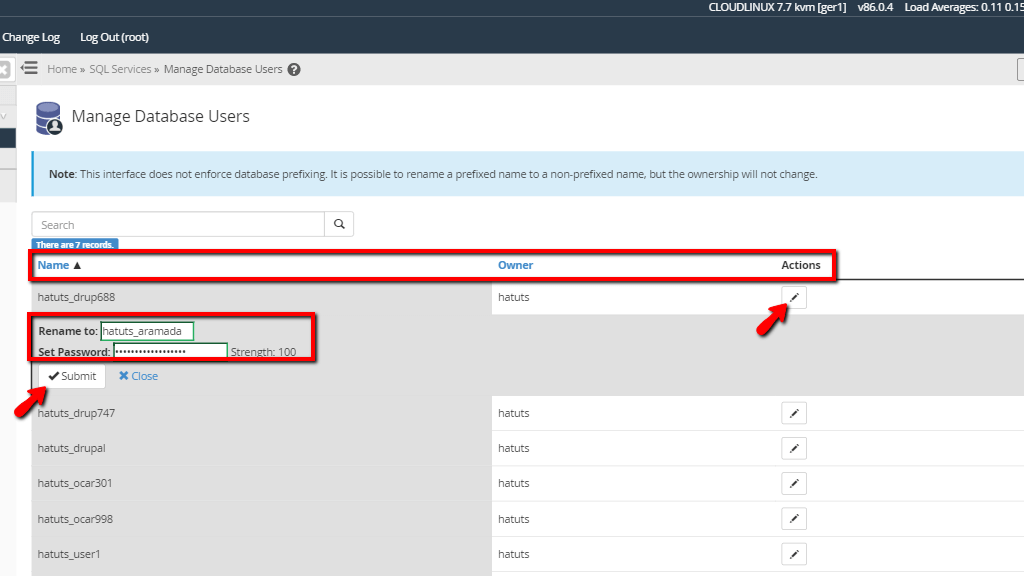
When the button under the “Actions” column is pressed, the row will expand itself and two text fields will appear under the “Name” column. The first one is called “Rename to:” and inside, you will see the current database username. In order to change it, please click on the text field, delete it and type in the new database username.
The second text field is called “Set Password:” and it will be blank by default. In order to change the database user’s password, please click inside and type the new password.
On the right side of the “Set Password:” field, you will find a score, letting you know the password’s strength. You should aim for it to be as close as possible to 100.
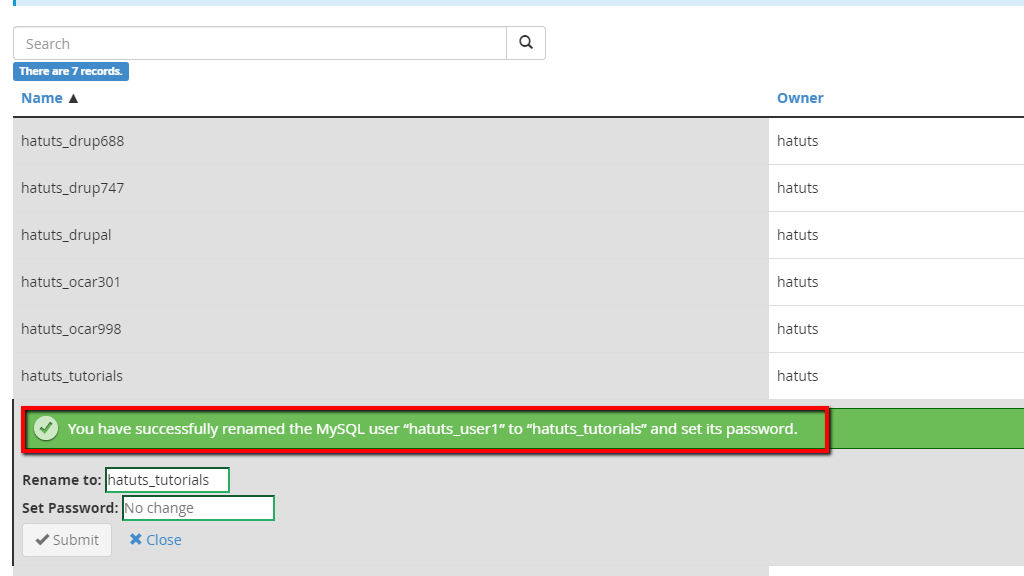
When you are done typing in the new username and password, please click on the “Submit Button”, located below the “Set Password:” text field. When pressed, a green bar will pop up above the “Rename to:” text field, letting you know that the change has been successfully applied to both the database username and its password.
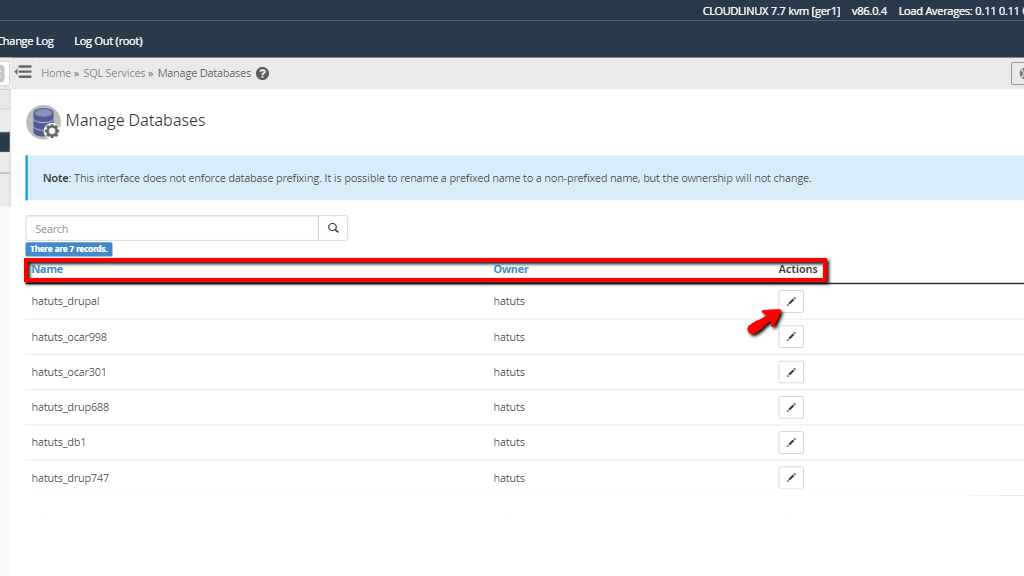
Accessing the Manage Databases feature #
In order to access this functionality, please navigate to the search bar located on the top left corner of the WHM control panel and type “Manage Databases”.

A single result will be presented by WHM and upon clicking on it, you will be redirected straight to the “Manage Databases” feature.
When you land there, you will see another blue note explaining to you that you may not respect database prefixing if you do not want to, just like with the “Manage Database Users” functionality.
Changing your database name #
Bellow this blue bar, you will see a search field, which you can use to filter out the databases by name.
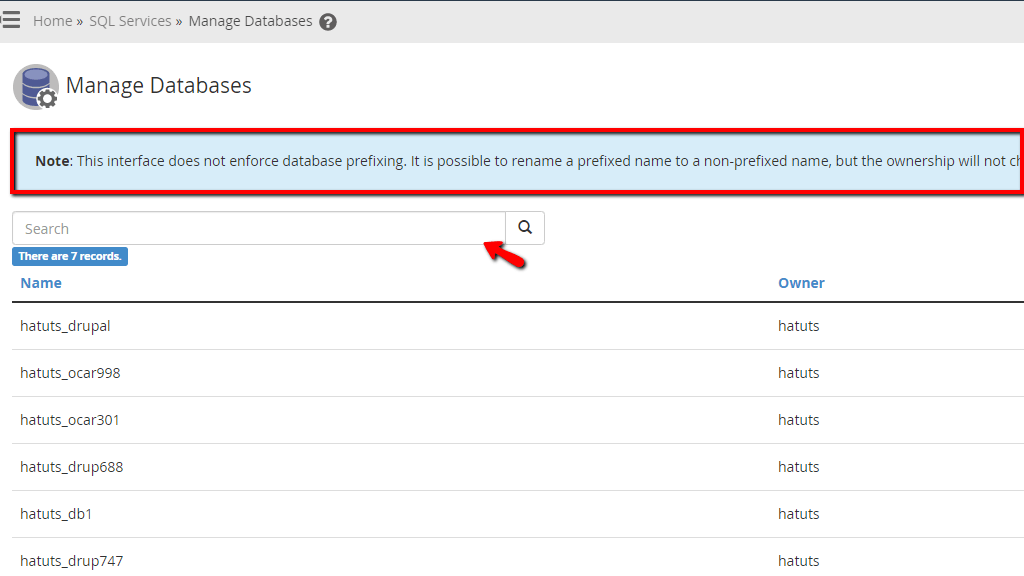
Under this search field, you will notice a table section containing three columns:
- Name – This column will contain the name of the database.
- Owner – This column will represent the username of the reseller that owns the database. In most cases, it will be the username of the cPanel account.
- Actions – In this column, you will find a button with a pencil icon inside. This button will be presented on each row, making you able to modify each database.
When you press the button located under the “Actions” section, the row will expand and under the “Name” column, you will notice a “Rename to:” label.
The “Rename to:” text field will display the current database name and you may click inside to delete its content and type in the new name for your database.
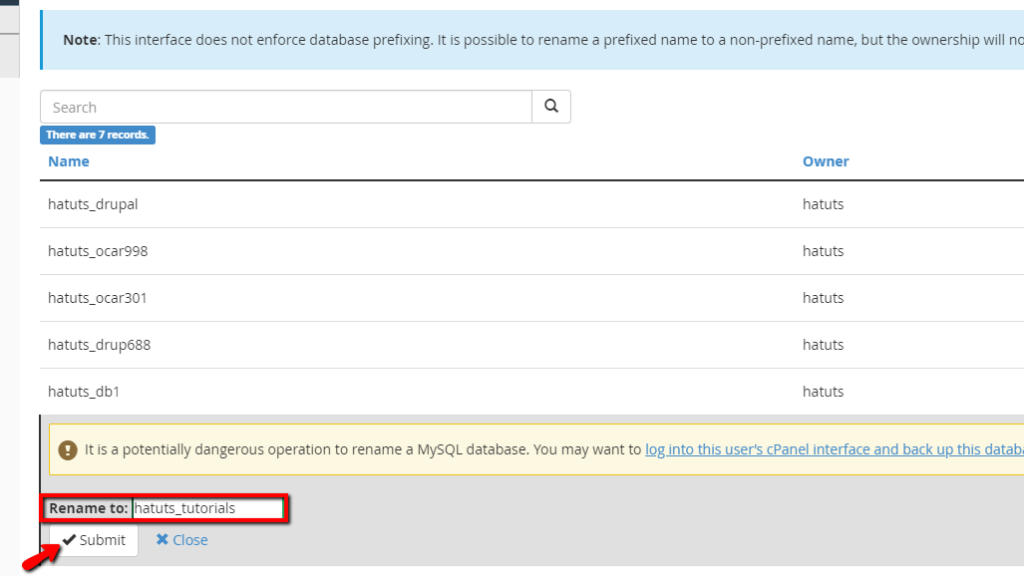
When you are done typing in the name for your database, please press the “Submit” button located under the “Rename to:” text field.

Upon doing so, a green bar will appear on top of the “Rename to:” text field, notifying you that the change has been successful.
Before we wrap up this tutorial, we would like to mention something really important. After any of these features have been used and changes have been performed to the database, its username or password, you will NEED to manually apply the new database username and/or password to the configuration files of your applications.
For example, if you have performed a change to the username and the password of a database, you need to modify that inside files containing your database information or your websites will STOP working since the same will no longer recognize the provided database credentials. The WHM Control Panel does not perform any changes to any of your websites’ configuration files, so you will need to do it on your own.
That’s it! We have just introduced you to two very straightforward functionalities that give you control over the database, its username, and its password. After going through this tutorial, you should be completely able to perform these changes with ease. However, if you are experiencing issues with the features or you are unable to perform the explained changes, please let our Technical Team know. They are reachable 24/7 over the ticketing system in your Client Area.


