Introduction #
In this guide, we will review the powerful WooCommerce Tax tools which will allow you to configure your tax settings and manage your Online Store in an easy and efficient way. Even though the great people who developed WooCommerce had made everything as easy as possible, it is strongly recommended to consider advising with a tax professional in order to ensure you are in full compliance in accordance with your local government law and regulations.
Getting Started #
The very first step we will need you to take is to log in to your WordPress Admin Dashboard and navigate through the left menu bar to WooCommerce > Settings. Afterward, we will need you to switch to the “Tax” settings tab from the top menu bar.
Please, note that in case the “Enable Taxes “option is disabled from your WooCommerce “General” Settings you will not be able to locate the “Tax” tab.

As you will notice the Tax Settings tab is split into four main categories: “Tax Options“, “Standard Rates“, “Reduced Rate Rates“, and “Zero Rate Rates“. In the following lines. we will carefully review each of the categories, one by one, and we will walk you through the process of properly configuring your settings.
Tax Options #
Under the “Tax Options” category you will locate the general tax settings which are based on your Online Store’s location defined under WooCommerce > Settings > General.
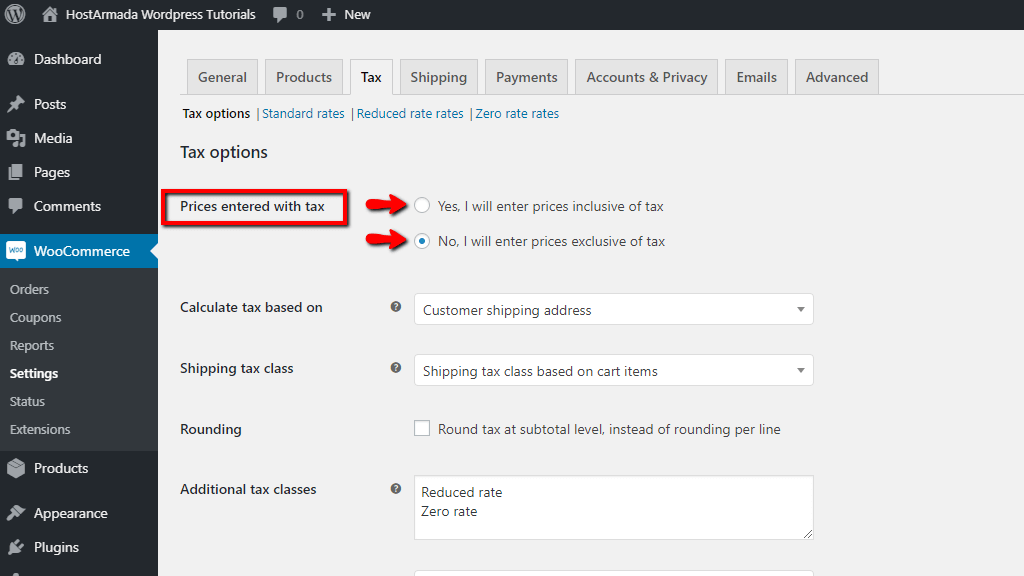
The very first option you will notice is “Prices entered with tax“, which is essential as it will determine how you will input your product prices. You will have to choose from one of the following options:
- “Yes, I will enter prices inclusive of tax” – where the prices you will input for your products will include the tax rate for your store’s base location. E.g. if you are located in a country member of the European Union you will input the catalog price with a 20% tax already applied to it – if you input a product price of €10.00 it will include a €1.67 tax. The countries where the tax will not be applied will have to pay the price discluding the tax, therefore €8.33. With this option, the tax amount will be calculated with the following equation:
“tax_amount = price – ( price / ( ( tax_rate_% / 100 ) + 1 ) )” - “No, I will enter prices exclusive of tax” – where the prices you will input for your products will NOT include the tax rate. E.g., if you are located in a country member of the European Union and you input a catalog price of €10.00 the respective 20% tax rate will be applied during the checkout process and the final price will become €12.00. With this option, the tax amounts will be calculated with the following equation:
“tax_amount = price * ( tax_rate_% / 100 )”
Please note that changing the “Prices entered with tax” option in the future will not affect the products you have previously added, therefore you will have to manually update their prices.
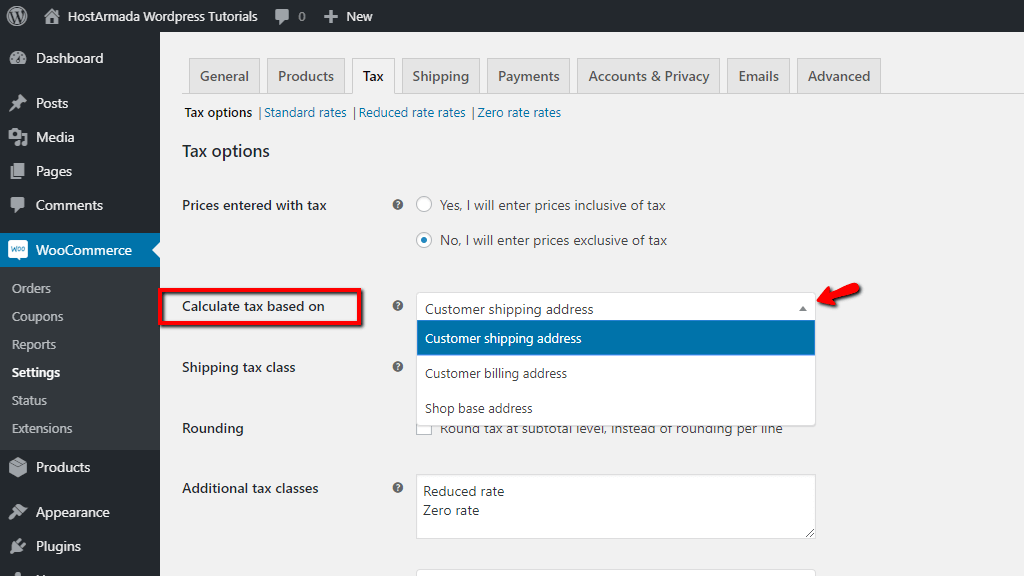
The second option you will notice will be “Calculate tax based on” where from you can select your preferences on the address which will determine the tax calculation.
Please click on the dropdown menu in order to choose whether you would like the taxes to be calculated based on the “Customer shipping address“, “Customer billing address“, or your “Store base address“. In case you decide to go with the last option the taxes will always be calculated based on your current store address regardless of your customers’ location.
The following “Shipping tax class” option will allow you to determine the tax class for your shipping. In most cases, the shipping tax class is being determined by the class under which the selected items fall, therefore the default option you will see is “Shipping tax classed based on cart items“. If this is not in compliance with your local jurisdiction you can select one of the additional options from the dropdown menu or add an additional tax class from the “Additional tax classes” option you will see below.

The “Rounding” checkbox option will allow you to enable rounding taxes on a sub-total level, rather than per line (product) rounding. It is recommended to check with your tax jurisdiction in order to ensure this option is in compliance.

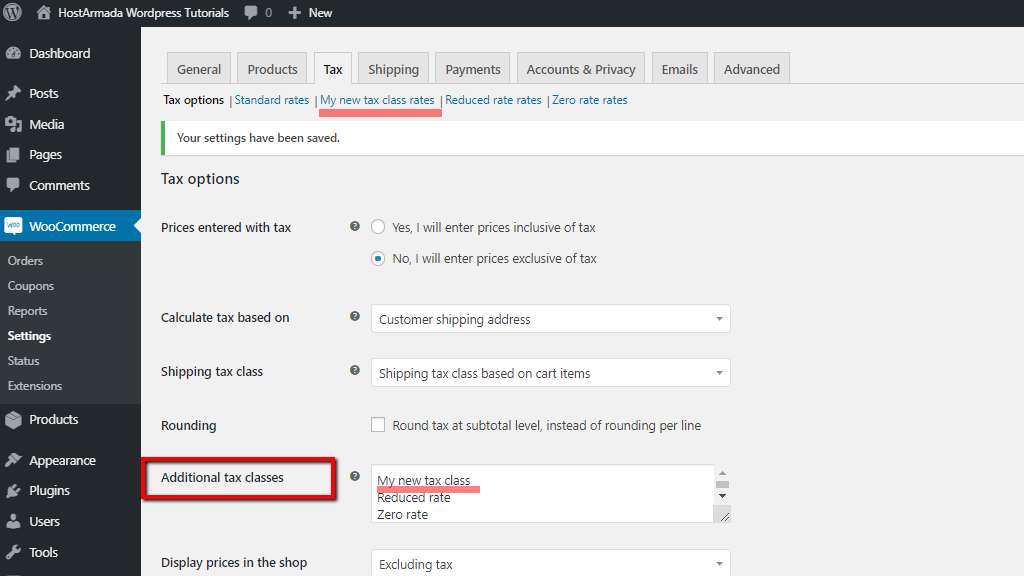
Under “Additional taxes classes” you will be able to include additional tax classes depending on your requirements. All extra classes are added in addition to the default “Standard rates“. You will notice that “Reduced rate” and “Zero rate” are already added by WooCommerce. If you need to add an additional tax class you will need to include it in the text box on a new line. Once the tax class is successfully added it will appear at the top of the page as a separated tag, as you can see under the following screenshot:
“Display prices in the shop” and “Display prices during cart and checkout” are quite straight to the point. From the dropdown menus, you will be able to select whether you would like your catalog prices to be displayed including or excluding tax rates, and respectively whether you would like the prices under your customers’ shopping carts and checkout pages to be displayed including or excluding tax rates. Please note that these two options are not connected and you can set up different preferences on each of them.

Next, you will see the “Price display suffix” option which will allow you to include custom text after your product prices. For example, if you would like to clarify that your prices do not include VAT tax. You can also use one of the following lines in order to have your prices substituted:
- {price_including_tax}
- {price_excluding_tax}
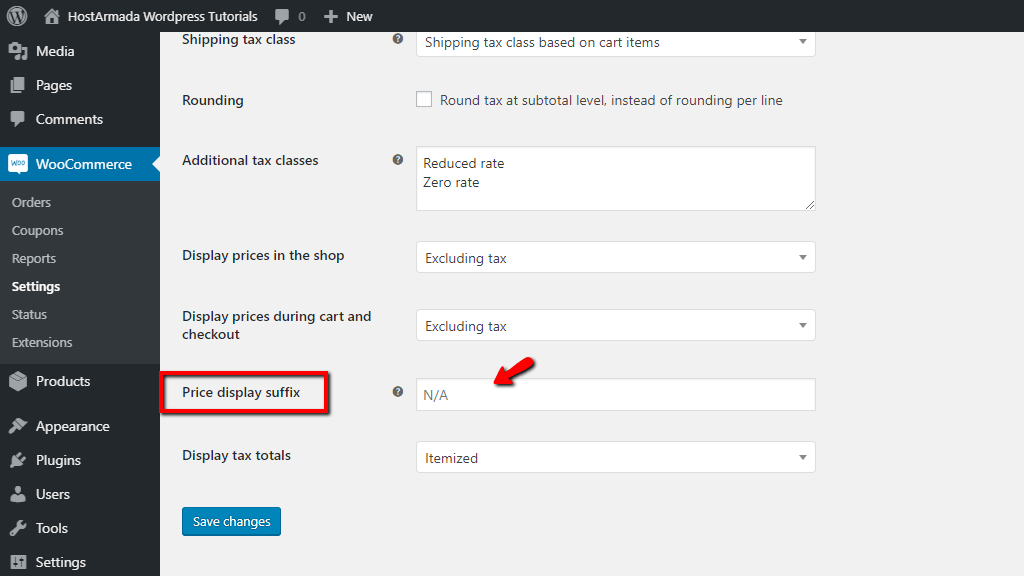
And the last option you will notice under this page will be the “Display tax totals” option where from you will have to select how you prefer the tax total to be displayed on your page – it can either be displayed as a single total or as an itemized list of taxes. Please click on the dropdown menu in order to select your preferred choice.

As soon as you are ready, please do not forget to click on the blue “Save changes” button in order to successfully record your preferences. Now we are ready to move forward with configuring your tax settings.
Tax rates #
In this section, we will guide you on how to set up your tax rates. At the top of the “Tax” page, you will see listed the default WooCommerce tax classes – “Standard rates“, “Reduced rates“, “Zero rates“, as well as any custom tax classes you have added. Since the process of setting up the Tax rates is the same for any of the Tax classes we will give an example by adding a tax rate under “Standard rates“.
If you are ready to begin, please click on the “Insert row” button and we will carefully explain each of the attributes you will have to configure.

Now, you will see listed the following attributes:
- Country code – Here you will need to specify the two-digits country code. If you are unsure you can always double-check the codes under ISO 3166-1 alpha-2 codes. If you would like the tax rate to be applied to all countries, please leave the field blank (*).
- State code – Similarly, here you will need to specify the two-digits state code if applicable. In case you rather not specify any state, please leave the field blank (*).
- Postcode/ZIP – Here you can specify the postcodes for the rate. You can separate multiple values with a semicolon (;). You can use wildcard and numeric ranges, e.g. US* to match all US postcodes or 10* to match all postcodes starting with 10. You can also leave the field blank in order to cover all postcodes.
- City – Similarly, you can separate cities with a semicolon (;) or you can leave the field blank (*) to cover all cities.
- Rate % – Here you will need to enter the tax rate in four decimal places, e.g. for 20% you will have to enter 20.0000, for 9,5% – 9.5000, etc.
- Tax name – Here you will be able to name your tax, e.g. VAT tax, State tax, etc.
- Priority – Here you will need to determine the priority for the given tax rate. Please note that only one matching rate can be specified per priority, therefore if you have multiple rates for the same region you will need to give them different priorities.
- Compound – Here from you can define whether this tax rate is a compound rate. If you checkmark the box, this tax rate will be calculated on top of the previous taxes. For example, if your product price is $100.00 and you have another tax of $2.00, the compound rate will be calculated on top of $102.00, instead of $100.00.
- Shipping – Here from you will need to determine whether this tax will be applicable to your shipping rate. If you would like the tax to be calculated on top of the product price and shipping rate, please make sure the checkbox is ticked.

As soon as you are ready, please do not forget to click on the blue “Save changes” button in order to successfully add your new tax rate.
Adding and deleting tax rates #
Right below the list of all your Tax rates you will notice a few additional options.
Intuitively, by clicking on the “Insert row” button you can add a new Tax rate and configure it depending on your needs. Respectively, from the “Remove selected row(s)” button you can remove tax rates. You just need to click on the tax rates you desire to remove from the list. As soon as they are highlighted it will mean they are marked and you are ready to delete them.

In case your goal is to delete all tax rates you can do that by navigating to WooCommerce > Status > Tools, therefrom you will have to click on “Delete tax rates“.
Importing and Exporting Tax rates #
WooCommerce also allows you to import and export tax rates from and to CSV files. The CSV file needs to contain the following ten columns:
country code, state code, postcodes, cities, rate, tax name, priority, compound, shipping, tax class
Where the “tax class” should remain blank in case you are importing the file for “Standart rates”.
If you are looking forward to importing tax rates, please click on the “Import CSV” button which you will see at the right bottom of the page. You will be presented with a new page where you will notice a few options. You will be presented with a direct link where you can download a tax rate sample file. Secondly, you will be able to select and upload a CSV file from your local computer by clicking on the “Choose file” button. Alternatively, you can select a file directly from your web hosting server by specifying the file path under the “enter path to file” field.
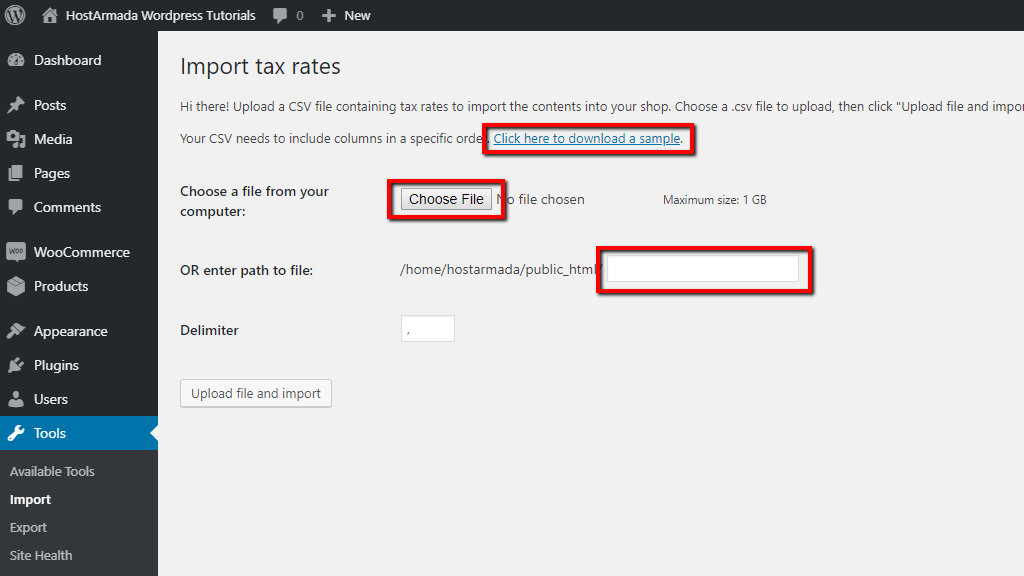
After you select your file, please click on the “Upload file and import” and your tax rates will be automatically imported.
Similarly, if you need to export your tax rates you will just need to click on the “Export CVS” button and you will be automatically presented with the CSV file which you can directly download on your local computer.
At this point, you should have your WooCommerce Tax Settings successfully configured and be ready to move forward with configuring the rest of your Online Store’s settings. We would like to sincerely congratulate you and welcome you to contact our support team in case you have experienced any sort of difficulties or you need additional instructions.


