Introduction #
Keeping track of the received and sent messages on your server ensures that you will be able to control any potential outgoing or incoming spam. The WHM Control Panel will let you filter all the outbound and incoming emails on your server based on a wide variety of criteria. You may create different search patterns that aim to locate spam and proactively prevent it before your server’s IP address gets blacklisted. If your IP does get blacklisted and flagged for spamming, this would mean that the emails sent from the server will either end up not reaching their destination or will land inside the recipient’s spam folder. All of this can be achieved by using the “Mail Delivery Reports” feature of the WHM control panel. In this guide, we will go over all of the options you have using this functionality. Let’s get started!
Accessing the Mail Delivery Reports feature #
First, you need to log into the WHM service for your VPS or Dedicated Server. After you have logged in, please use the search bar on the left side of the page and type “Mail Delivery Reports”.

When the functionality shows up below the search bar, please click on it so you can be sent to the “Mail Delivery Reports” page.
Configure the search Criteria #
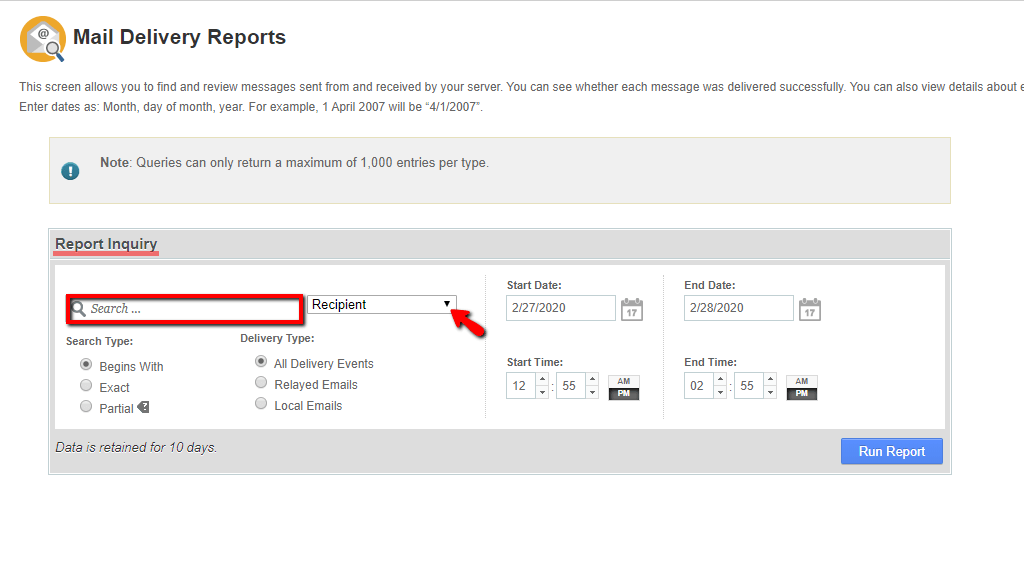
When you land on the “Mail Delivery Reports” page, you will notice a brief description of the feature itself and a note saying that it may only provide you with a maximum of 1000 entries per type. Below that note, you will find the “Report Inquiry” section where you may define your search criteria by using the provided search properties.
Let’s cover this one by one.
The first thing you are going to see in the ”Report Inquiry” section will be the search field located on the top left. On its right side, you will find a dropdown menu allowing you to select the criteria by which to filter out the emails. The options are as follows:
- Sender – Filter the results by the sender you type inside the search field.
- Recipient – Filter the results by the recipient you type inside the search field.
- From Address – Filter the results by the address that has sent the email.
- Message-ID – Filter the results by the sent message’s ID.
- Sender Domain – Filter the results by the sender’s domain name.
- Sender Users – Filter the results based on the sender’s cPanel username.
- Sender IP – Filter the results based on the sender’s IP address.
- Sender Host – Filter the results based on the sender’s hostname.
- Sender Auth – Filter the result based on the authentication method the user used. For example – password authentication.
- Spam Score – Filter the results based on the spam score (1-100).
- Delivery User – Display results based on the username that owns the recipient’s email address.
- Delivery IP – Filter out the results by the recipient’s mail exchange IP address.
- Delivery Host – Filter the results by the recipient’s mail exchange hostname.
- Router – Arrange the results based on the mail server’s internal router used to determine the email’s destination.
- Transport – Arrange the results based on the recipient’s SMTP type.
- Result Message – Filter out the messages based on the outcome of the delivery. It could be either a return code or simply an “Accepted” label.
- Delivered-To – Filter the messages based on the recipient’s mail address.
- No Filter – Do not restrict the search with any criteria and show all results, depending on what you typed in the search field.
A very basic example here would be for you to select “Recipient” from the dropdown and inside the search field type an email account that has been receiving a lot of spam.
Below the search field, you will notice “Search Type” and “Delivery Type” options. In order to select the ones most appropriate for your search, please use the radio buttons located underneath each of the respective types.

On the right side of the search field, you will notice two sections where you may configure the search result to show a match from a specific date period. For example, under “Start Date” you may set 1/20/2019 and in “End Date” you can select 2/20/2020 which will show you results ONLY from the 20th of January 2019 until the 20th of February 2020. Below the date fields, you will see time fields where you are able to use a similar pattern to manipulate the results based on the time when the specific issue you are looking for occurred.
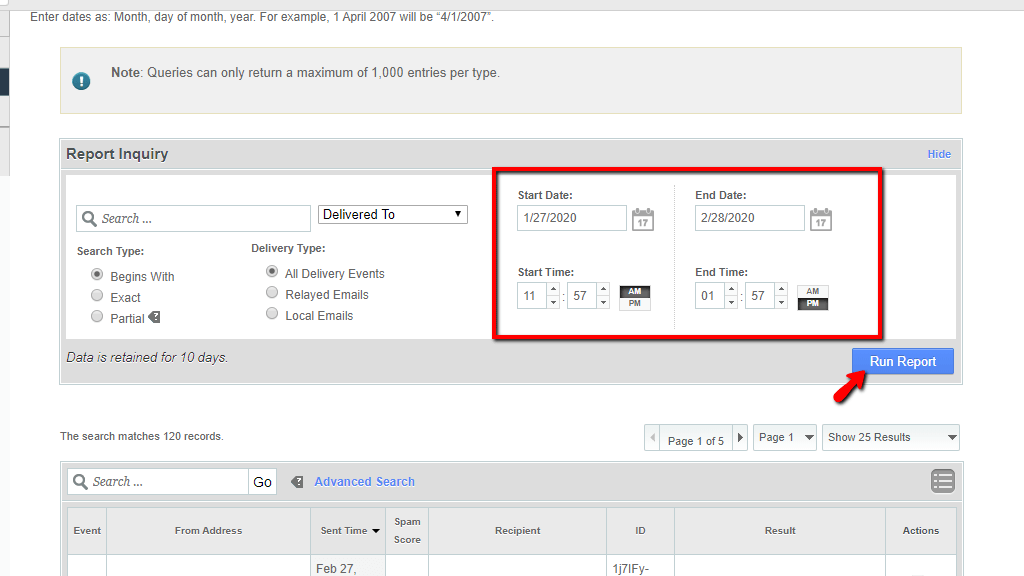
Once you have selected the criteria and the rest of the search options inside this section, please press the “Run Report” button located on the bottom right corner of the “Report Inquiry” section.
Look through the results of the search #
When the “Run Report” button is pressed, the table section below the “Report Inquiry” section will be immediately populated with results (if there was a match to your search pattern). Let’s go over all of the columns inside the table section so we can get a better understanding:
Event #
This column can be represented by 5 different results that are displayed as Icons.
- – This means the email was delivered successfully by the system.
 – This will represent the unknown status or the delivery is currently in progress.
 - – This means that the system has deferred the email. A deferred message is an event observed when the remote server (the server where the recipient’s email account is located) refuses the sent email when access has been temporarily limited for some reason. In this situation, the sender’s server will attempt to send that specific message for up to 72 hours, until it does. If a sent is not complete within the mentioned time frame, it will be bounced back.
- – The email encountered a delivery error.
- – The system rejected the email at STMP time. This typically occurs because an RBL contains the sender’s server or that server contains an insecure configuration.
From Address #
This column will represent the email address that sent the message itself.
Sent Time #
This column will show the time in which the message has been sent.
Spam Score #
This column will show the spam score of the message.
Recipient #
This column will show the recipient’s mail account.
ID #
This column will display the unique ID of the message.
Result #
This column will contain the result of sending the message.
Actions #
This column will have either one or two clickable icons inside. One of the icons, represented by a magnifying glass, will allow you to view details about the message, such as the ones we explained in the “Configure your Search Criteria” paragraph while the other one, represented by an envelope, will allow you to read the message.

Here you go! All the information you will need to use the “Mail Delivery Reports” in the WHM control panel. We hope that this tutorial has enriched your knowledge regarding this specific functionality and has opened your eyes in regards to what it provides. If you are experiencing any issues while using it and you are in need of assistance, please contact our Technical Support Team over the ticketing system in your Client Area. They are 24/7 available at your disposal.


