Introduction #
Database procedures, also known as “procs”, are stored SQL code statements that can be reused when needed over and over again. You can imagine them as functions in most of programming languages. Parameters can be submitted towards these procedures so they can parse information based on dynamic values. Some of the tasks they can perform are access control, data validation, and network traffic reduction between the MySQL client and the MySQL server. In this tutorial, we are going to go over how you can create procedures using the phpMyAdmin functionality in your cPanel. Let’s get started!
Accessing phpMyAdmin #
Before you can access the PHPMyAdmin functionality, you need to log into your cPanel account with us.
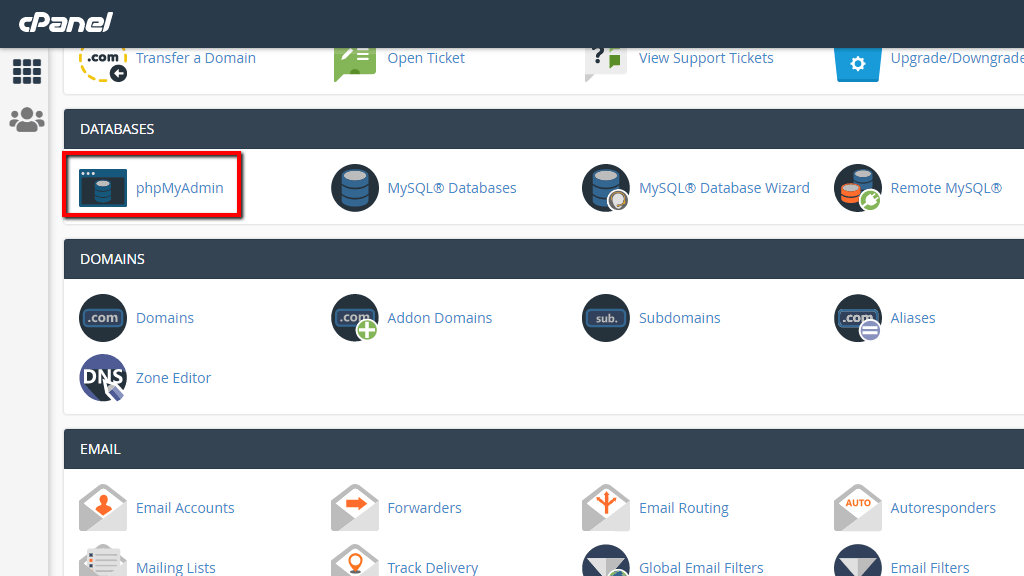
Once logged in, please navigate to the “Database” section and click on the “phpMyAdmin” icon.

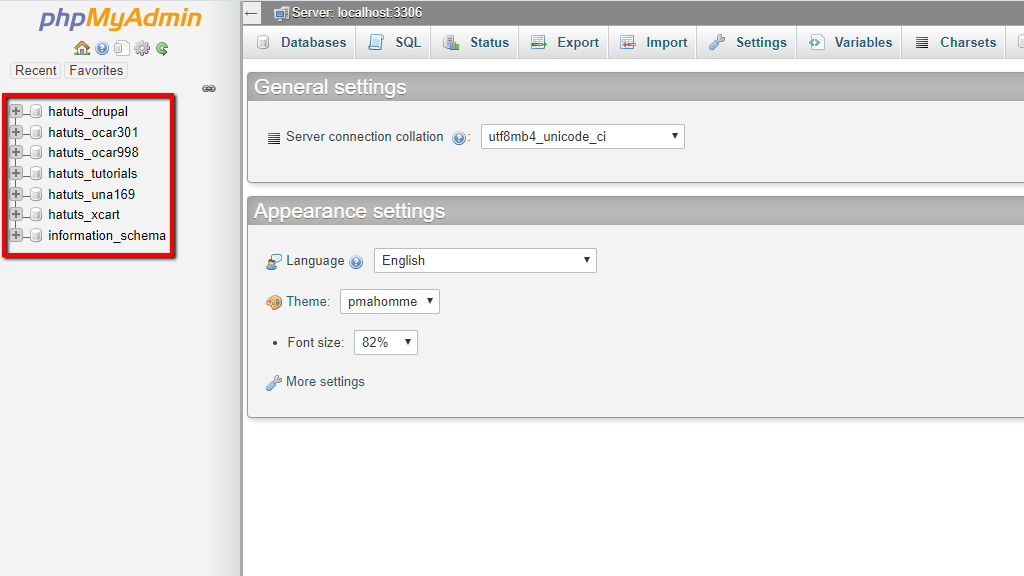
Clicking on the result redirects you to the “PHPMyAdmin” feature. In the left sidebar, you can see a list of all your databases.

Please select the database for which you want to create a procedure by clicking on it.
Creating a Database Procedure #
Once you have selected the database, all its tables are generated in the middle of the screen.

From the tab bar on top, please click on the “Routines” tab. This action takes you straight to the page, which allows you to add a database procedure.

On the top, you can see the “Routines” section where all the existing procedures are shown. If there are no procedures created like in our case – it is empty. To add a procedure, please click the “Add routine” button located under the “New” section.
This action shows a popup window, which allows you to configure your new database procedure.

Bellow, we are going to cover the majority of the options provided in the popup window.
- Routine name – In this text field, enter the name of your procedure. It is a good practice to set a proper name for the tasks it is performing.
- Type – This dropdown menu gives the option of selecting the routine type – in our case, it is a procedure.
- Parameters – Using the dropdowns and text fields on the right side of this label, please set the parameters for your procedure.
- Add parameters – When you click this button, it adds more parameter fields underneath the current one.
- Definition – In the content box on the right side of the definition label, you are able to type in your MySQL code for the procedure.
- Security type – This dropdown allows you to specify the security context of the procedure. If “DEFINER” is selected, ONLY the user who created the procedure can execute it. While if “INVOKER” is selected, anyone who enters phpMyAdmin is able to execute, edit, export, or drop it.
- SQL data access – This will “tell” the MySQL server what this procedure is looking to accomplish. In our example, it is set to “NO SQL”, which gives information to the MySQL server that the procedure contains noSQL statements.
- Comments – Enter a comment for your procedure, which is going to be included in your SQL code when exported.
After you have configured your procedure, please press the “Go” button to create it.

We have prepared a really simple example of what a procedure might look like. Please check the screenshot below:

When created, this procedure is listed on the left side of the screen, right under the database you selected when creating it.

It is also shown inside the “Routines“ tab, under the “Routines” section we went over in the previous paragraphs.

On the row where the procedure is located, you can notice 4 buttons. Let’s go over all of them.
- Edit – Clicking on the “Edit” button opens the previously mentioned popup window allowing you to change the current procedure.
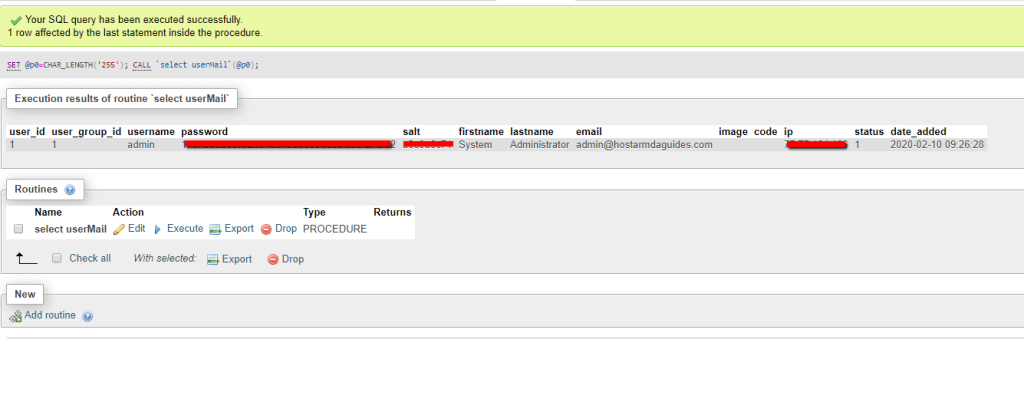
- Execute – Pressing the “Execute” button immediately executes the SQL code defined within the procedure and provides you with the result of the query. Here is an example underneath:

- Export – Clicking on the “Export” button exports a file containing the SQL code of this procedure.
- Drop – Clicking on the “Drop” deletes the procedure.
And there you have it! This is the way you can use phpMyAdmin to create procedures for your database. If you are facing any technical issues with this functionality, please do not hesitate to contact our technical support staff over the ticking system in your Client Area.


