Introduction #
In this tutorial, we will guide you on how to remotely manage your web files using the WinSCP FTP Client. In the following lines, you will learn how to create files and folders, how to rename, move and delete them, as well as how to change their permissions.
Getting Started #
At this point, you are expected to have the WinSCP client already installed on your local computer, and connected to your web hosting account.
Once you initiate a successful connection, you are ready to begin.
Creating Files and Directories #
Now that you are connected to your web hosting account, you will see all your web files listed in the right panel. In order to create a new file or directory, you will need to navigate through the file structure and to access the folder where the new file/directory should be located.
Once you are under the desired folder, you can either right-click somewhere on the blank space and select “New” from the list of options or click on the “New” button located in the toolbar at the top. In both cases, you will be presented with two options: to create a new file or a new directory.

In order to create a new file, please select the “File” option. Then a new pop-up window will be displayed where you will need to specify the file name.
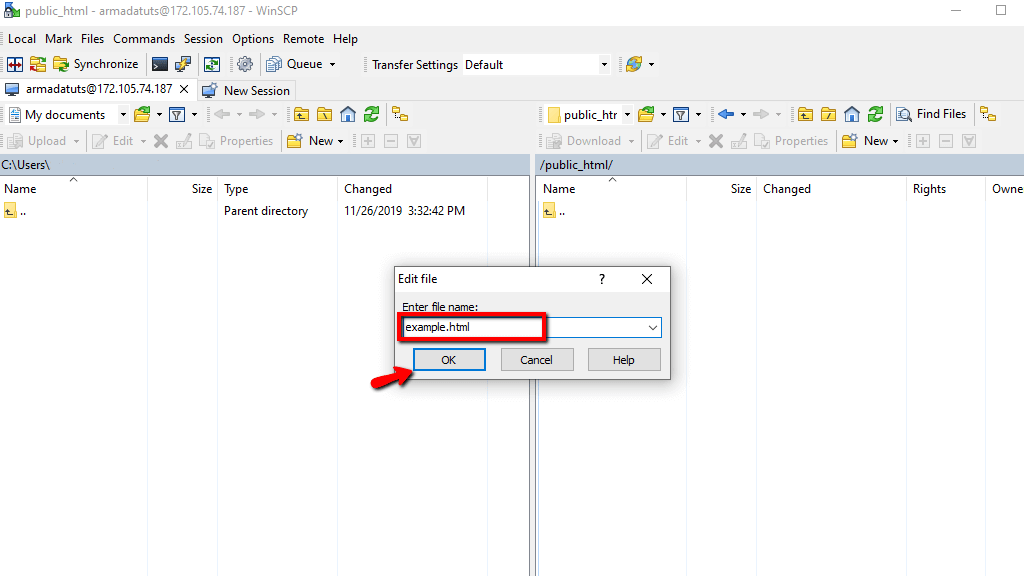
Once you are ready, please hit “OK”. In the new dialog, you will need to enter the content of the file and click on the “Save” icon.

In order to create a new folder, please select the “Directory” option. Afterward, a new pop-up window will appear where you will need to specify the folder name. By ticking the “Set Permission” checkbox you will also be able to edit the directory permissions if needed.

Once you are ready, please hit the “OK” button and your new folder will be successfully created.
Please note that if you need to delete or rename a file or folder, you can do it anytime in the future by right-clicking on it and selecting the corresponding “Delete” or “Rename” option from the list.
Moving Files and Folders #
If you need to change the location of a file or a folder you can do that as easy as dragging and dropping it to the desired directory. First, please make sure to enable the “Directory Tree” so all the directories could be listed. You can do that by clicking on the folders icon available at the toolbar. Then you will need to click on the file/folder and drag and drop it into the destination folder.

Alternatively, you can right-click on the file/folder, select the “Move To” option and manually enter the path to the new directory.
Changing File and Directory Permissions #
Incorrect permissions could cause errors on your website. Therefore, ensuring your web files and directories are set with the correct permissions is vital for your website’s proper functionality. Luckily, by using WinSCP you can easily manage and edit the permissions of all your web files and directories.
All you will need to do is right-click on the file/folder in question and select the “Properties” option.

Then you will be presented with the “Properties” pop-up window. You can edit the permissions by ticking/unticking the corresponding boxes, or by directly entering the permission value in the “Octal” field.
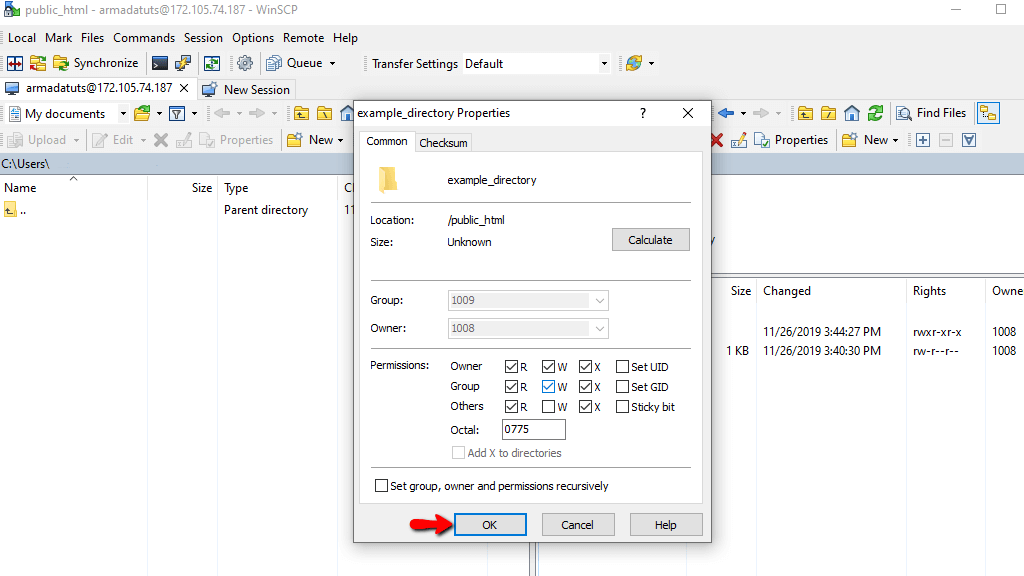
Once you are ready, please hit the “OK” button and you will be all set.
Congratulations! Now you are familiar with the process of remotely managing your web files via WinSCP. Hopefully, you have found the information in this tutorial valuable and our guidance easy to follow. In case you require any further instructions, please do not hesitate to contact our Support Team.


