Introduction #
Email filtration is a process that allows you to instruct the email service if certain emails should be filtered following specifically configured filtration rules. In other words, if you do not want to receive emails from somebody or if you would like to discard messages with a certain subject you will need an email filter. cPanel offers filtration on two levels. The first one is Globally for all email accounts you have created for all of your domains or basically every message sent to an email account associated with any of your domains. The second one is filtration on an Email Account level which allows for email filtration only on selected email accounts. In the following lines of this tutorial, we will review the “Global Email Filters” feature of cPanel.
Accessing the Global Email Filters feature in cPanel #
To begin managing the email filters for all email accounts associated with your domains, first, you will need to access the cPanel service for your Web Hosting Account.
Now that you are logged in, you will need to locate the “Global Email Filters” feature of cPanel. You can achieve that by either using the search tool provided at the top of the page or by locating the “Email” features group, in which the “Global Email Filters” will be listed.

When you click on the feature’s name you will be redirected to the “Global Email Filters” default page where depending on whether or not you have already configured “Global Email Filters” you will be provided with a complete list of those.
Adding a new Global Email Filter #
Let’s start by adding a new Global Email Filter. To do that please click on the “Create a New Filter” button located at the top of the “Global Email Filters” page.

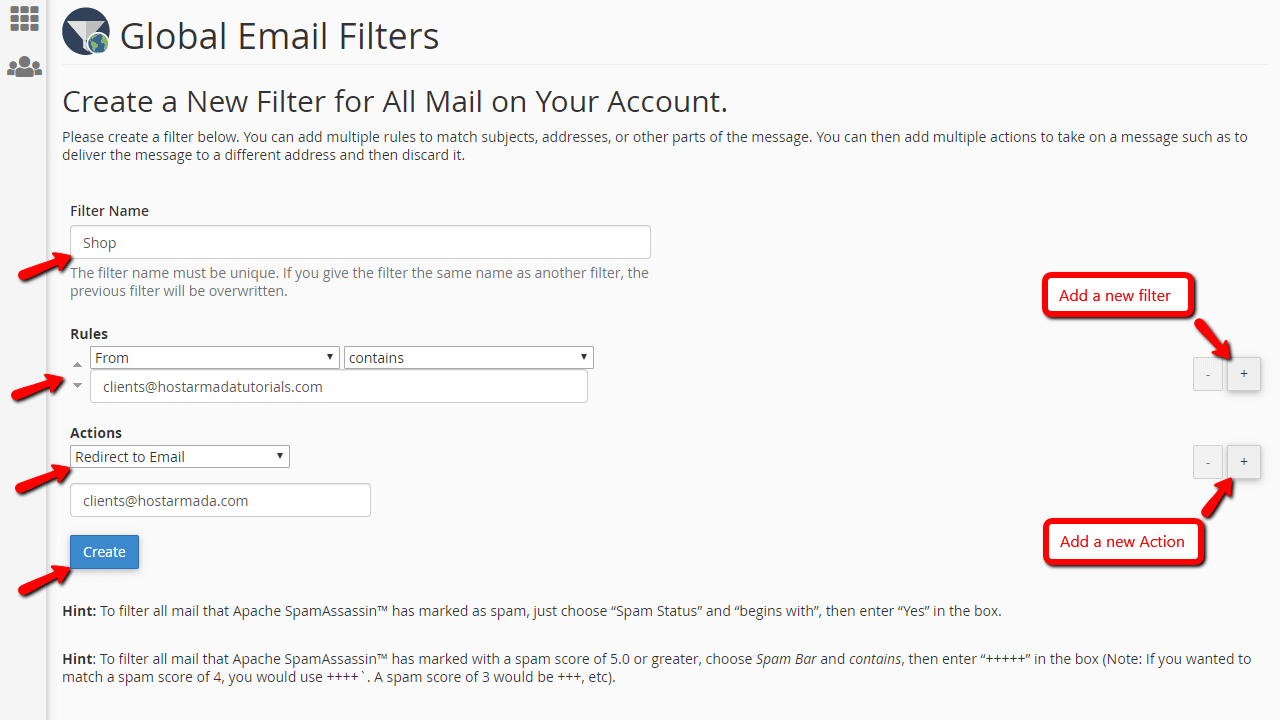
This action will redirect you to a brand new page on which you will be presented with a few options to configure. Let’s review those.
- Filter Name – The name of the filter you will be adding. Please bear in mind that the name of the filter must be unique since it identifies the filter in the bulk of filters you might be adding.
- Rules – To instruct the email service that a message should be filtered, first, you will have to set rules for which messages should be filtered. Please note that you can have as many filters as you would like to and you can either add or remove rules by using the provided buttons next to every filter.
- Actions – With this option you can configure the action which the email service will take for emails that are matching the rules you have previously configured. The available actions are as follows:
- Discard Message – This option will instruct the mail server to Discard all messages that are matching any of the rules you have previously configured.
- Redirect to Email – This option will instruct the mail server to redirect any message that is matching any of the rules you have previously configured.
- Fail with Message – This option will cause any emails matching the rules you have specified to be discarded, however with a failure message being sent to the sender.
- Stop Processing Rules – This option will cause any configured rules to be skipped.
- Deliver to Folder – This option will instruct the mail server to deliver the messages only to a specific folder.
- Pipe to a Program – This option will cause any messages matching the created filters to be sent to a script on your Web Hosting Account.
Once you are ready with the configurations please click on the “Create” button displayed at the bottom of the page.
When the filter is created, cPanel will display a message for success or any errors that you need to fix before you can add the filter.
Managing existing Global Email Filters #
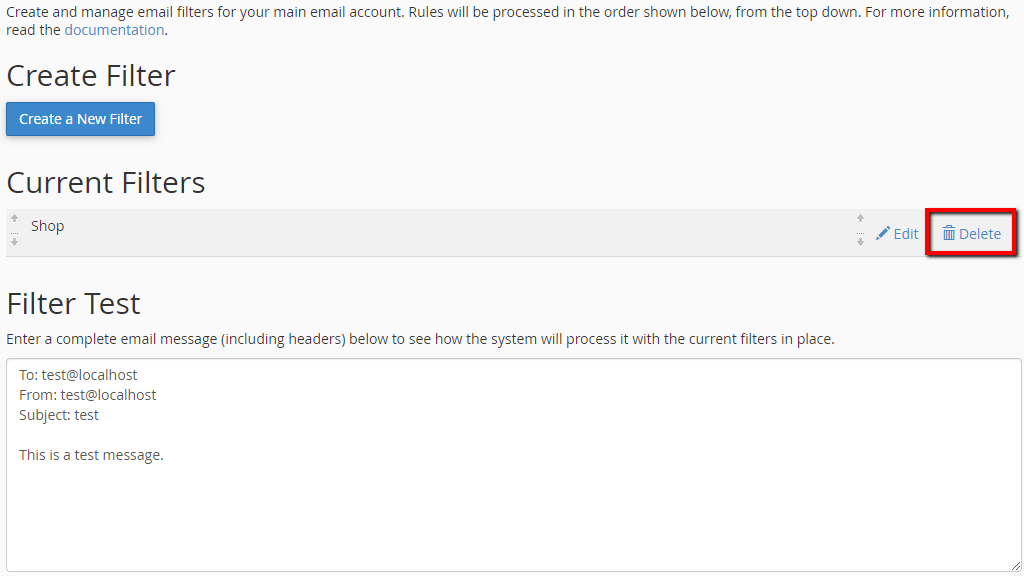
The next section displayed on the “Global Email Filters” default page is the “Current Filters” section. In it, you will see a list of the already created email filters. For each one of those, you can take advantage of the functionalities “Edit” or “Delete“.
To “Edit” an existing Global Email Filter, please click on the “Edit” link right next to the feature name.

This action will redirect you to the same configuration page that we have discussed previously when adding a new filter, however, the settings for this filter will be already filled out so you can edit those based on your needs. Once you are ready with the edits, please do not forget to click on the “Save” button displayed at the bottom of the page.
To “Delete” an existing Global Email Filter, please click on the “Delete” link displayed right after the “Edit” link.
cPanel will then prompt you with a new page where you will need to confirm the deletion of the filter. Once that is done, cPanel will redirect you back to the “Global Email Filters” default page.
Congratulations! You now know how to fully manage the “Global Email Filters” for your entire Web Hosting Account. Please bear in mind that these files will be applied to every email account you have configured for any of your domain names. If you are looking to filter the messages for a specific email account you should check our other tutorial “How to manage the Email Filters in cPanel” where we will explain how to set up and manage filters for a specific email account.


