Introduction #
Restoring your backups is equally important as generating them. The restoration process would typically require you to deploy an older version of the files over the current ones replacing them in the process. Additionally, it could require a substantial amount of time which involves fixing your application’s configuration files, dropping your MySQL databases, and re-importing the backed up SQL files. The “Backup Restoration” feature allows you to automatically perform this process with a few clicks and in this tutorial, we are going to cover all it has to offer. Let’s get started.
Accessing the Backup Restoration feature #
First, you need to log into the WHM service for your VPS or Dedicated Server. After you have logged in, please use the search bar on the left side of the page and type “Backup Restoration”.

When the functionality shows up below the search bar, please click on it so you can be sent to the “Backup Restoration” page.
Restoring an account #
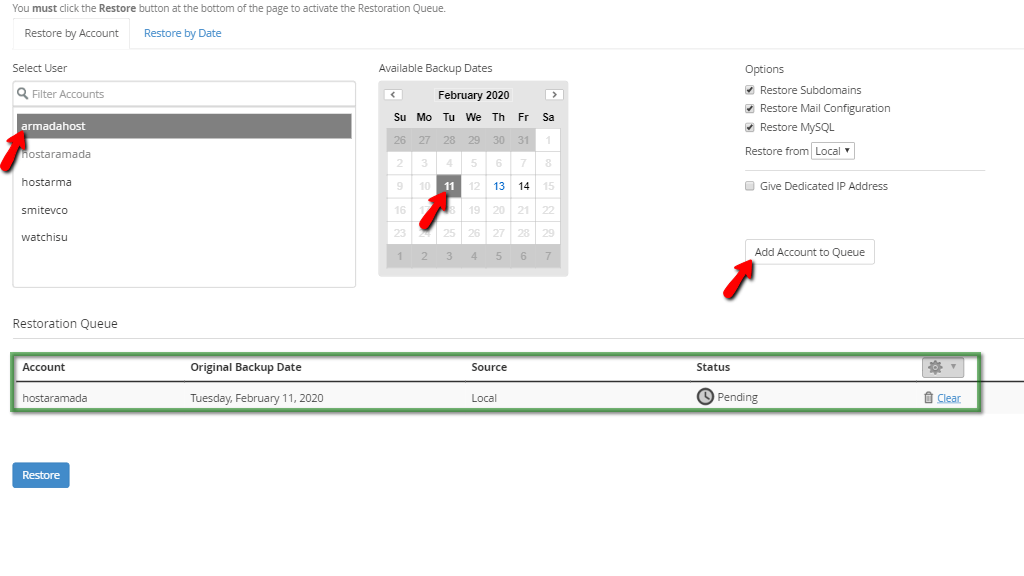
Upon landing on the page, you will notice two tabs “Restore by Account” and “Restore by Date”. Beneath them, you will see a search bar that is attached to a list section. Using the search bar you can filter the accounts and select the one you want to restore. Upon choosing an account you will see that some of the dates in the calendar on the right side of the list section have become clickable blue links while the rest remained greyed out. The bolded date shows the present day.

Alternating between the two tabs mentioned above, will basically, swap the places of the calendar and the search bar with the list section.

The layout you choose is entirely based on your preference. The first option will allow you to select an account and pick a date from the calendar to restore if a backup is available.
The second layout will cause all the dates that hold available backups to become blue clickable links and once selected the list section will display the accounts that have a backup for that specific date, with a bolded text. The accounts that do not have an available backup from the specified date will be left grayed out.

In the example provided in the screenshot, we have selected the 9th of February 2020 and only the account “hostarma” is bolded, while the rest are greyed out. This means that from this date, only “hostarma” has an available backup.
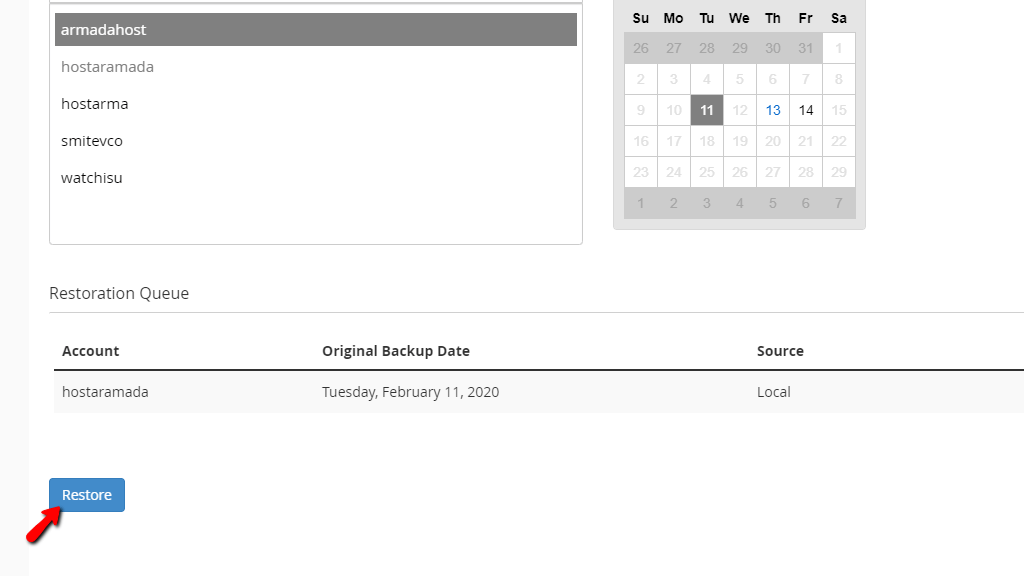
When you have picked an account to restore, in order to start the restoration process, you need to first put it in the account restoration queue. This is done by selecting the account itself and then pressing the “Add Account to Queue” button located on the right side of the page above the “Restoration Queue” table. When this button is pressed, you will notice the account show up under the “Restoration Queue” table which is located on the bottom side of the screen. In this example, we will use the first layout that was explained in the previous paragraph.
Restore Options
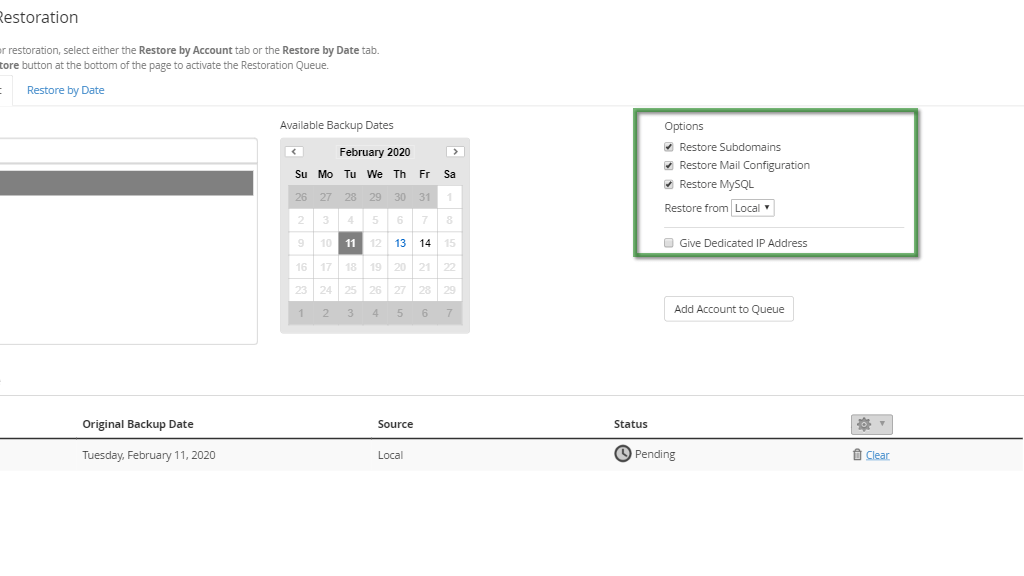
Before we go ahead and explain how to actually perform the restoration process, let’s go over the options which you can choose for it. The “Options” section is located on the right side above the “Add Account to Queue” button and it has 4 checkboxes, along with a dropdown menu. Let’s go over what they do.
- Restore Subdomains – Having this checkbox selected will restore all of the subdomains under the specified cPanel account.
- Restore Mail Configuration – Selecting this checkbox will restore the account’s mail configuration.
- Restore MySQL – Ticking this checkbox will restore all of the MySQL databases under the cPanel account.
- Restore from – This dropdown menu provides the option of selecting the source from which the cPanel account is restored. In this case, as this tutorial will cover only local restorations, this will be set as “local”.
- Give Dedicated IP Address – This option will assign the account a dedicated IP address during the restoration process.
Now that we have covered the options, let’s move on to the actual restoration process!
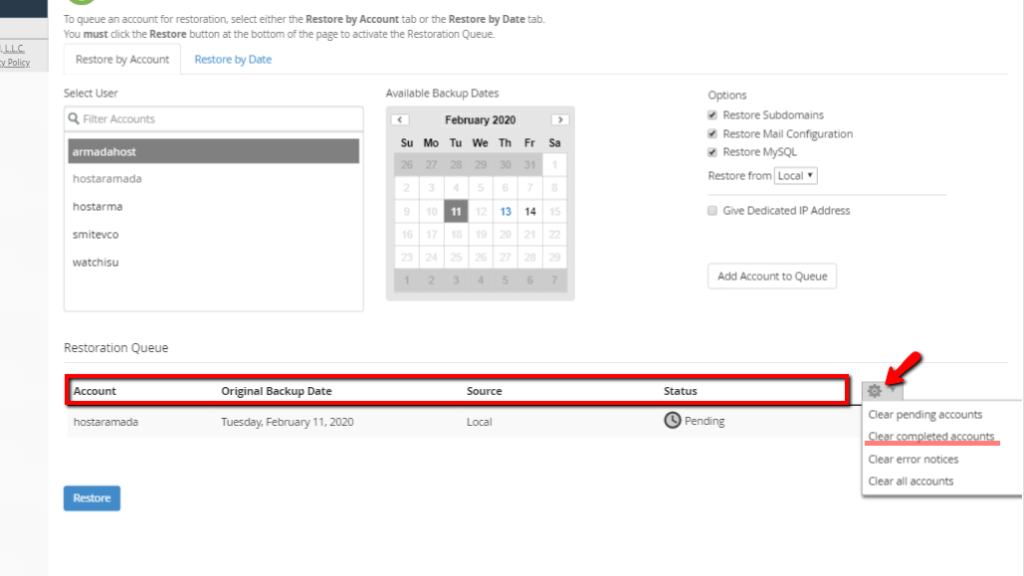
The Restoration Queue Table
Let’s go over all of the columns and what they contain.
- Account – This column contains the name of the account we are about to restore.
- Original Backup Date – This contains the date from which we are going to perform the restoration.
- Source – This will show the source from which we are restoring the backup – in our case, this will be “Local”
- Status – The status of the restoration process. This could be “Pending”, “Restoring Account”, “Completed”, “Completed with Warnings” and “Failed”.
On the far right side of the table, there will be two additional functionalities you can use. The first one we are going to discuss is the “Clear” link. What it does is clear the entire row from the restoration queue when used. You would likely use this when the restoration process is complete and you want to remove the record from the queue table.

The second functionality is the clickable cogwheel that is actually a dropdown menu. It has similar functionality to the “Clear” link, however, it will remove accounts from the restoration queue in a bulk manner. Simply put if for example, you have 10 accounts in the restoration queue and they have the “Complete” status. By using the cogwheel dropdown, you can select “Clear completed accounts” and remove their records from the restoration table.
Initiate the restoration process
Now that you have selected the account and put it in the restoration queue, let’s proceed with the restore process itself. In order to initialize it, please press the “Restore” button located on the bottom left side of the screen.
When this is pressed, the restoration process will be started and all that’s left for you to do is wait until it is completed.
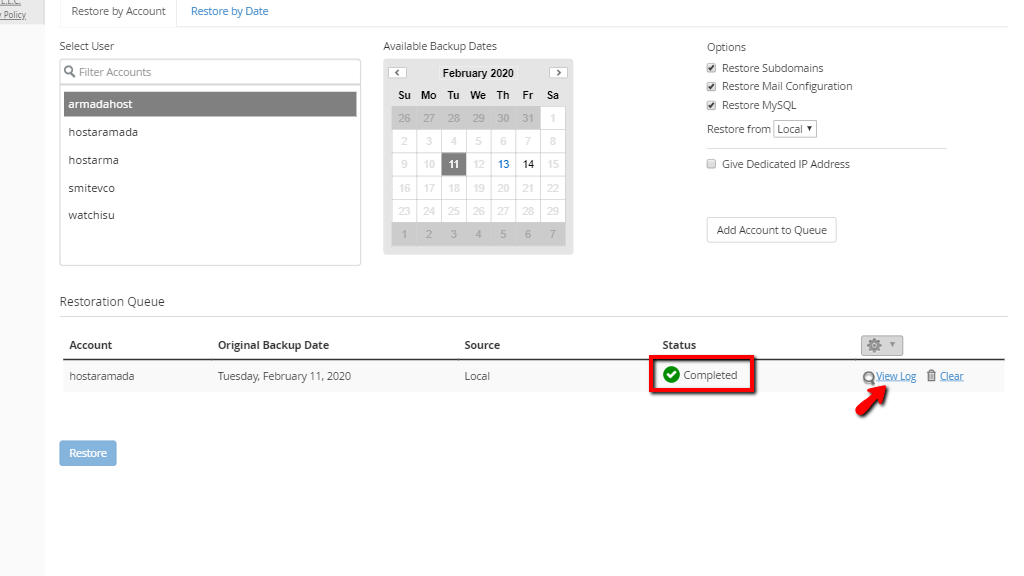
Upon completion, the status will become “Completed” and a clickable “View Log” link will appear on the left side of the “Clear” link. When you click there, you will be redirected to the log page where you can see what happened in the background while you were waiting for the restoration process to be completed.

If you scroll all the way down, you will find a “<- View Session Summary” button located on the bottom.
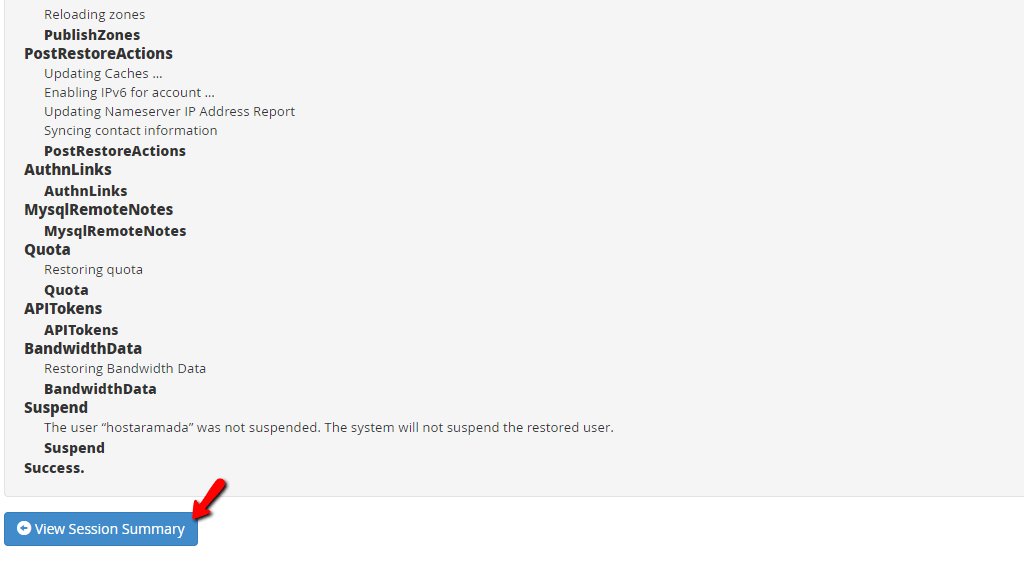
Please press it in order to be redirected to the last page of the process containing a small summary of how it went.
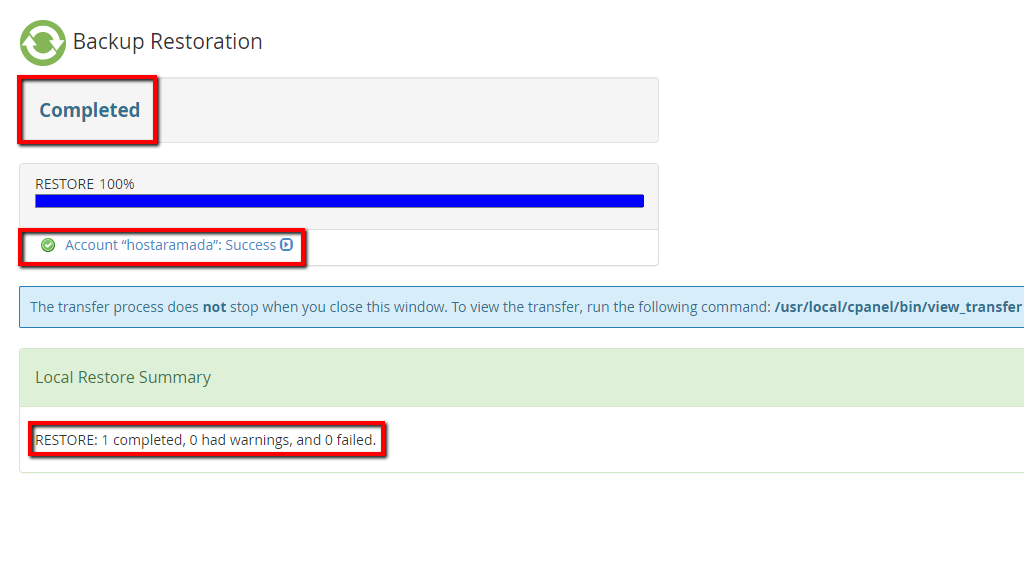
Upon reaching this page, please point your attention to the top of the screen, where you should see a “Completed” label. The second thing you should look for is the “Account “username”: Success” message which will be located under the blue bar displaying the restoration progress. Lastly, the third thing you should pay attention to is the text on the bottom of the page that will give a summary in regards to the entire restoration process “RESTORE: 1 completed, 0 had warnings, and 0 failed”.
Here you go! The “Backup Restoration” feature in the WHM control panel explained in this neatly packed tutorial. Hopefully, the information provided is enough for you to be able to perform restorations for your accounts without any issues. If you need assistance with this procedure, please, do not hesitate to contact our Technical Support Team with a ticket from your Client Area. They are 24/7 available at your disposal!


