Introduction #
WordPress is one of the most popular platforms empowering 35% of the websites over the Web. Easily manageable, customizable and powerful, WordPress provides countless possibilities. From blogging to online stores, everyone can create a beautiful and professional website with it. In this tutorial, we will guide you on how to install the application via the Softaculous Auto-Install. After following the steps below you will have your website up and running within just a few minutes.
Getting Started #
In order to install WordPress the very first step, we will need you to take is to log in to your cPanel account. You can do that by clicking on the purple “cP” button available under the Home Page of your Client Area with phluit.
Once you are logged in to your cPanel account, please navigate to the “Software” directory where you will locate the “Softaculous Apps Installer” icon.
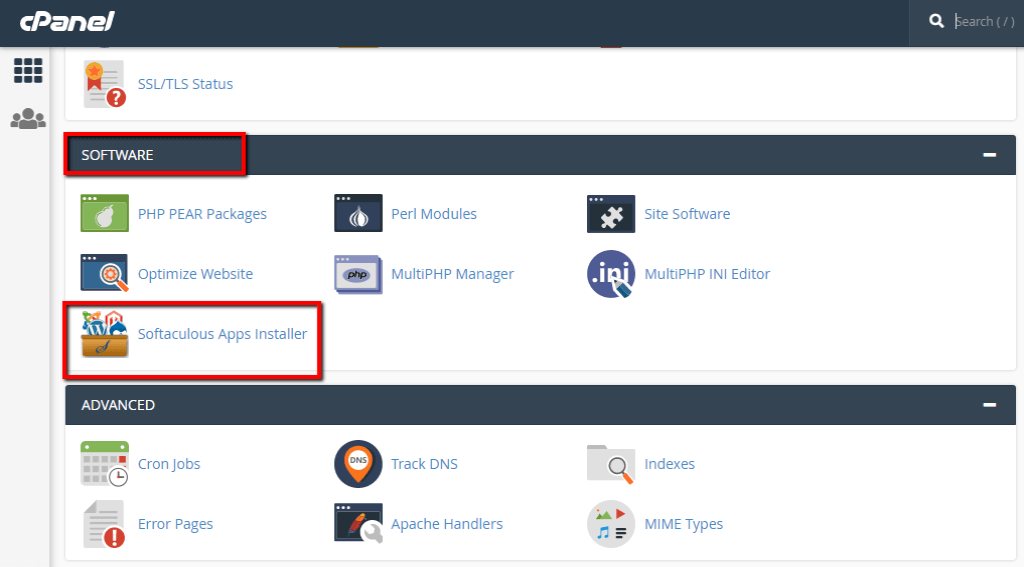
After you access the Softaculous Dashboard you will notice that WordPress is displayed as the first application under the “Top Scripts” section. You can directly click on it in order to access the Installation page. Alternatively, you can use the search bar available on the left-hand side.

When you access the WordPress overview page, you are ready to start with the installation process.
Installing WordPress #
Now that you have accessed the application page, please click on the blue “Install Now” button and you will be presented with a new page where you will have to specify the configuration details for the installation.

In order to keep it consistent, we will review each of the sections one by one starting with the first “Software Setup” section.

The first thing you need to select is the installation version. At this point, Softaculous supports WordPress 4.9.12, 5.0.7, 5.1.3, 5.2.4, and 5.3. We strongly recommend you to choose the latest available version unless you strickly require another one.
Next, you will need to determine the application URL settings:
- Choose Protocol – From this dropdown menu you will need to determine the protocol for the installation. Please note that in order for the secure HTTPS protocol to function properly it requires a valid SSL certificate installed on your domain name.
- Choose Domain – From this dropdown menu you will need to select the domain name you would like the installation to be performed onto.
- In Directory – In this field, you can specify the directory path where the installation to be performed. If you would like the installation to take place directly under the domain name’s root folder ( i.e. https://yourdomain.com), please make sure to leave this field blank. Alternatively, if you wish WordPress to be installed under a subdirectory (e.g. https://yourdomain.com/blog), please make sure to specify the subdirectory under this field.
In the following two “Site Settings” and “Admin Account” sections you will need to specify the website and admin details.
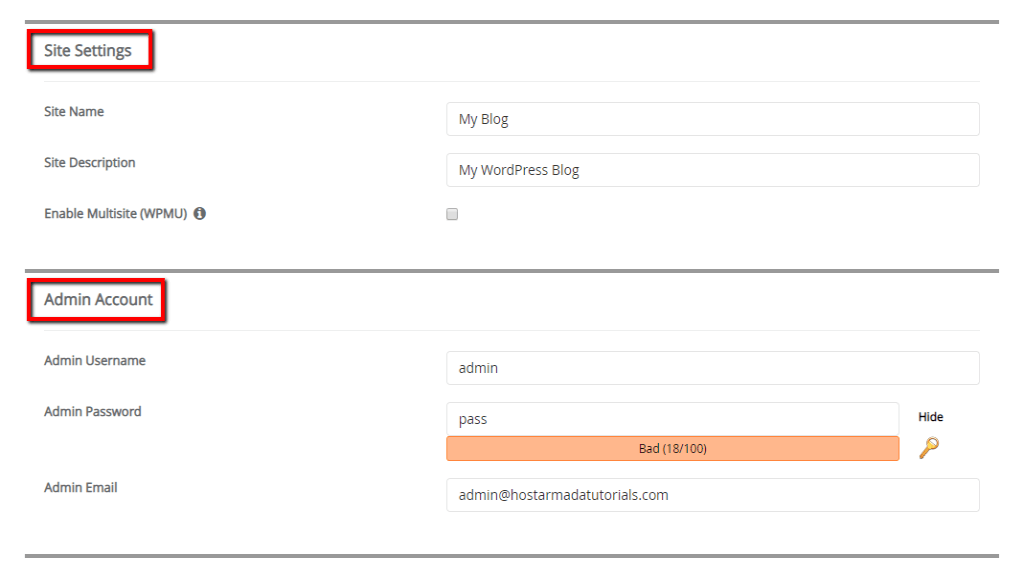
In the fields under “Site Settings”, you will need to specify the following:
- Store Name – Here you will need to enter the name of your store as it will be displayed in the browser title bar.
- Site Description – In this field, you can enter a custom title for your website which will be displayed in the header of your store frontend pages.
- Enable Multisite (WPMU) – If you tick this checkbox the Multisite option will be enabled for your WordPress website.
Under the “Admin Account” section, you will need to enter the following information:
- Admin Username – In this field, please specify the admin username for your WordPress Admin Dashboard.
- Admin Password – In this field, you will need to enter the password for your Admin account. Please make sure to select a strong password as using insecure login credentials may influence your website security and make it vulnerable for various attacks. You can use the password generator (“Key” icon) to create a strong password.
- Admin Email – In this field, you will need to enter the desired administrative email address which will be used for all update notifications, password reset requests, etc.
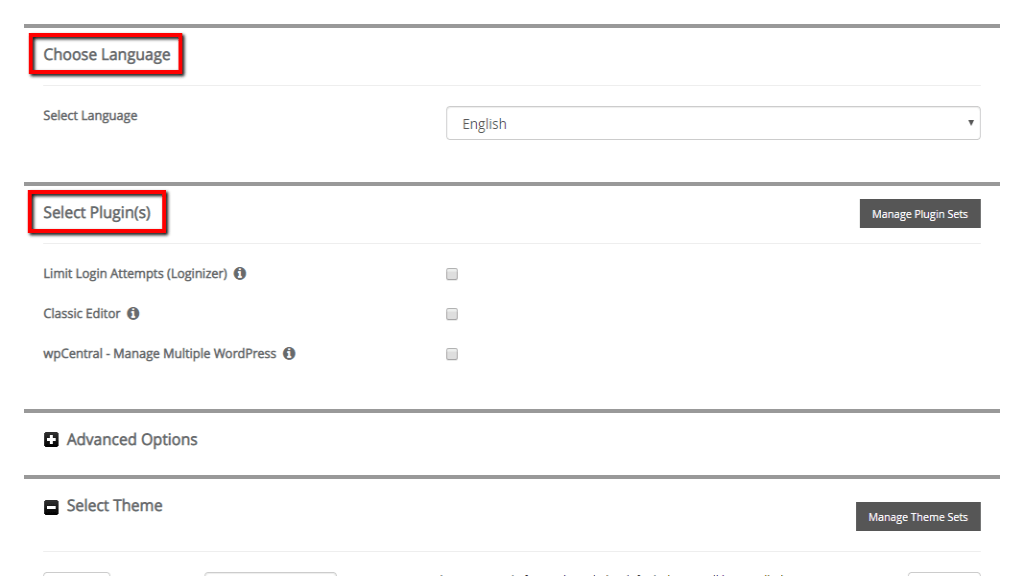
From the following two “Choose Language” and “Select Plugin(s)” sections, you will be able to select the default language for your WordPress website and enable the listed plugins if needed.
The “Advanced Options” section is optional, it will allow you to customize the database assigned to your WordPress website and select your update and backup preferences. If needed, please click on the “+” button to expand it.
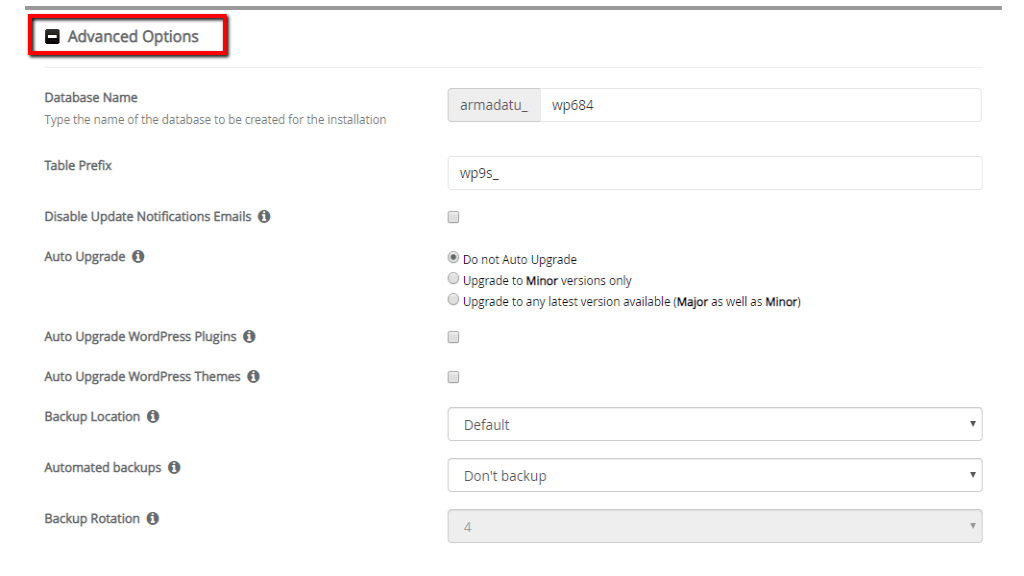
You will be able to give your database a custom “Database Name” and change the database “Table Prefix”. You can disable the update notifications sent via email by ticking the checkbox. You can configure your preferences for the automated update functionality of your WordPress version, themes and plugins by thinking the corresponding checkboxes. You can control the “Backup Location”, the frequency of the Softaculous “Automated Backups” and the “Backup Rotation”. Please note that these backups will be stored under your hosting account and they will demand available free space. If you are using one of our shared hosting solutions Phluit is already backing up your data and storing it on remote servers for enhanced security.
From the last “Select Theme” section you will be able to select a theme that will be pre-installed for your new WordPress website. This is optional, therefore you are not required to select it right now, anyhow you will be able to change your WordPress theme anytime in the future.

Once you are have entered all the details, please click on the “Install” button in order to initiate the process and allow it with a few moments to be completed. After it is finalized, you will be provided with your store and Amin Dashboard URL addresses.
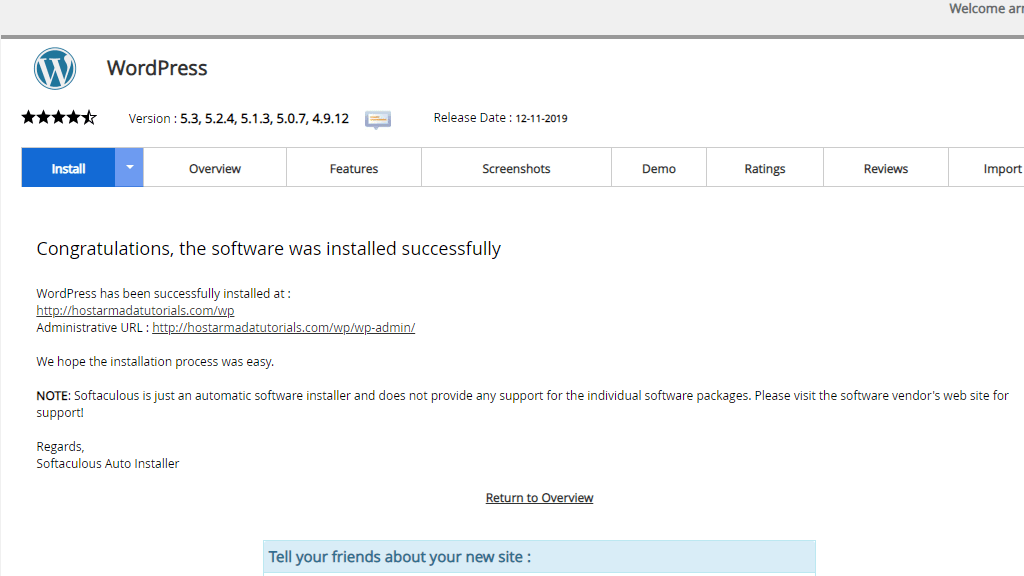
Congratulations! You have successfully installed WordPress and you are ready to put your creative thinking in work and develop a beautiful and successful website. We hope you have found our guide useful and easy to follow and we would like to welcome you to contact our Support Team in case you have run into any difficulties.


