Introduction #
It is no secret that WordPress comes with a pocketful of various handy features. One of them is the Import tool. As the name suggests, this tool allows you to move your content from one website to another. Whether you want to migrate your data from an old WordPress website to a new one or to switch from a completely different blogging platform to WordPress, you can rely on it.
In the following lines of this tutorial, you will find step-by-step instructions on the complete process of importing data into your WordPress-based website.
Before you move forward, please note that this tutorial will overview only the import process. In other words, you are expected to already have the content from your old website already exported into a file.
Accessing the Import Tool #
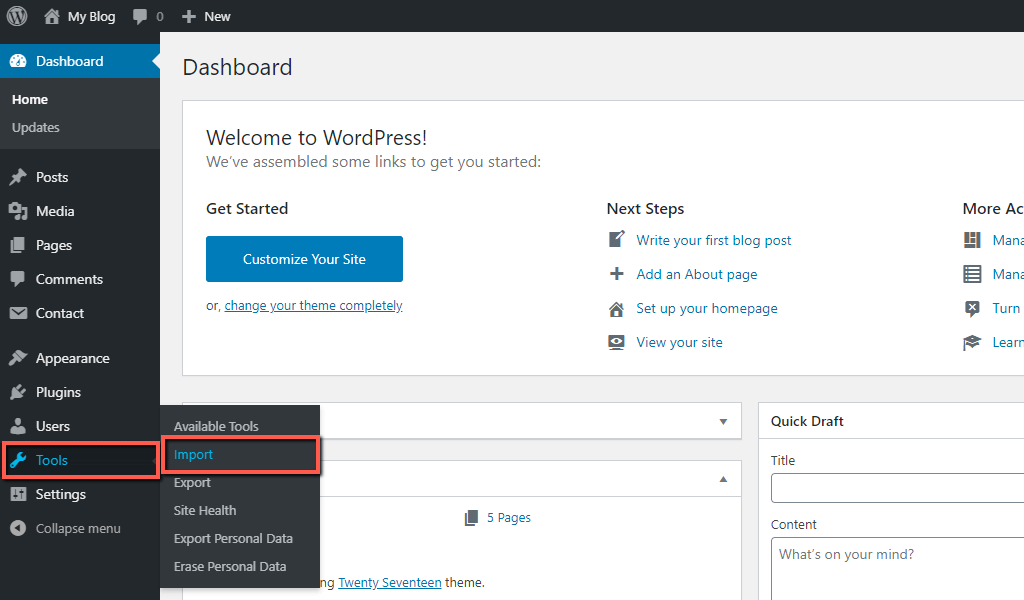
First off, we will need you to log into your WordPress Admin Dashboard. You can do that by accessing your domain followed by “/wp-admin“, i.e., “yourdomain.com/wp-admin“, where “yourdomain.com” stands for your actual domain name.
Once logged, please navigate through the left-hand side menu bar to Tools > Import.
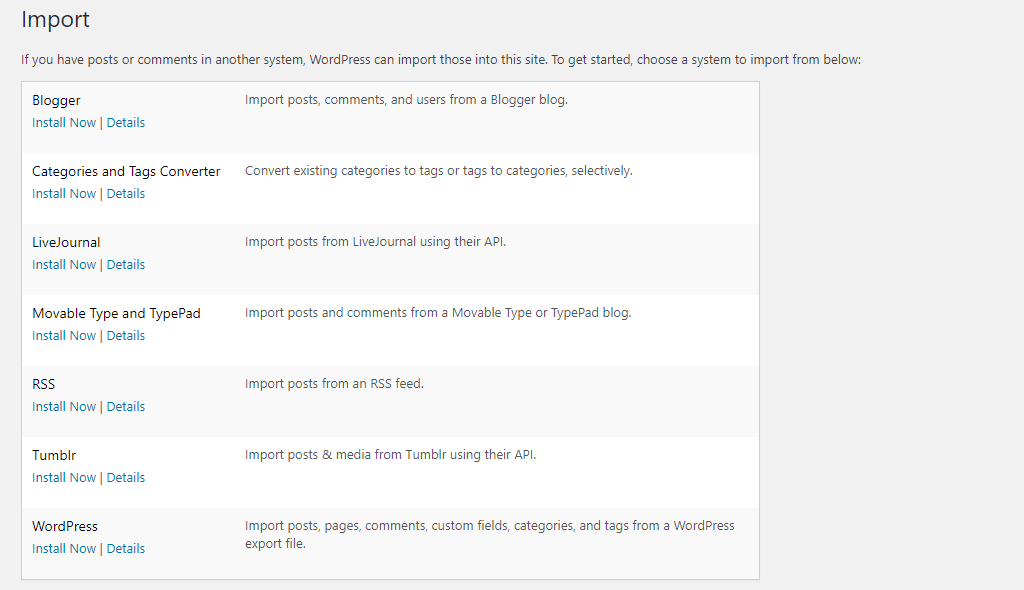
Upon doing that, you will be redirected to the “Import” page, where you will see a list of all supported importers. At this point, WordPress supports the following platforms and sources for importing content from:
- Blogger
- Categories and Tags Converter
- LiveJournal
- Movable Type and TypePad
- RSS
- Tumblr
- WordPress
Each of the importers is empowered by a particular plugin. As you can see, none of them is installed by default. This is intentionally done in order to avoid unnecessarily overburdening your website.
With this in mind, your first step is to install the corresponding plugin depending on the platform you are going to be importing your content from.
Installing Importer #
The steps for importing content are the same regardless of the current platform you utilize. For the sake of this tutorial, we will give an example with an import from a WordPress-based website.
To install the desired importer, please click on the corresponding “Install Now” link.
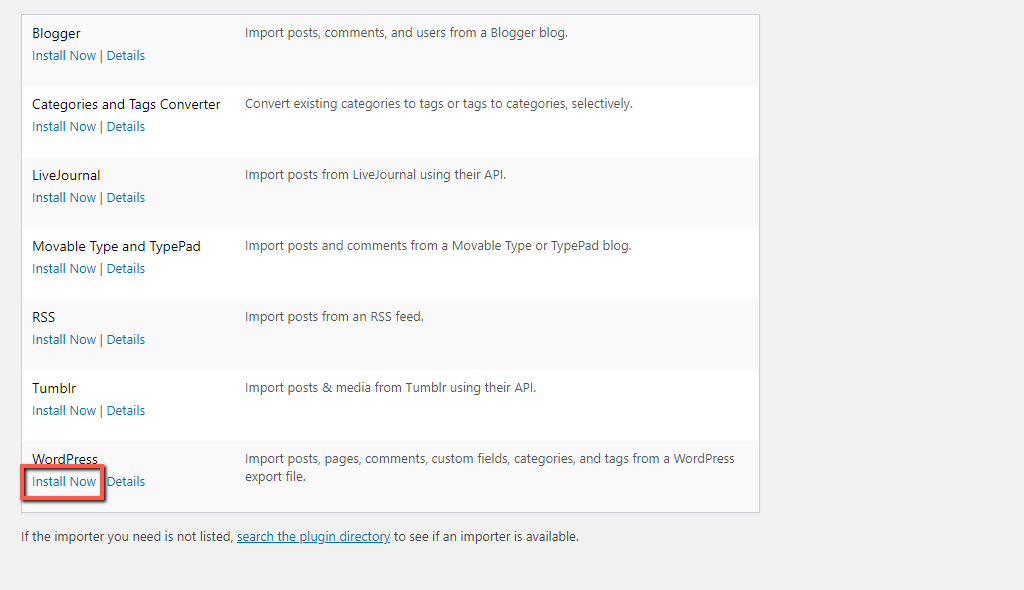
After a brief loading period, the importer will be installed, and the “Install Now” link will be converted to “Run Importer“.
Please bear in mind that if you cannot find an importer that fits your needs included in the Import tool, you can always browse the WordPress Plugin Directory and independently install another importer. To do so, you have to click on the “search the plugin directory” link placed at the very bottom of the page.

Importing Content #
Now, to actually import your content, please click on the “Run Importer” link mentioned above.
This action will redirect you to the importer interface, where you will be welcomed to upload the WXR (.xml) file from your local computer. Once you have the file prepared, please click on the “Choose File” button and browse to the location of the file.

Now that the fine is selected, please click on the “Upload file and import” button.

With this done, the import will be initiated. Depending on the size of the file, and your local Internet connection speed, the time required for completing the process may differ.
Once finished, you will be redirected to a new page where you will need to configure the import settings.
By default, the imported content is automatically assigned to the current user (typically, the admin user). The options below the “Assign Authors” allow you to specify another user by either creating a new one or by selecting an existing user.
The “Download and import file attachments” option allows WordPress to actually download all the media files directly from the source of the import. If the content you are importing (posts, pages, comments, etc.) contains images, videos, or audio files, we strongly advise you to tick the checkbox.
Please bear in mind that if the imported content is large in size, the import process might fail due to a high number of media files that have to be downloaded. In such a scenario, you should separate the import into a few smaller batches presented as different .xml files.
When you alter the settings as desired, please click on the “Submit” button to proceed further.

Once this is done, a confirmation message stating the import had been successfully completed will be displayed. In case there is an issue detected, you will be presented with a detailed changelog indicating the exact reason for encountering the error.

Congratulations! Now you have the freedom to move your content from one website to another. We hope your new skills will come in handy in the future. In case you can not proceed with the import, you can always request a full website migration by submitting a ticket request to our Technical Support department.


