Introduction #
In this tutorial, we will guide you on how to remotely manage your web files using the FileZilla FTP Client. FileZilla provides a user-friendly and intuitive interface that will help you easily handle certain tasks. In the following lines, you will learn how to create, remove and move files and folders, how to rename them and how to change their permissions.
Getting Started #
Before we move forward, please note that at this point it is expected that you have the FileZilla Client already installed on your local computer and you have established a successful connection to your web hosting account.
After you follow the steps and you are connected, you will see displayed two panels: the left one will list the files and directories of your local computer, while the right one will list the files and directories on the remote server (i.e. your hosting account). Our primary focus will be on the right panel, as we will be reviewing how to remotely manage the web files.
Creating Files and Directories #
We will first guide you on how to create new files and folders. Please navigate through the list of folders and ensure you are located under the directory where you would like to create the new file/folder.
Let’s say for example that we would like to create a new “example.html” file under our root directory. For that purpose, we will need to ensure that we are located under the “public_html” folder.
Once you are located under the proper directory, all you will need to do is simply to right-click somewhere on the blank screen and click on the corresponding “Create directory” or “Create new file” button.

Afterward, you will be prompted with a pop-up window where you will need to specify the file/folder name. If you are adding a file, please make sure to specify the prefix (e.g. example.html). In case you are adding a folder, note that unless you are located in the home directory the path to the current directory will be also displayed (e.g. /public_html/example_folder/).
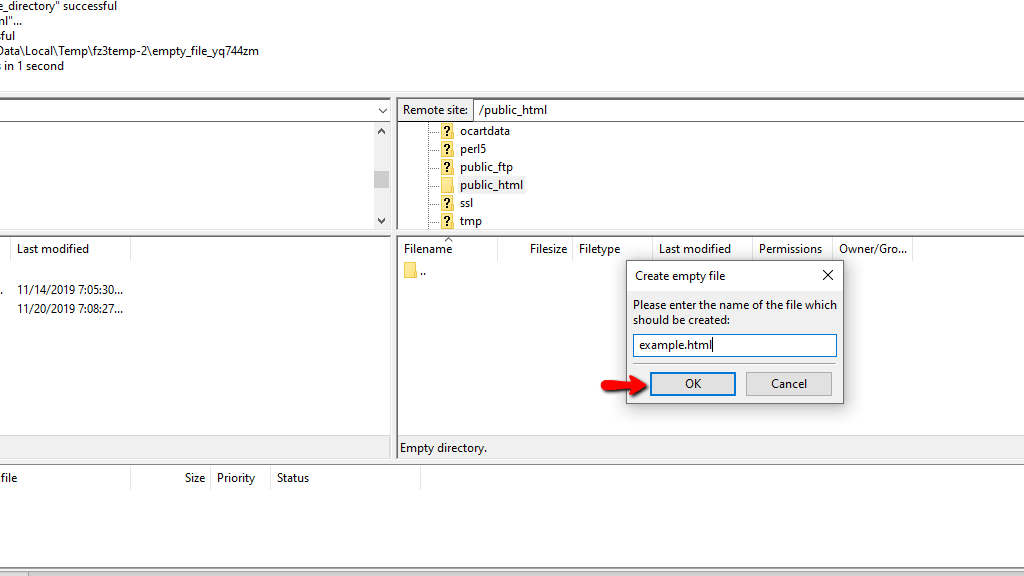
When you enter the name, please click on the “OK” button and your new file/folder will be successfully created.

If you need to rename or delete a file or directory, you can do it anytime in the future by right-clicking on it and selecting the corresponding “Rename” or “Delete” options.
Moving Files and Folders #
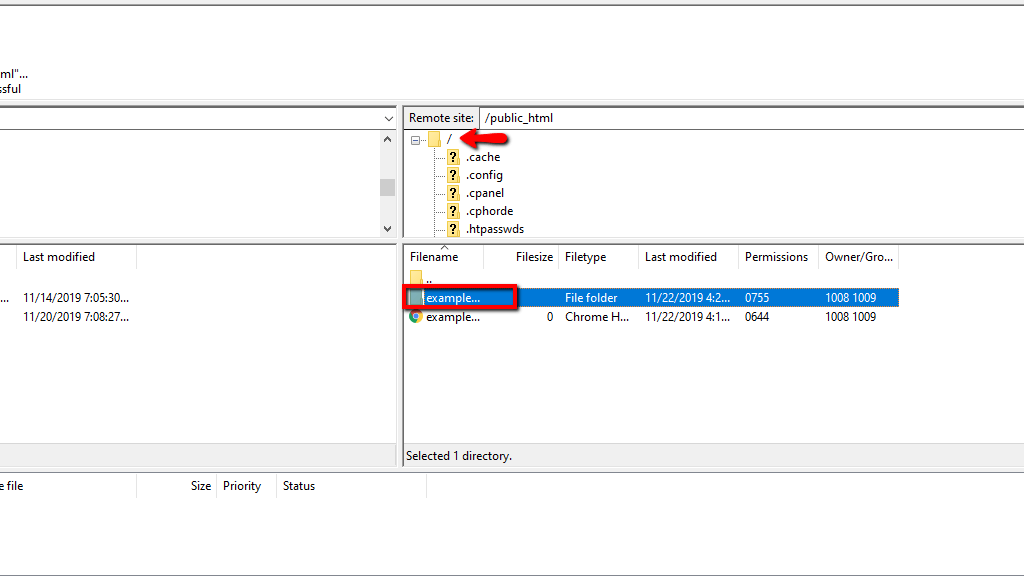
With FileZilla moving files and folders is as simple as dragging and dropping them into the desired location. Let’s say, for example, we would like to move our newly created “example_directory” right under the home directory. To achieve that we will need to select the desired file/folder and drag and drop it into the desired location.
Important note to make – while dragging and dropping files/folder from the left pane (local files) to the right pane (web files) allows you to transfer, i.e. copy, files from your local computer to your web hosting account, do that within the scope of your hosting account file structure moves them entirely to the selected location.
Changing File and Directory Permissions #
Ensuring your web files and directories are set with the correct permissions is vital for your website’s proper functionality. Therefore, being able to troubleshoot and change incorrect permissions is an important thing to know. Using FileZilla you can do that within a few clicks.
All you will need to do is to locate the file/folder in question, right-click on it and choose the “File Permissions” option.
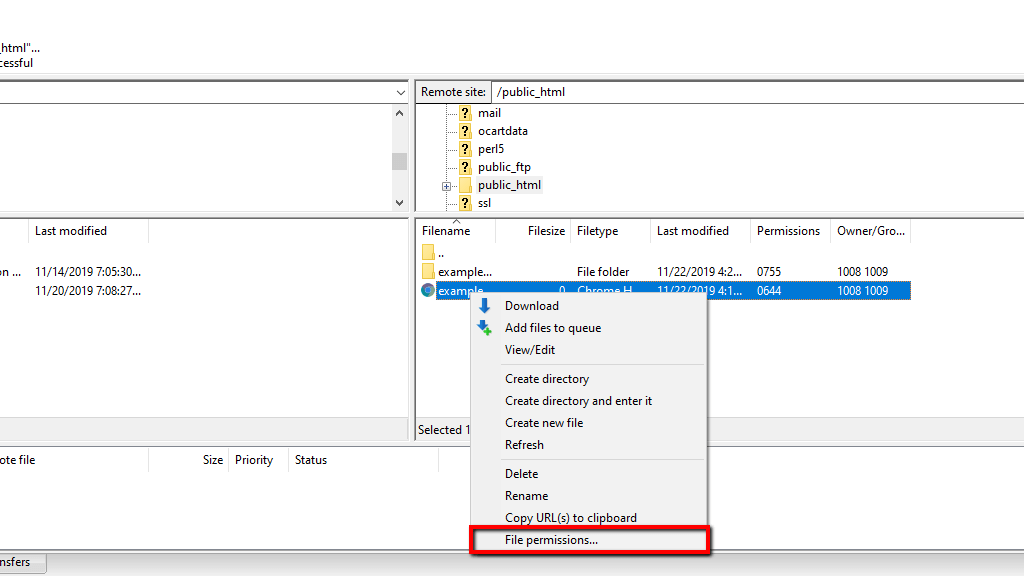
Afterward, you will be prompted with a new pop-up window displaying the current owner, group and public permissions. You will be able to edit them by marking the corresponding checkboxes or directly entering the permission value into the “Numeric value” field. Once you are ready, please click on the “OK” button in order to save the changes.

Congratulations! At this point, you should feel comfortable working with FileZilla and managing your files using it. We hope you have found our instructions easy to follow and you have learned useful information. We would like to thank you for trusting our guidance and welcome you to contact our Support Team in case any additional questions arise.


