Introduction #
Google Analytics is a suite of tools that allows you to track and analyze your site data and user activity. It gathers a wide range of information about your web traffic and it allows you to monitor it in real-time. Among the key insights, you will be provided with, are your website audience, traffic volumes, traffic origin, and user interaction.
These reports are extremely valuable in terms of developing successful marketing, advertisement, and content strategies. When properly analyzed, the data can help you improve your website design and functionalities, and improve your overall performance.
Typically, Google Analytics is integrated by a JavaScript code snippet inserted into the code of your website pages. However, as a WordPress user, you are able to achieve that by installing a plugin and eliminate the need for making manual code changes.
We are going to guide you on the process of setting up the Site Kit by Google plugin. This is the official WordPress plugin developed and supported by Google. Among its great advantages is that it integrates an intuitive and user-friendly dashboard directly into your WordPress Admin Backend, and it allows you to monitor everything directly through it. In addition, it is not only intended for Google Analytics, but it pulls information from various Google tools, such as Search Console, AdSense, PageSpeed Insights, and Tag Manager.
Getting Started #
Before you step into the actual plugin installation, you first need to set up your Google Analytics account. This is a free service, and all you need is a Google account.
As soon as your Google Analytics account is set up, you need to proceed with the plugin installation from your WordPress Admin Dashboard. It can be installed like any other standard WordPress plugin.
Setting Up Site Kit by Google #
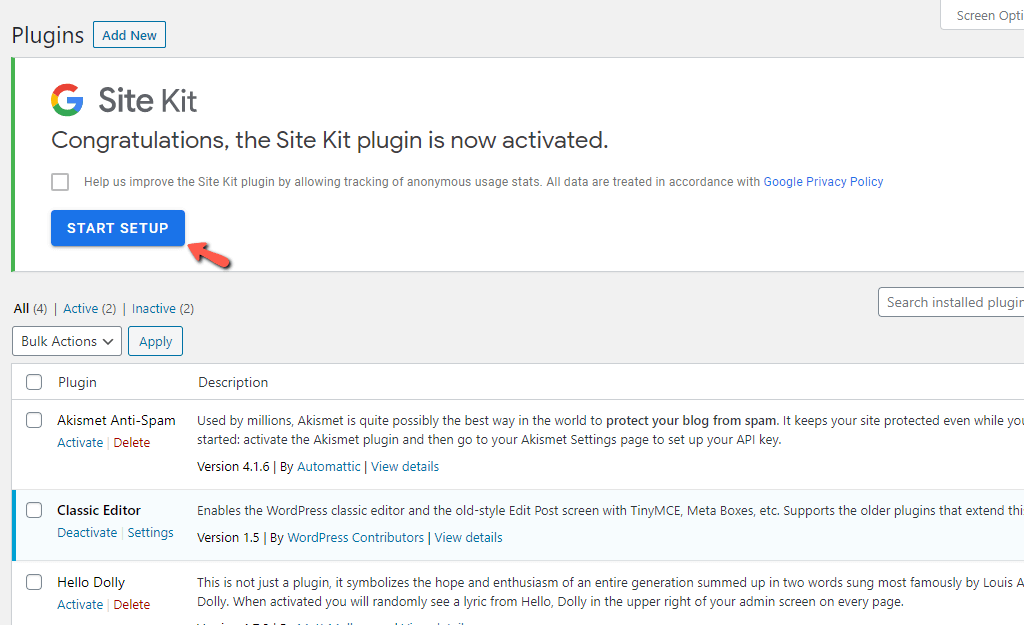
Once the plugin is installed and activated, you will need to complete a few simple steps to configure it. You will be immediately prompted to initiate the process with a “Start Setup” button displayed at the top of the page.
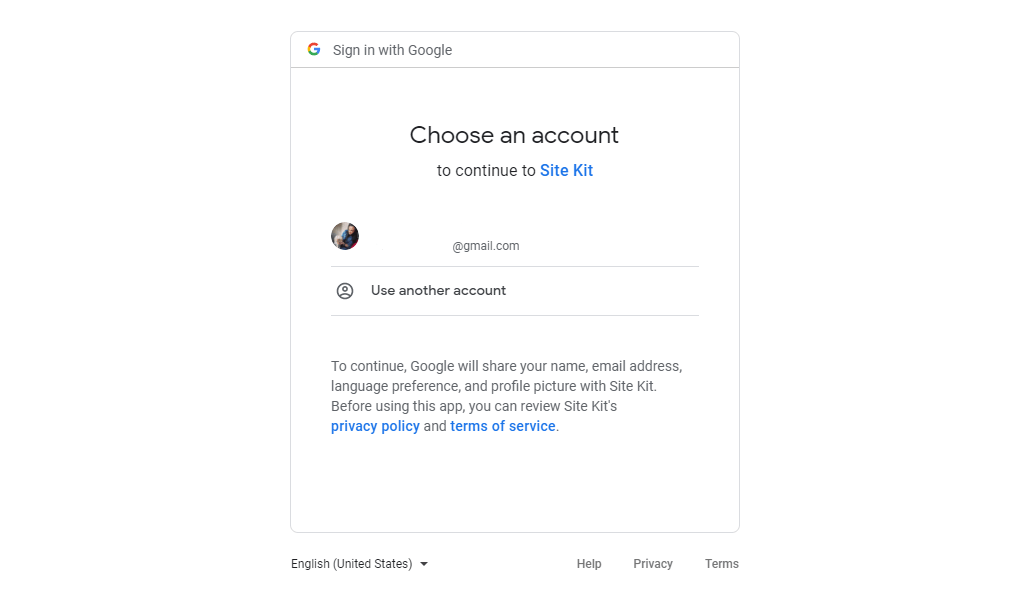
When the button is clicked, you will be redirected to a new page where you will be asked to verify you are the owner of the domain name Site Kit was installed onto. To do so, please click on the “Sign in with Google” button.

Upon doing that, you will be presented with a list of your existing Google accounts, and you will need to select the one connected with Google Analytics.
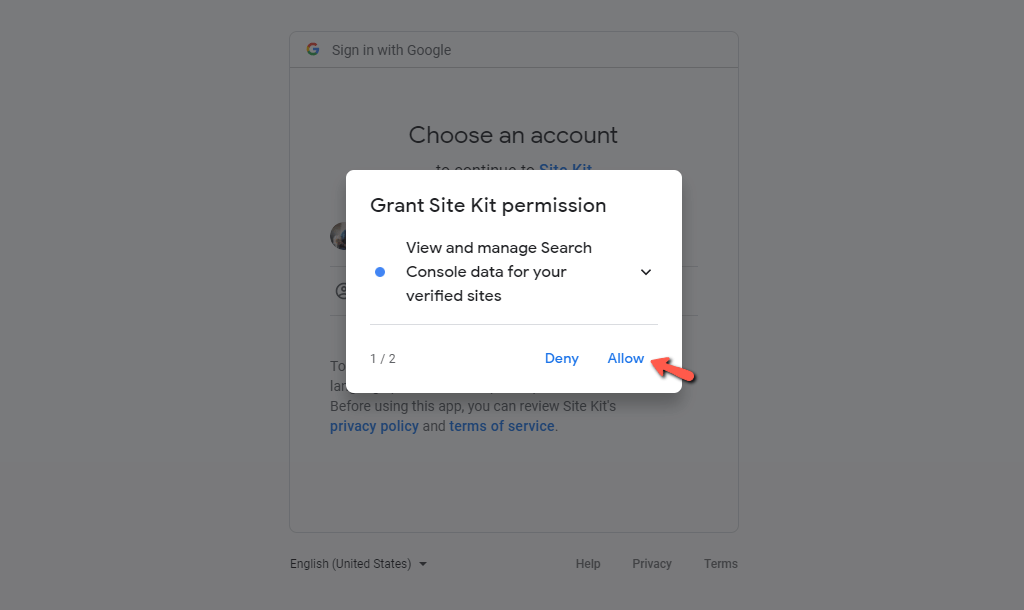
Next, you will be presented with a new dialog asking you to grant Site Kit permission to manage the Search Console data for your website. Even though this is not required, we will recommend you to click on the “Allow” link.
Then you will be asked to allow Site Kit access to manage the lists of sites configured within your Google Analytics account. Such access is not required either. However, we would recommend you to click on the “Allow” link. This will let you to easily manage multiple sites and domains directly through your Site Kit Dashboard.

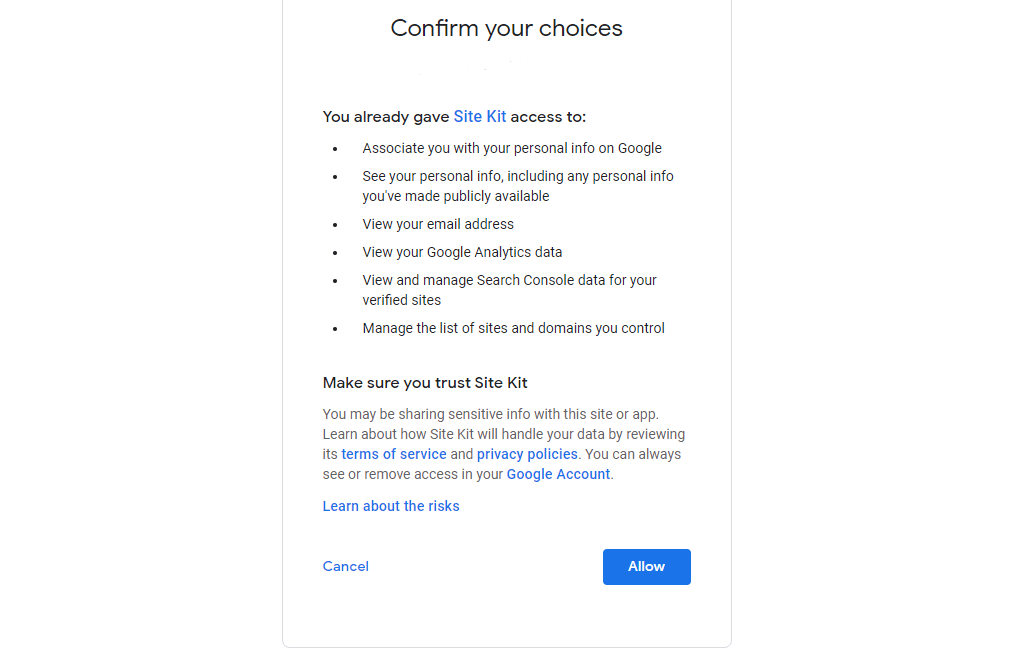
Afterward, you will be presented with a summary of what information will be shared with Site Kit. To continue, please click on the “Allow” button.

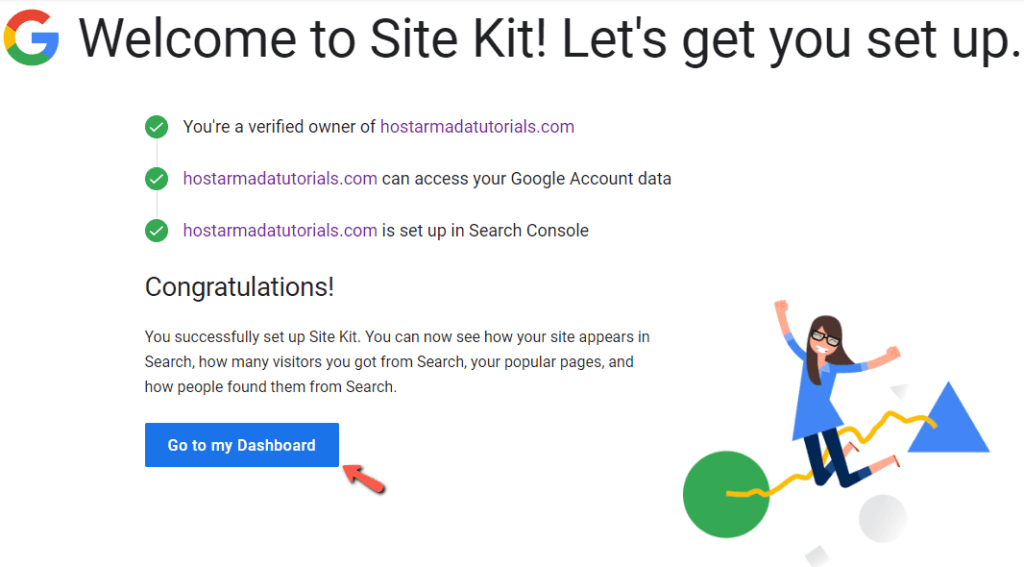
With this done, the process is completed, and you are ready to start monitoring your website(s). Please click on the “Go to my Dashboard” button.
Upon doing that, you will be redirected to the Site Kite Dashboard within your WordPress Backend. At the top of the page, you will see the supported Google tools. Please click on the “Connect Service” button within the “Analytics” box.

You will need to once again select your Google account, similarly to the previous example.
Then, you will be required to confirm the access you have previously granted to Site Kit by clicking on the “Allow” button.
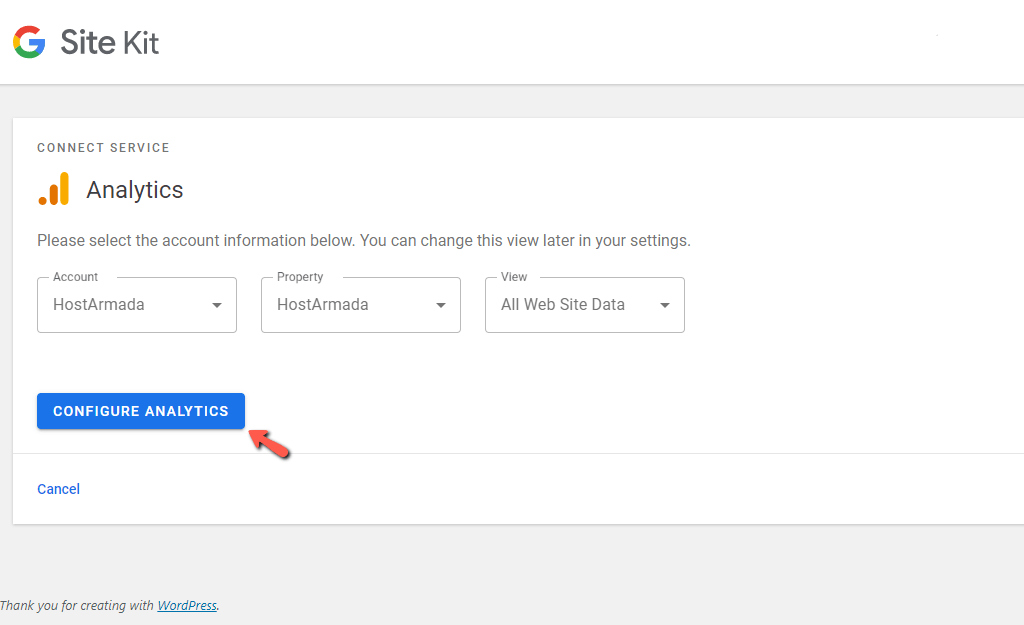
Afterward, you will be redirected back to the Site Kit Dashboard. You have to configure the following properties by selecting the desired value from the corresponding dropdown menu:
- Account – The Google Analytics Account you want to configure to Site Kit
- Property – Simply put, a property is a resource associated with your Google Analytics tracking code. You need to select the one accosted with the desired account.
- View – The data type you want to collect.
When done, please click on the “Configure Analytics” button.
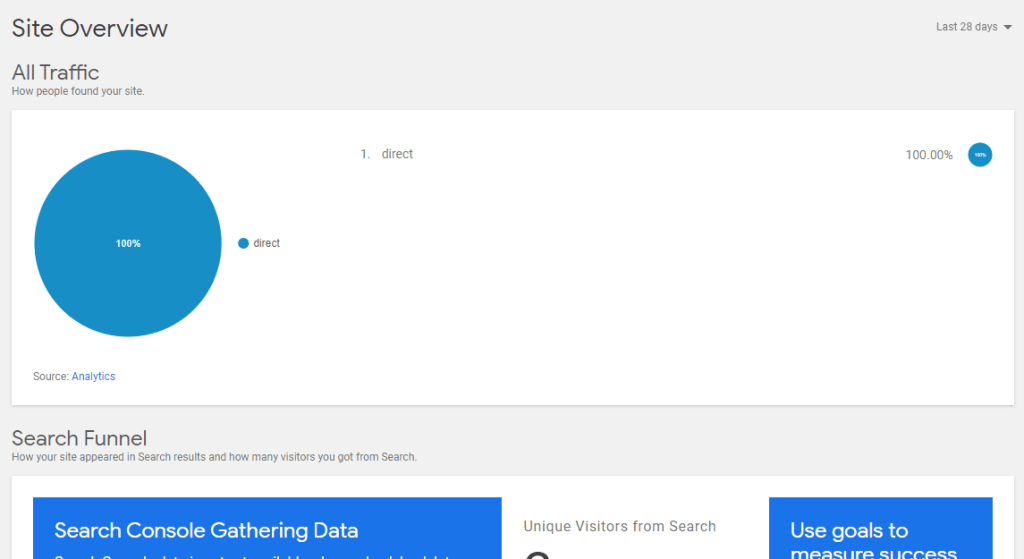
With this done, Site Kit should be successfully connected with your Google Analytics account. You will be immediately presented with the reports for your website.
Congratulations! In this tutorial, you have learned how to integrate Google Analytics to your WordPress-based website with the Site Kit plugin. Now you can enjoy the convenience of monitoring your website traffic directly through your WordPress Admin Dashboard. We hope this information was useful to you, and our guide helped you to complete this task with ease. In case you have experienced any difficulties with the plugin installation, please do not hesitate to contact our Technical Support team.


