Introduction #
LiteSpeed Cache for WordPress is a powerful optimization plugin. It is a collection of multiple features built-in one handly tool, which is easily integrable directly into your WordPress Admin Dashboard.
After installing the plugin, it is essentially important to review and configure its settings with attention to achieving the best possible results.
In this tutorial, we will guide you on how to take advantage of the free image optimization feature that is implemented into the plugin. We will guide you on how to optimize your images on one of the free cloud servers provided by LiteSpeed and then pull them back.
Getting Started #
To begin, you have to log into your WordPress Admin Dashboard. To do that, please add “/wp-admin” to your domain name – for example, “mywordpress.com/wp-admin” where “mywordpress.com” is your actual domain.
Once you are in, please hover over the “LiteSpeed Cache” option on the module bar on the left. When the submenu is expanded, please click on the “Image Optimization” option.
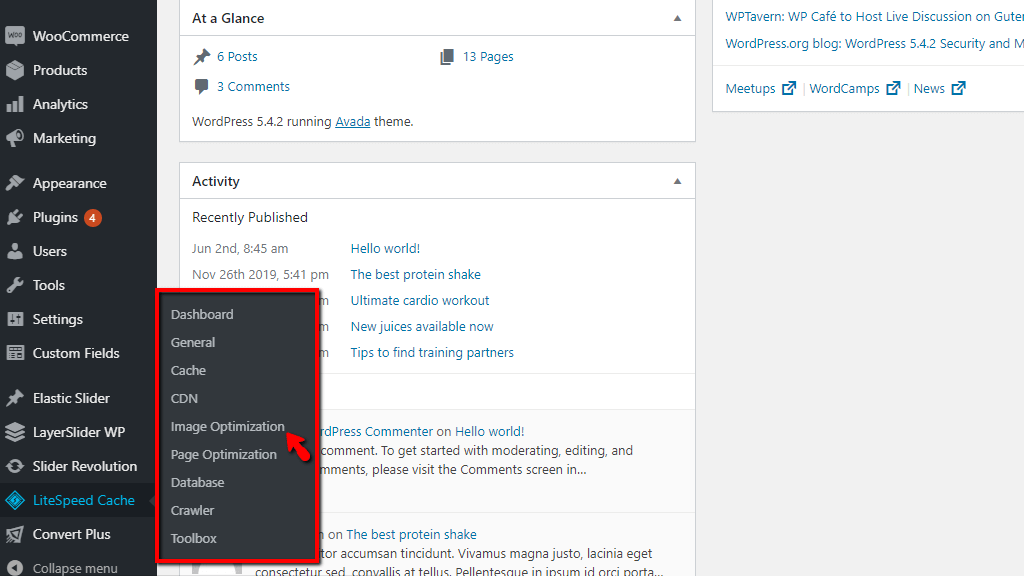
Upon doing that, you will be redirected to the Image Optimization section.
Configuring Image Optimization Settings #
Now that you are located on the intended page, let’s review the settings it holds. To keep it consistent, we are going to overview each of the tabs separately and explain every single option in detail.
Image Optimization Summary #
- Gather Image Data/Send Optimization Request – These two buttons change based on the status of your image. The “Gather Image Data” button will be available if new images are uploaded, and the “Send Optimization Request” button will become active when the images have been gathered, and it will allow you to send them to the cloud server for optimization. To use this functionality, you need to register at Quic.cloud and add your Domain key in the “General Settings” Tab. At first, you will be able to send one image at a time. This count will then gradually increase until the cap (200 images at once) has been reached.
- Pull Images – When you have sent the images to the cloud server for optimization, it will take some time before they are optimized. The Pull Images button will allow you to download them back to the server and use them on your site in their new, optimized variant. Before the original images are sent to the cloud server, the plugin will back them up in case something goes wrong. The backup will be placed in the original directory and will have the original image’s name with a “bk” at the end.
- Clean Unfinished Data – Sometimes, the compression or upload process may get stuck. If that is to happen, please press this button to clean all unfinished processes and start them again.
- Calculate Backup Disk Space – Clicking this button will calculate the amount of disk space allocated by the backed-up files. This could be useful if you are having issues with your disk space, and want to lower the usage.
- Remove Original Image Backups – Clicking on this button will remove the backups of the original images. If you used the above option and you feel like they occupy too much disk space, you can proceed. We do recommend downloading the backups locally first, just in case you need them at some point.
- Rescan New Thumbnails – Using this link, you can scan your images for new uploads and resend new optimization requests, should there be images that require such. Basically, It will rerun the same functionality as the “Gather Image Data” button explained above.
- Use Original Files/Use Optimized Files – These two links will allow you to change between the original files and the optimized files. This can be a great opportunity to test the benefits of optimizing your images!
- Destroy All Optimization Data – This link will wipe the sleigh clean and will bring back the original images.

Image Optimization Settings #
These are all sorts of settings you can manipulate regarding the previous tab. Such include automation when it comes to uploading and pulling back your images from the cloud.
- Auto Request Cron – If you want to send all the new images you upload to the cloud for optimization, then you should turn this setting on. It defaults to “OFF” normally.
- Auto Pull Cron – If you want to automatically pull the newly optimized images from the cloud server, please leave this setting to its default “ON” position.
- Optimize Original Images – This setting should be left at its default value “ON”. Otherwise, you will not be able to benefit from the image optimization options.
- Remove Original Backups – This setting should be left at its default value “OFF”. If you enable it, it will remove the backups of the images, and there is no way to get them back. If you are 100% sure you like the optimized images, you can enable it, as it will help you manage your disk usage better.
- Optimize Losslessly – Enabling this feature will cause the optimization process to use a compression method, aimed to keep the quality of the optimized image as high as possible. This will result in a larger size. However, we recommend enabling it only if you have images that have a bigger size (1MB+) as they will benefit from this a lot more.
- Preserve EXIF/XMP data – Some images contain information on them, such as the date the shot was taken (if it is a photo), information about the photographer, or comments. Enabling this option will preserve this information. However, the size of the optimized image will be increased.
- Create WebP Versions – WebP is an image format developed by Google that incorporates both lossy and lossless compression methods to optimize images and reduce their size, providing faster loading speeds for websites. Using it is up to personal preference, but online studies have shown that files with the WebP format image have a 30% reduction in size when compared to jpg or png. If you have a lot of images, getting a 30% overall size reduction can show really promising results when it comes to loading speed. The only downside would be the fact that WebP is not supported by some of the browsers out there. However, LSCache is so amazing that it will simply use the original images should such a browser user visits a site utilizing WebP.
- Image WebP Replacement – The default option here is “OFF”. If you decide to use WebP, then turn it “ON”.
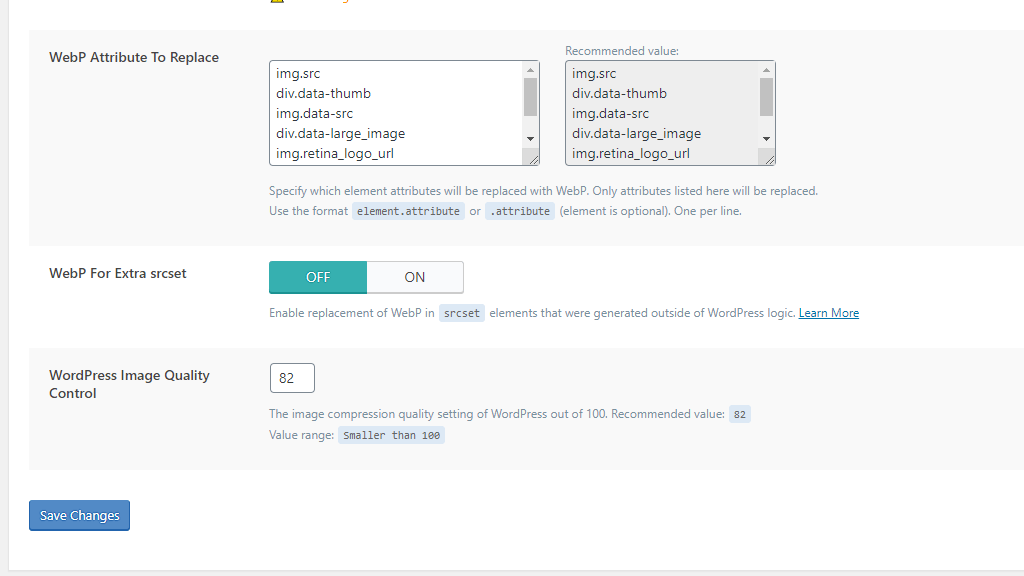
- WebP Attribute To Replace – This is a very flexible option that will give you control over which formats are affected by WebP. Please use the content box to manipulate this and remove/add more file types that will be converted to WebP.
- WebP For Extra srcset – If you are using custom codes on your site, which include “srcset” elements and you want them to benefit from WebP, then please, turn this option “ON”, otherwise, keep it “OFF”.
- WordPress Image Quality Control – We recommend leaving this value to its default “82”. It controls the image quality compression, and you should never put 100 there. You can play around with this setting if you want to squeeze out that extra performance boost.
That’s it! The settings within the Image Optimization tab of the LiteSpeed WordPress caching plugin. Image optimization can be a powerful ally when it comes to website speed, and taking advantage of what it has to offer is a great addition to your speed-increasing arsenal!


