Introduction #
It is really important to keep track of your cPanel users, as this will allow you to better utilize the disk space and resources of your server. In this tutorial, we will explore the “List Accounts” feature in the WHM control panel which provides a really easy way of browsing various information about your cPanel user accounts.
In order to gain access to this tool, you will need to first log into the WHM control panel.
Locating the List Accounts feature #
After you log into the WHM control panel, you will see the default page which lists all of the different categories of features/functionalities WHM has to offer. It may look overwhelming at first, however, do not panic, as we got you covered with everything WHM-related. You will notice a search bar on the left side, where you need to type “List Accounts” in order to filter everything out and find the functionality you need.
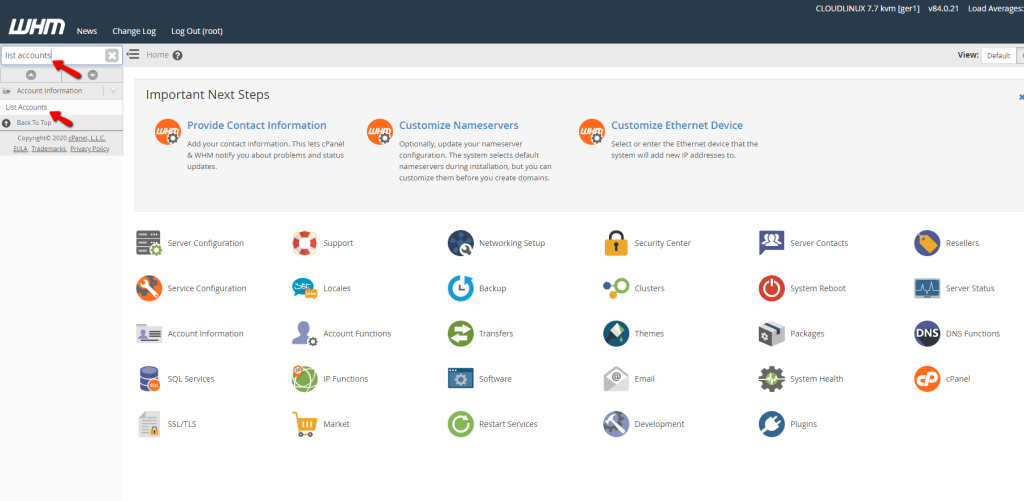
Upon clicking on the “List Accounts” feature right below the search bar, you will be redirected to a new page, where an actual list of all cPanel accounts hosted on your server will be shown.

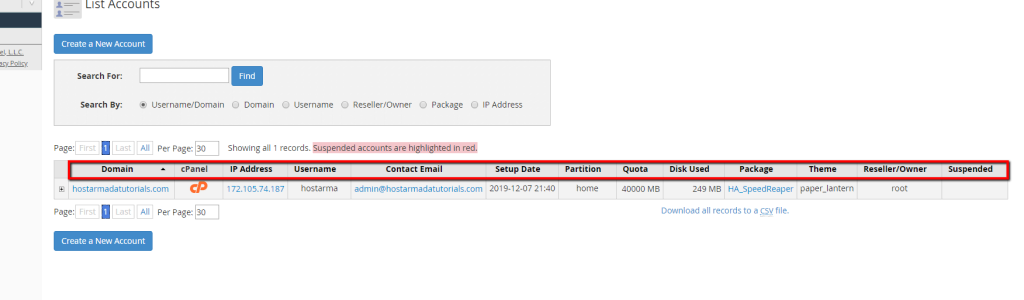
As you can see, this page will provide you with a lot of information about each of the cPanel accounts, such as:
- Domain – this lets you know what is the primary domain name of the account.
- IP Address – gives you information about the IP address of the account.
- Username – The cPanel username for the account.
- Contact Email – the e-mail address of the user using the account.
- Setup Date – when the account has been created.
- Partition – lists the partition that is used for the cPanel account. Most commonly this will be home.
- Quota – information about the account’s disk space quota.
- Disk Used – the current disk space usage for the account.
- Package – the package assigned for this cPanel account.
- Theme – currently used cPanel theme.
- Reseller/Owner – who owns the account – usually this will be either ‘root’ or a reseller user.
- Suspended – is the account suspended or not.
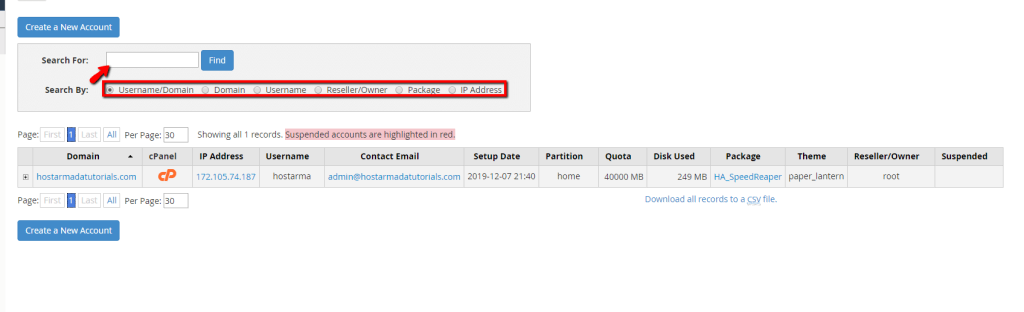
Another thing you can view really quickly is the handy search bar which allows you to look for accounts based on different parameters – for instance, you can filter using a username, domain, reseller/owner, package, and IP address. This makes it extremely easy to navigate and find whatever you are looking for.
As you will notice there are some additional functions available here.
Other functions #
Right below the list of accounts, you can see the “Create a New Account” feature
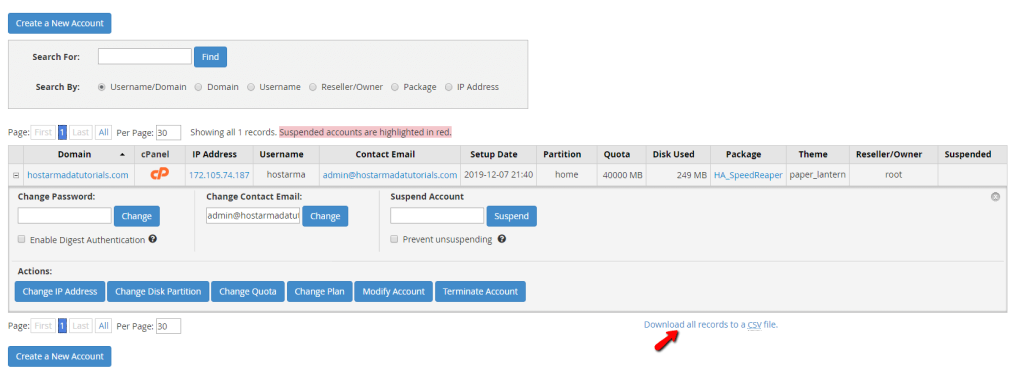
If you look closely on the left side right beside the domain name itself, you will see a little plus sign. When you click on it, it opens an additional menu with a set of functions you can use to manage the accounts. Here is a bit of information about each one:
- Change Password – This option allows you to change the password of the account in question.
- Change Contact Email – Lets you change the contact email address of the user.
- Suspend Account – Allows you to suspend the account in question. (Note that this will only be possible if you are logged in with root or the owner of the account itself!)
- Terminate Account – You need to be really careful with this one. It completely removes the account and all records on the server for it. This is irreversible and unless you have a backup of the account, it cannot be restored.

The last function on this page which we will talk about is “Download all records to a CSV file”. With a single click, you are presented with an exported information in a CSV format, which you can then view/change in excel or similar programs.
This was the List Account feature in most of its entirety! We hope we were able to go over all of the features it presents and you have familiarized yourself with it. As always, should you experience any difficulties with this, you can always submit a ticket and request assistance from our Technical Team.


