Introduction #
LiteSpeed cache is available for the majority of the OpenSource applications and WordPress, being the most popular and widely used OpenSource application is no exception. There are two methods you can follow to install it. The first one is from the integrated “LiteSpeed Web Cache Manager” functionality in the cPanel and the second one is from the official WordPress plugin repository within your WordPress Dashboard. In this article, we will review the way of installing it from your Administrative Area and we will explore the other method in a separate tutorial. Let’s get started!
Getting Started #
To begin the installation process, you have to log into your WordPress Admin Dashboard. To do that, please add “/wp-admin” to your domain name – for example, “mywordpress.com/wp-admin” where “mywordpress.com” is your actual domain. Accessing the mentioned URL will show a login page, where you have to enter your login credentials to access the backend.
After logging into your admin area, please point your attention to the left side of the screen. From the module menu, please look for the “Plugins” option and hover over it. This will cause a side menu to show up and from the provided choices, select “Add New”.

This action will take you to the WordPress plugin installation interface.
Installing LiteSpeed Cache #
When you land there, on the top right corner, you will see a search field. Please enter “LiteSpeed Cache” into it. Within a few moments, the results will be shown below.
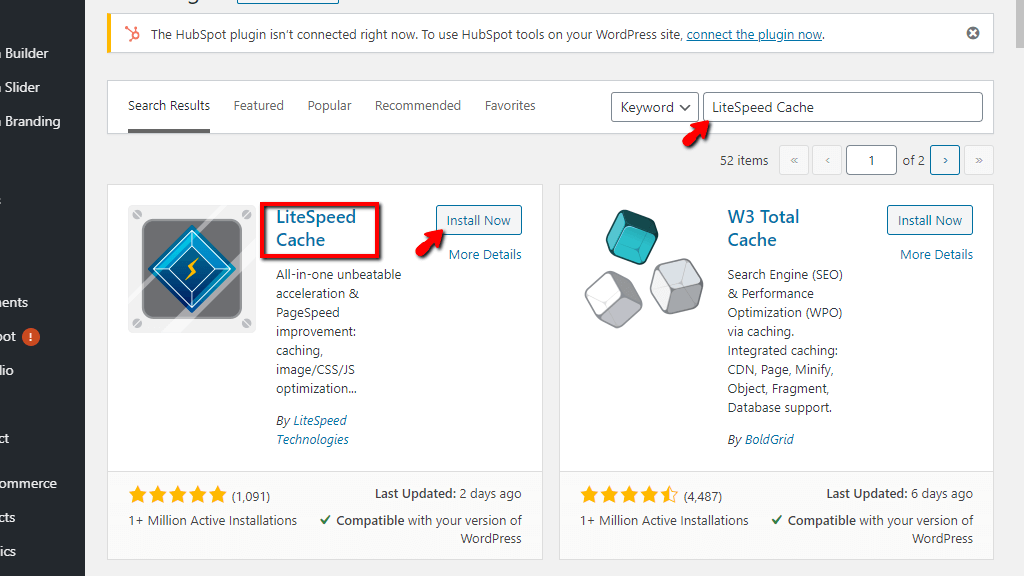
To install the plugin, please click the “Install Now” button, located inside the “LiteSpeed Cache” block.
Performing this action will trigger a short loading animation inside the button itself and in a few seconds, it will transform into the “Activate” button.

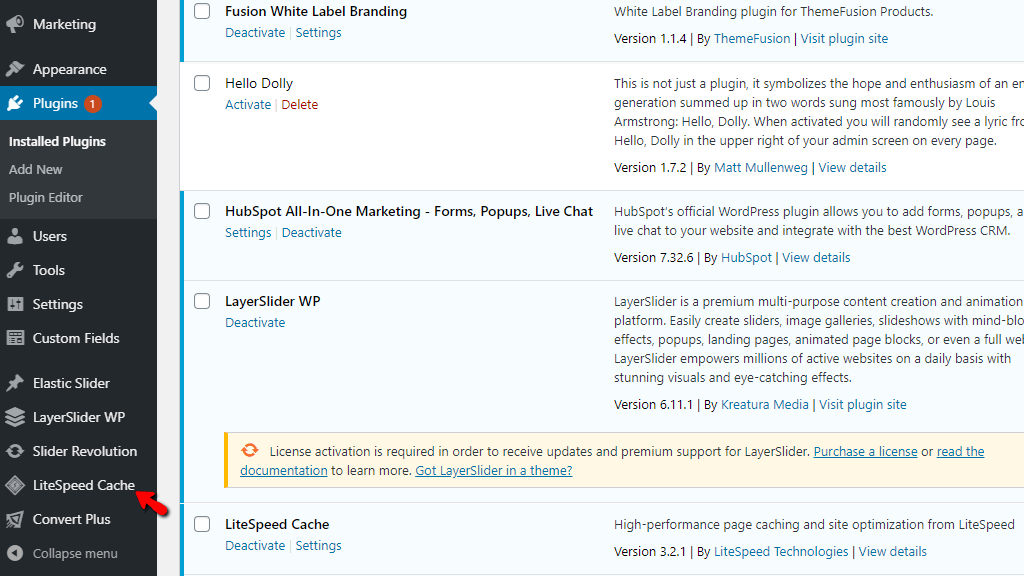
This is the final step needed to finalize the installation process! Please click on the “Activate” button. Your page will be reloaded and the “LiteSpeed Cache” functionality will be integrated into your WordPress module menu.
That’s it! The process behind the installation of this amazing caching plugin. We hope that this tutorial was sufficient enough and you were able to complete it on your own.


