Introduction #
SSL (Secure Socket Layer) is mandatory for all websites. If you want your clients to have confidence when browsing your site or making purchases on your online store, you should ensure an SSL is installed on your domain name.
The “SSL/TLS Status” is a feature that lets you check the status of your SSL certificates and also allows you to Include or Exclude domain names in your cPanel account from the AutoSSL service. In this tutorial, we will introduce you to the “SSL/TLS Status” feature and its functionalities. Let’s begin!
Getting Started #
For a start, you have to log into your cPanel account.
Upon logging in, please use the search field on the top side of the screen and type in “SSL/TLS Status”. This action will filter out the result you need.

When the cPanel presents the “SSL/TLS Status” icon, please click on it to access the new interface.
Using the SSL/TLS Status Feature #
On the upper side of the page, you will see a search field, which will allow you to filter out your domain names and find the one you need.

Underneath the search bar, you will see a table section, populated with all your domain names. On the left side, you will see the domain itself and its SSL Type along with a few checkboxes.
The SSL Types can be the following: – Seeing this icon means that the domain name has no SSL certificate installed and will show an insecure warning in browsers.
 – Seeing this icon indicates that the domain has an SSL certificate, however, it is an unsigned one. An unsigned SSL certificate does not have a CA(Certificate Authority) seal.
 – If you see this icon, this means that the domain name is secured and uses an SSL, supplied by the AutoSSL service.
 – If you see this icon, then the domain utilizes a DV (Domain Validation) certificate issued by a third-party SSL vendor.
 – If you see this icon, then the domain name uses an OV (Organization Validation) certificate issued by a third-party SSL vendor.
 – If you see this icon, then the domain name has an EV (Extended Validation) certificate, issued by a third-party SSL vendor.
Above the table section, you will see three buttons:
- Include Domains During AutoSSL – When you select a domain using the checkbox on the left side of the table section, you can press this button to include it in the AutoSSL installation/renewal process.
- Exclude Domains from AutoSSL – When you select a domain using the checkbox on the left side of the table section, you can press it to exclude a domain name from the AutoSSL feature.
- Run AutoSSL – When a domain name is selected via the checkboxes on the left side of the table section, you can run this button to initiate the AutoSSL feature for the selected domain.
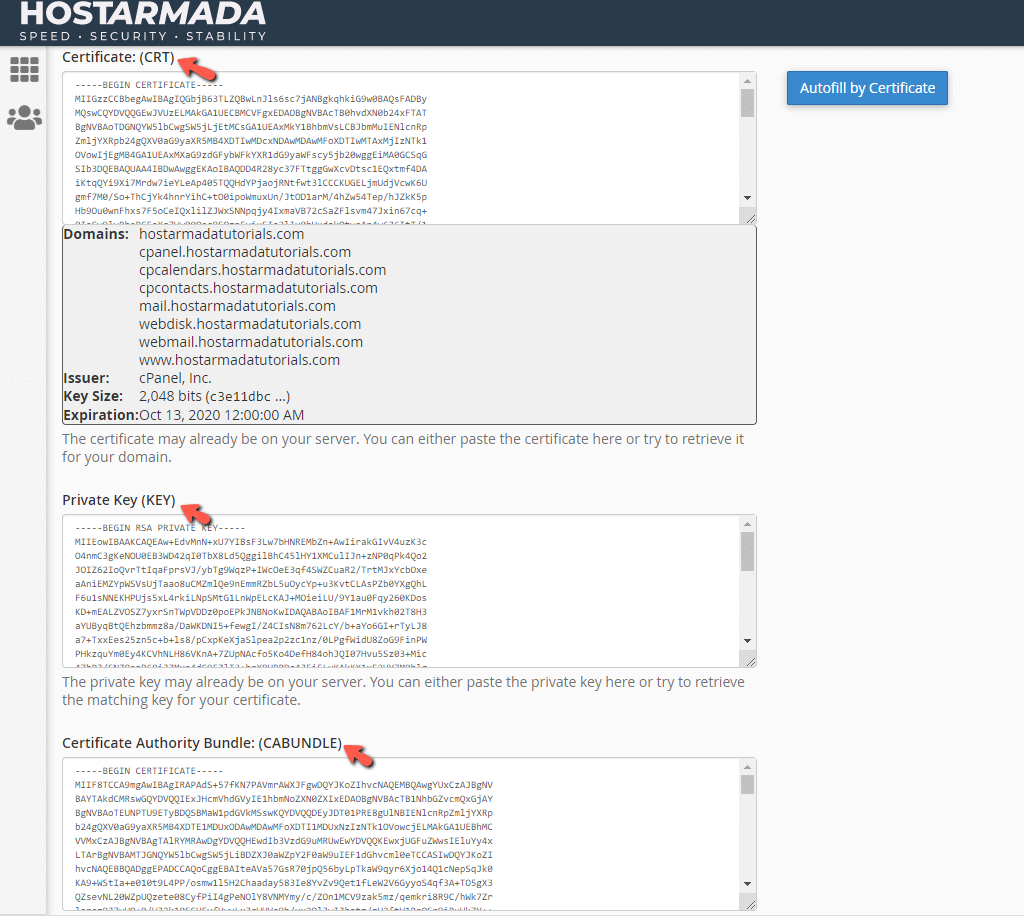
Lastly, this page will allow you to view the actual certificate, private key, and the CA bundle. To see them, please click on the “View Certificate” button located under the “Certificate Status” column. Additionally, under this column, you can also view the expiration date of the SSL.

Once redirected to the certificate page, scroll down and to the bottom where you will see three content boxes containing a piece of your SSL certificate – the CRT, the KEY, and the CA Bundle.

You can copy these pieces and install the SSL on a different server or use them for another purpose, which could require them.
There you have it! The “SSL/TLS Status” feature of the cPanel, neatly packed under this tutorial. We hope that the information was sufficient, and you are now fully able to use it to achieve your goals.


